Roasted Chicken with Root Vegetables

Is it winter or spring?   The wacky weather we have been having says spring, and the snows have melted unusually early this year.  But spring has not sprung.  Not yet.  There are still root vegetables filling the root cellar and produce bins at the stores.  Not even the wild leeks have begun to emerge from the forest floors.  We have been making maple syrup all week, so no, it is not spring.
Roasted chicken makes a festive dish any time of the year.  Root vegetables added to the roasting pan makes a one-dish meal that is hard to beat. My stovetop is engaged with boiling sap for syrup, so a one-dish meal in the oven is good thing.
 
In this dish I have golden beets, fingerling potatoes, onion, carrots, celery root, and garlic.  The veggies take on the flavor from the chicken juices – a delightful combination.  A fresh cabbage salad would not go amiss here.  Serve with a good red wine and you won’t mind waiting just a bit longer for spring.
Roasted Chicken with Root Vegetables

Serves 4 to 6
1 whole roasting chicken (3 1/2 to 5 pounds), neck and giblets removed
2 tablespoons canola or extra virgin olive oil 
6 cups peeled and cubed root vegetables (any combination of beets, carrots, celery root, parsnips, rutabagas, salsify, turnips) 
2 cups cubed fingerling potatoes
1 to 2 onions, cut into wedges
1 whole bulb garlic, cloves separated and peeled
2 tablespoons extra virgin olive oil, plus more to brush
3 teaspoons dried sage
1.  Preheat the oven to 350°F.
2.  Rinse the chicken under cold running water and pat dry.  Set in a large roasting pan.  (The pan must be large enough to hold the vegetables in a single layer surrounding the chicken.)  If you like, tie together the legs with cotton string or thread to prevent them from overcooking.  Brush with the oil and sprinkle with 1 teaspoon of the sage.
3.  In a large bowl, combine the root vegetables, potatoes, and onions in a large bowl.  Place a few garlic cloves and 1 teaspoon of the sage in the chicken.  Add the remaining garlic cloves to the vegetables along with the remaining 1 teaspoon sage.  Add the oil, salt and pepper, and toss to coat. Arrange the vegetables in a single layer around the chicken. 
4.  Roast for 1 1/2 to 2 hours (20 to 25 minutes per pound), until the juices run clear from the chicken, a leg moves easily, and an instant-read thermometer inserted into the thickest part of the thigh reads 165°F.  Stir the vegetables once or twice during the roasting to promote even roasting and baste the vegetables with the yummy chicken juices.
5.  Transfer the chicken and vegetables to a serving platter and keep warm under a tent of foil.  Allow to rest for 10 minutes before serving. 
Adapted from Recipes from the Root Cellar.  ©2010 Andrea Chesman.  All rights reserved


Cooking Winter Greens

It’s the first of March and the snow has finally arrived here in Vermont, where the western slopes of the Green Mountains have been sorely deprived of our usual white blanket.  The wacky weather has brought our early maple sugaring to a halt and promises some much delayed cross-country skiing.  Still, the body knows what it knows.  And right now, I am craving greens.
The further along we get from the growing season, the more greens I crave.
I know I’m not the only one.  Last week I cooked winter greens for a very receptive audience at the Rhode Island Flower Show.  (Oh! Those masses of tulips…) The recipes that follow are the greens I prepared for the flower show.  I cooked kale at the flower show mainly because kale is my favorite vegetable.  Today I cooked those same recipes using collard greens and bok choy.  The recipes work with any hearty green.
Every time I demo making winter greens, I get a comment from someone who says the greens never become tender.  At first the comment mystified my, then I realized the problem was that the stems were not being stripped away.  You must hold the stem in one hand, and strip away the leaves.  Chop the leaves and discard the stems.  (Or mince them and add to soups.) But don’t try to cook kale or collard greens quickly when they are still attached to those tough stems.
The Chinese-style steamed greens are steamed for just 5 minutes, then drizzled with soy sauce and sesame oil.  Lately I have also been adding a drizzle of Chinese black vinegar.  This rich vinegar is to Chinese cooking as balsamic vinegar is to Italian cooking – a bold flavor accent.  Vinegar is often paired with greens because it cuts through bitter flavors.  The greens can be served hot or at room temperature. 


Steamed Chinese Greens

Serves 4


It doesn’t get any simpler than this, and this way of preparing greens is simply perfect.  It is terrific with kale, especially lacinta kale, and most Chinese greens, including baby bok choy, Chinese broccoli, and Chinese or napa cabbage.  It is also an excellent method for preparing regular broccoli and broccoli rabe.  


1 1/2 to 2 pounds greens, tough stems discarded

Soy sauce

Asian sesame oil

Chinese black vinegar


1.  Fill a saucepan with a couple of inches of water and bring to a boil.  Put the greens in a steaming basket and steam until tender, about 5 minutes.

2.  Arrange the greens on a platter.  Drizzle generously with soy sauce and sparingly with sesame oil and vinegar.  Serve hot.


Kitchen Notes: For an extremely simple meal, steam cube silken tofu and place over the greens before drizzling with soy sauce, sesame oil, and vinegar.  Serve over rice.


From Recipes from the Root Cellar by Andrea Chesman.  ©2010.  All rights reserved.


Portuguese Kale Soup

Serves 4 as a main dish


Caldo verde (“green soup”) is considered one of the national dishes of Portugal. I like it best when it is kept simple, made with homemade chicken stock, potatoes, sausage, and kale.  The only seasoning needed is salt and pepper.  Don't confuse dried, cured Portuguese or Spanish chorizo with fresh Mexican chorizo -- they are very different in flavor.


1/2 pound Portuguese or Spanish chorizo, sliced

8 cups chicken stock or broth, preferably homemade 

3 to 4 medium-sized potatoes (1 pound), peeled and diced

12 ounces kale, stems discard and leaves chopped (8 cups lightly packed) 

Salt and freshly ground black pepper


1. Combine the sausage and stock in a large saucepan.  Bring to a boil, then reduce the heat and simmer while you prepare the potatoes. 

2. Combine the potatoes with water to cover in a medium-size saucepan.  Cover and bring to a boil.  Boil until tender, about 8 minutes.  Drain and briefly mash with a potato masher for an uneven, lumpy texture.  Add to the chicken stock along with the kale.

3. Simmer for 10 to 15 minutes, until the kale is quite tender.  Add salt and pepper to taste.  

4.  Serve hot.


Adapted from Serving Up the Harvest by Andrea Chesman.  ©2008.  All rights reserved.


Steamed Chinese Greens

Serves 4


It doesn’t get any simpler than this, and this way of preparing greens is simply perfect.  It is terrific with kale, especially lacinta kale, and most Chinese greens, including baby bok choy, Chinese broccoli, and Chinese or napa cabbage.  It is also an excellent method for preparing regular broccoli and broccoli rabe.  


1 1/2 to 2 pounds greens, tough stems discarded

Soy sauce

Asian sesame sauce


1.  Fill a saucepan with a couple of inches of water and bring to a boil.  Put the greens in a steaming basket and steam until tender, about 5 minutes.

2.  Arrange the greens on a platter.  Drizzle generously with soy sauce and sparingly with sesame oil.  Serve hot.


Kitchen Notes: For an extremely simple meal, steam cube silken tofu and place over the greens before drizzling with soy sauce and sesame oil.  Serve over rice.


Adapted from Recipes from the Root Cellar by Andrea Chesman.  ©2010.  All rights reserved.


Bird and Biscuits

A cookbook writer never rests.  Maybe a recipe seems perfect as it goes into print, but inevitably, an improvement occurs.  Such is the case with my chicken potpie, one of the family favorites for years. The biscuit lovers requested that I bake the biscuits separately from the creamed chicken and vegetables. The biscuits absorbed too much moisture was the complaint.  Not much of a change as it turned out, but oh, what a difference!  
The biscuits remain tender, and the creamed chicken seems richer.  This is comfort food, there’s not doubt about it. The chicken (or turkey) can be leftovers from a roasted bird or from making stock or it can be quickly prepared by poaching split chicken breasts for 35 minutes.  I change the vegetables with the seasons. It’s winter now, so I used golden beets, carrots, rutabagas, and turnips.
Adding the vegetables

 I could have also used celery root, parsnips, salsify, and/or winter squash. Good choices for the summer are corn (removed from the cob), carrots, green beans, or zucchini.  Frozen peas are always good.                                                                                                                                                                                                                                                                                                                                                                                                                                                                                                                                 
Chicken and Biscuits                                                                                                                                                       
Rolled Biscuits (see below)
6 tablespoons butter, chicken fat, or any vegetable oil 
2 shallots, minced, or 2 leeks, thinly sliced
2 garlic cloves, minced (optional)
6 tablespoons all-purpose unbleached flour
4 cups chicken stock 
4 cups cooked chicken
4 cups cubed vegetables, peeled if necessary
1 tablespoon chopped fresh dill or 1 teaspoon dried thyme
2 tablespoons sherry or dry white wine (optional) 
Salt and freshly ground black pepper                                                                                                                                                                                     
1.  Prepare the biscuits according to the directions below, up through step 3.  Place in the refrigerator.                                              
2.  If you are using fresh root vegetables, put in a saucepan, cover with water, and add about 2 teaspoons salt.  Bring to a boil and boil until just tender, about 10 minutes.  Drain.  If you are using, fresh summer vegetables, steam over boiling water until tender, about 5 minutes.  If you are using frozen vegetables, remove from the freezer.                                                                                                           
3.  Preheat the oven to 450°F.                                                                                                                                        
4.  To make the creamed chicken, heat the oil in a large saucepan over medium heat.  Add the shallots and garlic, if using, and sauté until fragrant and limp, 3 to 5 minutes.  Sprinkle in the flour and stir until all the flour is absorbed into the oil.  Whisk in the stock and stir until thickened and smooth.  Stir in the chicken, vegetables, dill, and sherry, if using.  Taste and adjust seasoning with salt and pepper.  Bring to a simmer.  Keep hot while you bake the biscuits.                                                                                                                               
5.  Remove the biscuits from the refrigerator.  Bake for 15 to 18 minutes, until the biscuits are golden.                
6.  To serve, split open one or two biscuits for each serving.  Ladle the chicken and vegetable mixture over the biscuits halves and serve immediately.                                                                                                                                                                                                                                                                                                                                                                                                                                                                           
Biscuits                                                                                                                                

 
Biscuits 
With a food processor, biscuits are really easy to make – no rolling required.                                                                                                                                                                                                                                 
3 cups unbleached all-purpose flour
2 tablespoons baking powder
1 1/2 teaspoons salt
2/3 cup butter, cut into pieces
1 cup buttermilk                                                                                                                                                            
1. Preheat the oven to 450°F with an oven rack in the middle of the oven.  For ease of clean-up, line a sheet pan with parchment paper or a silicone baking mat.                                                                                          
2. Combine the flour, baking powder, and salt in a food processor.  Add the butter and process until the mixture resembles coarse crumbs.  Pour in the buttermilk and process to make a soft dough.                                                       
3.  Transfer the dough to a lightly floured board and knead a few times to make a smooth ball.  Pat out the dough to a thickness of about 1/2 inch.  Cut into 3-inch rounds.  By gathering the scraps and patting out again, you should get twelve biscuits.                                                                                                               
4. Bake for 15 to 18 minutes, until golden brown.                                                                                                   
5.  Serve as soon after baking as possible.  Biscuits are best on the day they are made.  Day-old biscuits (if they last that long!) are delicious toasted.                                                                                                                  
Adapted from Serving Up the Harvest by Andrea Chesman © 2008.  All rights reserved.


Winter Fish Tacos

Every summer my brother spends a month fishing on Lake Champlain.  His haul is impressive and some of it winds up in my freezer.  I think I just pulled the last bag of his fish from my freezer.  The fish is known by the not-terribly-nice name of “crappie.”

Crappie is in the sunfish family and very popular among sport fishermen because it is delicious, with mild, sweet white flesh.  Other names for crappie are strawberry bass, speckled bass, speckled perch, and calico bass.  In Louisiana, I’ve been told it is called sac-au-lait ("bag of milk").  But around here it is called crappie, so crappie for supper it is.

In the sunny climes of California, fish tacos with grilled fish was invented.  It is typically accompanied by a sour cream and lime sauce, pickled red onions, and cabbage, which I think makes it perfect for whipping up in the middle of winter, as long as you skip the grill.

Winter Fish Tacos
Serves 6
In summer, I would probably add cilantro the fish marinade and sour cream sauce, but the dish is just fine without it.  Fresh corn tortillas are the preferred wrap, but flour wrappers do fine, especially where fresh corn tortillas aren’t available.
  
Pickled Red Onion
1 small red onion, halved lengthwise, cut thinly into slivers
1/2 cup rice vinegar
Juice of 1 lime
2 teaspoons sugar
1 teaspoon salt
Dash of hot pepper sauce

Fish and Marinade
3 tablespoons olive oil
2 tablespoons fresh lime juice
1 1/2 pounds fresh mahi mahi or other white fish fillet

Sour Cream Sauce
1 cup sour cream
1/2 cup mayonnaise
2 tablespoons fresh lime juice
1 teaspoon (packed) finely grated lime peel
Pinch of salt
Dash of hot sauce

Tortillas and Garnishes
18 small flour or corn tortillas
2 cups shredded green cabbage
Salsa

1. To make the pickled onion, combine all the ingredients in a small nonreactive saucepan and bring to a boil.  Remove from the heat, transfer to a serving bowl, and let cool.
 2.  To prepare the fish, combine the oil and lime juice in a large shallow glass baking dish.  Add the fish and turn to coat in the marinade.  Set aside and let marinate for 15 minutes.
 3.  To prepare the sour cream sauce, combine all the ingredients in a small bowl and stir until well combined. Set aside. 
 4.  Preheat a large heavy skillet over medium-high heat. Remove the fish from the marinade and place in the hot pan, skin side down. Cook the fish for 4 minutes on the first side and then flip and drizzle with the marinade.  Cook on the second side for 3 to 5 minutes, depending on the thickness of the fish.  Let rest for a few minutes, then flake the fish with a fork.
 5.  To warm the tortillas, stack them between damp paper towels and microwave for about 60 seconds.
 6.  Serve the warm tortillas, fish, cabbage, pickled onions, sour cream sauce, cabbage, and salsa in separate bowls and allow the diners to assemble their own tacos.


From Recipes from the Root Cellar.  ©2010 Andrea Chesman.  All rights reserved.

Music and Noodles

When you live in a DIY world, music can be as much a part of your life as carpentry and dinner from food you raised yourself.

It was around my dinner table—I can’t remember the menu at this point—that a casual conversation about the dearth of venues for singer-songwriters morphed into the idea of starting a once-a-month coffeehouse series.  Eighteen years later, the Ripton Community Coffee House is still going strong.

There’s a dedicated volunteer crew to keep the organization going.  I feed the performers and crew who come early for set-up.  I got that job because I live closest to the venue, and not because I am a cookbook writer.  The musicians expect dinner made by the executive director’s wife.  Expectations are low.

My expectations are high, however, and I like to please.  Still, the menu can be a problem.  Inevitably there is a vegetarian in the group. Vocalists want to eat lightly and never want cheese before they sing.  Male instrumentalists eat hearty, the younger the heartier.

The dishes I choose must be ready by sound check time for the crew, but hold up for the sound man and the performers, who will eat a bit later.  The meal must be portable, because half will be served at the venue and half at my house, where the performers can relax. 

Lately, my go-to meal is Chinese sesame noodles, accompanied by Sweet Spicy Thai Slaw.  Sometimes I’ll roast some tofu to add protein.  The great thing about Sesame Noodles is that it can be adapted to what is in season and what is in the fridge.  In this week’s version, I swapped in a handful of chopped cilantro for the leek.  Scallions can replace leeks; cilantro is always a good addition.  During the gardening season, summer vegetables replace the carrots and daikon radish. 

In a DIY world, musicians should always eat free (see my favorite DIY blog, Cold Antler Farm.com) and recipes should be freely adapted.

Sesame Noodle Salad
Serves 4 to 6

 An arsenal of Chinese condiments combines to make the spicy dressing for these noodles.  Serve as soon as you combine the noodles and dressing.  If you want to make this dish ahead, cook the noodles and toss with sesame oil, assemble the vegetables, and make the dressing.  Refrigerate separately and combine just before serving.


1 pound dried vermicelli
1 leek, very thinly sliced
3 tablespoons Asian sesame oil
2 garlic cloves, chopped
1/2 inch fresh ginger, peeled and chopped
1/4 cup tahini
1/4 cup water
3 tablespoons soy sauce, or more to taste
1 tablespoon rice vinegar, or to taste
1 tablespoon Chinese black vinegar
1 tablespoon rice wine
1 to 2 teaspoons Chinese chili paste with garlic, or more to taste
2 tablespoons sugar, or more to taste
1 carrot, finely julienned
2 turnips or 6-inch piece daikon radish, peeled and finely julienned

 1.  Cook the noodles in plenty of boiling salted water according the package directions until tender but firm to the bite. 
2.  Place the leek in the colander.  Reserve 1 cup of the cooking water. Drain the noodles by pouring into the colander; the hot water will cook the leek.  Rinse with cold water.  Transfer the noodles and leek into a large bowl and toss with 2 tablespoons of the sesame oil.
 3.  In a blender, combine the garlic and ginger and process until finely chopped.  Add the remaining 1 tablespoon sesame oil, tahini, water, soy sauce, rice vinegar, black vinegar, 1 teaspoon chili paste, and sugar.  Blend well.  Dip a noodle into the sauce to taste for seasoning, and add more soy sauce, rice vinegar, sugar, or chili paste, as needed. 
 4.  Toss the noodles with the carrot and turnips. (If you can’t serve immediately, cover and refrigerate the noodle mixture.  Hold the dressing at room temperature for up to 4 hours. Just before serving, add the dressing to the noodles and toss well.  Taste and adjust the seasoning as needed. Serve immediately. 

Recipe from Recipes from the Root Cellar by Andrea Chesman. ©2010.  All rights reserved


Roasted Spiced Potatoes

      The story goes that at age two, still in the highchair, I declared to my mother that I would never eat potatoes again.  And I didn’t.  Not until I was a teenager and decided to try a French-fry.  Delicious.  Of course.

      My repertoire has expanded somewhat, though I am still not the potato eater the men in my family are.  RR has it in his Irish genes.  My boys are part Irish and part, well, I say that the genes on my side are from Russian potato farmers.  Something has to explain the sturdy looking legs.  In any case, I could serve them potatoes day in and day out to no complaints.

      This was the first year I grew potatoes myself.  I’ve always left it to the professionals before.  But Sam did the digging and planting, so I agreed to do the cooking.  We shared the joy of harvesting.  And it was pure pleasure, rooting around for every last spud.  We had planted a 5-pound sampler of fingerlings from Moose Tubers that included Austrian Crescent, French Fingerling, LaRatte, and Rose Finn Apple.  Although a pain in the neck to scrub, these small potatoes are delicious roasted.


      I play around with spices when I roast.  Sometimes I make my own spice mix, sometimes I pull a jar of Ethiopian berbere off the shelf.  It is all delicious.  Just give those babies plenty of room on a baking sheet.  If you want them to brown, don’t crowd them.  Slick them with oil, then spices, then roast in a hot oven, turning them once or twice.  That’s all there is to it.

      Here’s my recipe for Roasted Spiced Potatoes.  It serves four.


4 tablespoons canola oil

1 teaspoon salt

1 teaspoon curry powder

1 teaspoon onion powder

1 teaspoon ground cumin

1/4 teaspoon ground ginger

1/4 teaspoon Chinese five-spice powder

1/4 teaspoon freshly ground black pepper

1/8 teaspoon ground cayenne pepper

2 pounds thin-skinned potatoes, cut into 1-inch cubes


      1.  Preheat the oven to 425° F.  Lightly oil a large shallow roasting pan or half sheet pan.

      2.  In a large bowl, combine the oil with the salt, curry powder, cumin, five-spice powder, ginger, black pepper, and cayenne. Mix well.  Add the potatoes and toss to coat.  Spread the potatoes on the prepared pan in a single layer.

      4.  Roast for 35 to 40 minutes, turning occasionally for even cooking, until the potatoes are tender when pierced with a fork and browned.  Serve hot.


From Recipes from the Root Cellar. © Andrea Chesman.  All rights reserved.


Eat More Kale

Eat more kale.  It’s been my words to live by for years, ever since I discovered that this delicious green was for eating, not for decorating salad bars at steakhouses.  This enlightenment happened for me sometime in the 1980s.  When I wrote Recipes from the Root Cellar I included 33 recipes for kale – wilted salads, stir-fries, sautés, braises.  And, of course, crisp oven-baked kale chips.

Indeed, after returning from the Mother Earth News fair this fall where I did some cooking demos, I wrote about cooking—kale!  

I usually phrase my personal mantra as “Can’t Cook Enough Kale” so as not to infringe on a Vermont artist who supports his family with a small business selling t-shirts and bumper stickers saying “Eat More Kale.” But when mega fast-food chain, Chik-fil-A threatened a lawsuit against Bo Muller-Moore for trademark infringement, I had to jump into the fray in defense of kale. 
Chik-fil-A has a marketing slogan of “Eat Mor Chiken,” which appears as hand-written signs held by cows.  The defense, of course, is who ever confused a leaf of kale with an extruded piece of chicken nugget?  And how can you trademark a saying of “eat mor” and have it apply to eating more of everything?

Yesterday I brought Crispy Kale Chips and a Wilted Kale Salad, both recipes from Recipes from the Root Cellar, to the Middlebury Natural Foods Coop and gave out samples.  My display included a hand-written sign that read, “Eat More Kale.” 

 “Aren’t you afraid of being charged with trademark infringement?” someone asked?  “They’ll never take me alive,” I replied.

 Enjoy More Kale.  Plant More Kale. Grow More Kale. Eat More Kale.    


Crispy Kale Chips
Serves 1 to 4

 Potato chips: be gone! Roasted kale is so delicious, you never need to turn to them again for a hit of crisp and salt.  My son introduced me to this delicacy, but he learned to make it in a cast-iron frying pan over a hot wood fire outdoors.  It took me a while to figure out this version, which is faster, more suited to the average lifestyle, and so good it will make kale lovers out of the most picky eaters.  This is more appropriate as a snack or hors d’oeuvre than a side dish because of the high volume of the pieces.    

1 bunch kale (I prefer curly kale), leaves chopped in 1-inch pieces and tough stems discarded
About 2 tablespoons canola or extra virgin olive oil
Coarse sea salt or kosher salt

 1.  Preheat the oven to 425°F.
 2.  Measure the kale and transfer to a large bowl.  For every 4 cups of firmly packed leaves, add 1 tablespoon oil.  Mix well with your hands to make sure the leaves are evenly coated.  Spread out on a large sheet pan into a single layer.  Use two sheet pans, if necessary.
 3.  Roast for about 10 minutes, until the curly tips of the leaves are darkened and the interior of the leaves are a bright green.  If you are using two sheet pans, roast in batches, unless you can use the “convection bake” option.  The leaves should be mostly crunchy and browned, but not blackened.
 4.  Toss with salt and serve.

Adapted from Recipes from the Root Cellar by Andrea Chesman.  ©2010.  All rights reserved.

Chicken Soup for a Grey Day

November 15, 2011


November is the start of cold and flu season.  Since RR works in an elementary school, he brings home colds all the time.  Of course, the only cure for a cold is chicken soup. 


I always have a package of chicken leg quarters in the freezer for the purpose of making soup.  I throw it in the pot, not even bothering to defrost it first.  I can’t trim of the fat, but no matter, it will be skimmed off later.  Next I fill the pot with water, a couple of onions, a couple of garlic cloves, the tops of a bunch of celery, and a bunch of parsley.  The aromatics—the onion, garlic, celery—are standard flavoring items, but the parsley is important, too, I think.  It gives the soup a hint of fresh greenness.  In this I differ from my mother’s chicken soup.  She used parsnips and carrots to give a hint of sweetness.  And she never, ever used fresh garlic.  The daughter of immigrants, she avoided foods that were too “ethnic” in nature. 


The soup will simmer on the stove for 3 or 4 hours.  Then I’ll strain it, skim off the fat, and there will be the rich chicken stock I can use as a base for soup.  It can go in many different directions.  Mexican Tortilla Soup, Greek Avgolemono, Pennsylvania Dutch Chicken and Corn Soup, Risi e Bisi, Chinese Noodle Bowl with Bok Choy, with noodles and vegetables.  So many choices.   


But we are talking comfort here.  So matzoh ball soup it is.  Chicken soup with matzoh balls is an all-purpose cure—for a cold, the flu, a broken heart, or a grey day.


Here’s a recipe that I worked up for my book, Mom’s Best One-Dish Suppers.  I’ve never really liked the title, but it contains an element of truth: I am a mom and the recipes in the book are family favorites.  Here’s a bowl of comfort on a grey day.  Today I substituted diced celery and carrots for the greens listed below only because the soup was a sort of spur-of-the-moment decision, and I didn’t have greens on hand.


Chicken Soup with Matzoh Balls

Serves 4 to 6

Matzoh balls are soup dumplings, made from matzoh meal. They are also called "“klose,”" "“kneidel,”" “"kleis,”" or “"kneidlach.”" Matzoh balls may seem exotic to those whose mothers never made them, but soup dumplings are so ubiquitous, historians can’t point to any specific cultural origins.


¼ cup canola oil

¼ cup water

2 large eggs

1 teaspoon salt

1 cup matzoh meal

6 to 8 cups chicken broth

10 sprigs parsley

3 sprigs fresh dill (optional)

4 cups shredded greens (such as bok choy, chard, Chinese mustard greens, escarole, kale, spinach, alone or in any combination)

2 cups diced cooked chicken


1. Whisk together the oil, water, eggs, and salt in a medium bowl. Stir in the matzo meal. Cover and refrigerate for at least 15 minutes.

2. Meanwhile, bring a large pot of salted water to a boil. Reduce the heat to medium-low to keep the water gently boiling.

3. Form the chilled matzoh meal batter into 1-inch balls and carefully ease into the water. Cover the pot and boil gently for 30 to 40 minutes. The balls will fluff up and float to the top of the pot as they cook. The only way to tell if the matzoh balls are cooked is to remove one from the water and cut it in half. It should be firm and uniform in color—no wet, dark center. When the matzoh balls are done, remove from the pot with a slotted spoon.

4. Meanwhile, bring the chicken broth to a boil in a soup pot with the dill, if desired. Add the greens and chicken, reduce the heat, and simmer, covered, until the greens are cooked through, 5 to 30 minutes, depending on the green.

5. To serve, place 1 or 2 matzoh balls in each bowl and add the soup.


From Mom's Best One-Dish Suppers.  ©2005 Andrea Chesman.  All rights reserved


Can't Cook Enough Kale!

Can’t Cook Enough Kale!

That was the title of a workshop I recently gave at the Mother Earth News fair in Seven Springs.  I am still catching off from my time there, when I promised to post recipes I prepared at the demo.  At last, I am fulfilling that promise. Below is the stir-fried greens I prepared for that demo.  I am also posting recipes for a salad and for shredded sautéed winter vegetables – two recipes I prepared for a workshop on Cooking Winter Vegetables.

 Kale is still growing.

      I am behind in every aspect of my life – in part because I have been busy trying to put my garden to bed.  Not a minute too soon, because the snow came this weekend.  Putting the vegetable garden to bed was a fairly easy task, because the soil is so lovely and yielding.  I planted a nice big bed of garlic and mulched the salsify, which I won’t harvest until the spring.


  Garden writers can wax poetic about time and worries slipping away in the Zen of gardening.  Not me, I was caught up in a sweaty profane battle against bishop’s weed in my perennial bed.  Bishop’s weed spreads by underground runners, and I suspect in a battle for territory against mint, the bishop’s weed would prevail.  It arrived unannounced and unwanted, probably in a perennial I purchased or was give by a “friend.”  Trying to get rid of it required digging up every square inch of garden and then sifting through the soil to remove even the smallest piece of root that remained.  I have no illusions that I succeeded in eradicating that pest, but I do think I made serious headway.  And along the way, I separated the iris and daylilies, which were in need of attention.

      Quite honestly, I’d rather be cooking.


Sichuan-Style Stir-Fried Chinese Greens

This has a few exotic ingredients, because I wanted to keep this vegetarian and I wanted to make something you might not have already tasted.  The odd ingredients are: Sichuan peppercorns and Chinese black vinegar.  Sichuan peppercorns are actually the berry of the prickly-ash and can be found at Asian groceries, perhaps under the name anise pepper, Chinese pepper, fagara, flower pepper, or sansho.  Chinese black vinegar has a distinctive flavor, closer to balsamic vinegar than to regular rice vinegar.  To make a reasonable substitute for Chinese black vinegar, mix 1 part soy sauce, 1 part Worcestershire sauce, and 1 part rice vinegar.


4 small dried chiles

2 teaspoons Sichuan peppercorns

2 garlic cloves, minced

1 1/2 pounds napa cabbage, bok choy, Chinese broccoli, kale, or other Chinese greens or a mix of greens, trimmed and sliced 1 inch thick, tough stems discarded

1/2 teaspoon sugar

1 tablespoon Asian sesame oil

Salt

Chinese black vinegar

      1.  Chop 1 ½ pounds kale or other greens

      1.  Heat 2 tablespoons in a large wok over high heat.  Add the 4 small chiles, 2 teaspoons Sichuan peppercorns, and 2 minced garlic and sauté for 30 seconds, just until fragrant.  Add the greens and stir-fry for 3 minutes, until the greens are wilted.  Cover and let steam until tender, 1 to 3 minutes, depending on the green and your preferences.

      2.  Add the ½ teaspoon sugar, 1 tablespoon sesame oil, and salt to taste.  Toss to mix.  Drizzle with the vinegar and serve immediately.


From Recipes from the Root Cellar by Andrea Chesman. ©2010.  All rights reserved.


Thai Sweet-Spicy Cabbage Salad

Serves 6 to 8

      This cabbage salad uses regular green cabbage, but napa cabbage could be substituted.  The secret ingredient is Thai sweet chili sauce, a condiment found in Asian markets.  It is made of sugar, vinegar, and chiles and makes a wonderful dressing for salads or a dip for spring rolls.  This salad combined with chicken makes a delicious wrap.


1 small head (about 1 1/2 pounds) green cabbage, cored and very finely sliced

2 teaspoons salt

1 carrot, grated

1/2 cup Thai sweet chili sauce

1/2 cup chopped roasted salted peanuts


      1.  Combine the cabbage and salt in a colander and toss to mix.  Let stand for about an hour to wilt the cabbage.

      2.  Taste the cabbage.  If it is too salty, rinse with cold running water.  Then drain.  Combine the cabbage, carrot, and chili sauce in a large bowl and toss to mix.  Add the peanuts and toss to mix.

      3.  Let stand for 30 minutes to allow the flavors to blend before serving. 


From Recipes from the Root Cellar by Andrea Chesman. ©2010.  All rights reserved.


Sautéed Shredded Root Vegetables

Serves 4 to 6

      This sauté of vegetables takes 10 minutes to cook and looks as beautiful on the plate as it is delicious to eat.  Vary the seasonings if you like, the shredded vegetables are amenable to experimentation.


3 tablespoons sunflower or canola oil

4 cups peeled and shredded mixed root vegetables (beets, carrots, celery root, parsnips, rutabagas, salsify, and /or turnips)

1 leek, trimmed and thinly sliced

4 garlic cloves, minced

½-inch piece fresh ginger, peeled and minced

1/4 cup dry white wine

Salt and freshly ground black pepper

Freshly grated nutmeg


      1.  Heat the oil in a large skillet over medium heat.  Add the root vegetables, leek, and garlic and sauté until the vegetables are limp, about 5 minutes.  Add the wine, cover, and cook until the vegetables are tender, about 5 more minutes.    

      2.  Season to taste with salt, pepper, and nutmeg.  Serve hot. 


From Recipes from the Root Cellar by Andrea Chesman. ©2010.  All rights reserved.


Mastering the Art of the Stir-Fry

I am playing catch up with my work since the MEN fair.  I promised I would post recipes from my workshop.  I’ll begin with the stir-fry I demonstrated in the workshop, “Mastering the Art of Stir-Frying.  It is a basic recipe that can be adapted to ingredients at hand.  In the demo I used tofu as the protein and vegetable broth in the sauce.  The firm vegetables were a combination of broccoli, carrots, and green beans and the oyster sauce was a vegetarian version sold as “stir-fry sauce.”


Basic Stir-Fry

Serves 4

            If I had my druthers, I’d probably make stir-fries on most nights.  It is important to have all the vegetables prepped and all the ingredients assembled before you start cooking.  And don’t forget to start cooking the rice first.  I have an electric rice cooker, purchased years ago.  It is an appliance that gets regular use and more than justified its inexpensive purchase price.


1 pound boneless skinless chicken, beef, or pork, sliced into matchsticks, or 1 pound extra-firm tofu, pressed and cubed (see Note)

5 tablespoons soy sauce

3 tablespoons oyster-flavored sauce or vegetarian stir-fry sauce

2 tablespoons rice wine or dry sherry

1 tablespoon sugar

2 teaspoons sesame oil

1/4 teaspoon black pepper

1 onion, halved and cut into slivers, or 1 leek, white and tender green parts only, thinly sliced

4 cups chopped or diced firm vegetables (asparagus, broccoli, carrots, baby corn, snap beans, snow peas or snap peas), corn kernels, or shelled peas

8 cups slivered greens (cabbage, bok choy, broccoli raab, chard, escarole, kale)

1/2 cup chicken or vegetable broth (see pages 000 to 000)

1 tablespoon cornstarch

3 tablespoons peanut or canola oil

1-inch piece fresh ginger, peeled and minced

3 to 4 garlic cloves, minced

Hot cooked white rice


            1.  In a medium bowl, combine the meat or tofu, 2 tablespoons of the soy sauce, oyster sauce, 1 tablespoon of the wine, sugar, sesame oil, and pepper and set aside to marinate.

            2.  To make the sauce, combine the broth, 1 tablespoon soy sauce, remaining 1 tablespoon wine, and cornstarch.   Whisk until thoroughly combined.

            3.  Heat a large wok or skillet over high heat.  Add 1 tablespoon the oil and heat until very hot.  Add the meat or tofu and marinade and stir-fry, stirring constantly, until well browned, 4 to 6 minutes. With a heat-proof rubber spatula, scrape out all the meat or tofu and sauce into a medium bowl and keep warm.  Return the wok to high heat. 

4.  Heat 1 tablespoon oil over high heat until very hot.  Add the onion and firm vegetables and stir-fry until slightly softened, about 3 minutes.  Add 1 tablespoon soy sauce, cover, and let the vegetables steam until soft, 3 to 4 minutes.  Remove from the wok and add to the meat or tofu.

5.  Return the wok to high heat and add the remaining 1 tablespoon oil.  Add the leafy green vegetables and stir-fry for 1 minute.  Add the remaining 1 tablespoon soy sauce and continue to stir-fry until limp, about 2 minutes more.  Push the vegetables to the sides of the pan and add the ginger and garlic.  Cook until fragrant, about 45 seconds.  Stir into the vegetables.

6.  Return the meat or tofu and vegetables to the wok and toss to combine.  Whisk the sauce and pour into the wok.  Stir-fry until the sauce is thickened and evenly coats the vegetables, 1 to 2 minutes. 

7.  Serve immediately with the hot rice.


Recipe from Serving Up the Harvest by Andrea Chesman©2005, 2007.  All rights reserved.

Stop the Presses!

            “Stop the presses!” I told my editor at Storey.  Kathy Harrison, author of Just in Case and possibly one of the most generous people on the planet, shared with me an amazing technique for making pickles.  I absolutely must try it and incorporate into The Pickled Pantry.

            Indeed, everyone I spoke with was pretty amazing and interesting—from presenters to fair-goers. Jenna Wogunrich (Made from Scratch and Chick Days), was a riot, and I admire her youthful energy and determination. Carol Ekarius makes beautiful books about livestock breeds. I may have convinced Ron and Jennifer Kujawski (Week-by-Week Vegetable Gardener’s Handbook) to plant salsify, and they convinced me to try hastening the ripening of my tomatoes with banana skins outside in the garden.

            Probably the highlight of the weekend for me was the absolute thrill of learning that the chef had made four dishes from Recipes from the Root Cellar for the Friday night buffet at the hotel: Braised Duck with Root Vegetables and Sauerkraut, Baked Beets in Bechemel, Roasted Vegetables, and Portuguese Kale and Potato Soup.  These recipes had all appeared in Mother Earth News magazine.  When I saw the dishes, I blurted out to the waitstaff, “Those are my recipes!”  Soon the executive chef, in his whites and wearing a toque, came out to meet me.  Compliments from the chef!

Real Deal Dill Pickles


I’ve been in a bit of a pickle this past year as I raced to meet a deadline to revise my 1983 book, Pickles and Relishes: From Apples to Zucchini.

When a cookbook sells well, it is pretty much inevitable that a publisher will ask the author to revise and update an older title in the hopes of breathing new sales life into a steady seller.  As a cookbook writer and editor, though, I am a project person—not a process person.  When I press that “Send” button on computer, I am done with a manuscript, with a specific topic.  Not that I don’t still enjoy making pickles.  But that book, my first book, was done and it took me a while to get enthusiastic about revising it.

Much has changed in the intervening years.

I grew up on kosher dills and stories of my great-grandfather’s crocks of sauerkraut that bubbled in the attic all through the winter.  When I asked my grandmother how to make pickles, she said to put the cucumbers in a crock with water and dill and add enough salt until it is just before you gag.  Turns out, I gag easily.  Without enough salt to kill spoilage bacteria, the cucumbers were a stinky, slimy mess in no time.

I learned how to make pickles from books and talking with older Vermonters.  I was part of the back-to-the-land movement, and I think the neighbors got a kick out of the young hippies who asked endless questions and didn’t seem to have much in the way of commonsense. 

Today there is the Internet, and recipes and how-to videos proliferate.  Farmers’ markets bring pickle-worthy produce to urban areas, separating pickling from gardening.  Many of today’s pickle makers are more interested in creating intensely flavored, fermented foods rather than in preserving food for the coming winter.  

Here’s a recipe for kosher dill pickles.  I love the way they squeak as I eat them. 

Full Sour Dill Pickles

Full Sour Kosher Dills
Makes 1 gallon

The secret to full sour pickles is to have a salty enough brine (5 percent is fairly standard) to enable a long, slow fermentation.  Cleanliness is critical here, as are daily checks to remove any scum that might form.  Pickles must be submerged in the brine.  These pickles will be salty, but not too salty to enjoy.  If you decrease the salt, the pickles will be fine, but will not keep as long.

12 cups water
9 tablespoons pickling or fine sea salt
1 whole head garlic, cloves separated and peeled
3 tablespoons dill seeds
4 dill heads or 24 sprigs fresh dill
2 tablespoons mixed pickling spices
1 gallon whole pickling cucumbers

1.  Heat the water and salt until the salt is fully dissolved.  Let cool to room temperature.

2.  Put the garlic, dill seeds, dill heads, and mixed pickling spices in a 1-gallon jar or crock.  Slice off the blossom end from the cucumbers and pack into the jar.  Pour the cooled brine over the cucumbers; you will not need all of it.  Set aside any extra in a covered jar. Weight the cucumbers so they are submerged under the brine.  Add more brine if needed to cover the pickles.  Cover the crock to exclude air.

3.  Set the crock in a cool place for 24 hours. It should be set in a place where it can overflow with damage to the floor.  (I set my crock in a plastic crate.) Check on the pickles.  The level of the brine may be even higher, which is fine.  If you press on the weight, bubbles should rise.  Skim off any foam that forms.

4.  Check the crock daily, skimming off any foam.  When fermentation tapers off, after 1 to 2 weeks, taste a pickle.  When it is pleasantly sour, the pickle is ready for storage.  At this point, you can make up fresh brine, or use the liquid in the crock.  Refrigerate for best keeping qualities.

Kitchen Notes
You probably won’t use all the brine, but it is handy to have extra on hand if needed.  How much brine and how many cucumbers you can fit in your crock depends on the shape of the crock, the size and shape of the cucumbers, and how tightly you packed the crock.


Maple Syrup: Anyone Can

Just Do It

It’s been a crazy, mixed-up sort of weekend.  Snow fell off and on.  As Sam (my son) collected the first sap from the buckets he hung earlier in the week, he spotted a barred owl in one of the trees.  That’s the owl that calls, “Who Cooks for You?”

The answer, of course, is me.  At least to those within hearing distance.

This morning while we continued our first boil, we spotted our first redwing blackbirds.  Buckets and birds mean spring will come to Vermont.  Falling snow means we are still locked in winter. Like I said, its been a mixed metaphor of a weekend.

Photo from 2010 sugaring season


When Sam was young, he liked to roam around and indulge in sips of sap from buckets the neighbors hung during sugaring season.  They were making syrup; he was enjoying the cold, faintly sweet, clear liquid that collected in the buckets. The spring he turned eleven he tapped two trees using a drill bit (without the drill), a couple of drinking straws, and plastic 1-quart containers. 

The next year, Sam got the season rolling with old buckets and taps a neighbor no longer needed.  He drilled the holes for the taps with an awl. That was the year the sap he collected exceeded his thirst.  We started boiling sap in our kitchen to make syrup.  It takes 30 to 40 gallons of sap to make syrup. The house welcomed a little extra moisture in the air after a long, dry heating season.  At the top of the stairs, there developed an aroma of maple syrup.  We didn’t care.  No wallpaper loosened from the walls (who uses wallpaper these days?); no mold grew on the paint.  We made about a pint of syrup. Liquid gold.

These days we have seven taps in five trees. We start by arguing whether or not it is time to tap.  Since Sam provides the labor, he always wins the argument, though it never becomes particularly heated.  (We missed the first run a few years in a row, but haven’t done so in a while.  The earliest sap runs produce a very light, delicately nuanced syrup that is considered “Fancy” grade. As the season progresses, the syrup becomes darker, going from Fancy to Grade A to Grade B to “buddy,” as the trees begin to bud and the season ends.)

So Sam tapped the trees earlier this week, a week after a major snowstorm dumped two feet of snow—on top of the three feet of snow already in the yard. The weather warmed to days above freezing and nights below freezing, as it is supposed to at this time of year, and sap collected in the buckets. 

This weekend we started our first boil.  Sam collected the sap and strained it through coffee filters.  Then he poured as much sap as he could into a five-gallon stockpot, and I began the boil. I boiled the sap up until it was time to go to bed, at which point I transferred the stockpot to the porch.  When I got up this morning, I added another half gallon of sap that hadn’t fit in the pot yesterday and put the pot on to boil again. When it is reduced to a couple of quarts, we’ll strain it again and pour it into a small, heavy saucepan for the final boil to the syrup stage.

Sap becomes syrup at 7.1° F above the boiling point.  Because our thermometer isn’t that accurate and we’ve never bothered to buy a hydrometer to accurately measure the density of the syrup (this isn’t a commercial operation), we decide when it is syrup by the look of the bubbles.  When the bubbles of the boiling sap change from small to big and open, the syrup is ready.  Sometimes we pull it off too soon and the syrup is thin; other times it boils too long and some of the syrup crystallizes in storage. 

That first pancake supper from the first batch of syrup is worth everything.  Because syrup stores so well, nobody tells you that fresh maple syrup is infinitely more delicate and delicious that aged syrup.

So my advice to anyone who lives up North among sugar maples: Just do it.  The syrup may be thin, or it may crystallize.  Whatever. It will be perfect. 

Sap is boiling on the stove

Quantity Pancake Mix

I developed this recipe for my book 366 Delicious Ways to Cook Rice, Beans, and Grains (© Andrea Chesman, 1988.  All rights reserved).  The mix makes a hearty pancake that doesn't sacrifice tenderness and lightness.  When making the batter, I often throw in a grated apple or a handful of berries.  For lighter pancakes, separate the eggs and beat the egg whites.

Dry Mix
5 cups unbleached all-purpose flour
2 1/2 cups whole wheat flour
2 1/2 cups stone-ground yellow cornmeal
1 1/2 cups sugar
3/4 cup baking powder
3 tablespoons salt

To make 1 batch (18 to 20 four-inch pancakes)
2 large eggs
3 tablespoons canola oil
1 1/4 cups milk
1 1/2 cups Quantity Pancake Dry Mix (above)

 To make the mix, combine the all-purpose and whole-wheat flours, cornmeal, sugar, baking powder, and salt in a large bowl.  Mix well.  Store in an airtight jar.
 To make a batch of pancakes, preheat the oven to 200°F.  Place four to six plates in the oven to warm, if desired.
 Combine the eggs, oil, and milk in a large glass measuring cup or bowl and beat well.  Add the mix and beat until smooth.
 Spray a well-seasoned cast-iron griddle or nonstick frying pan with nonstick cooking spray and heat over medium heat.  Pour about 3 tablespoons batter for each pancake and cook for about 1 1/2 minutes, or until bubbles appear on the surface and the edges appear dry.  Flip and cook on the other side until done.  Keep warm in the oven until all the batter is cooked.


Summer Means Squash

A few years ago I received a phone call asking me if I was interested in taking on a revision of Garden Way’s classic Zucchini Cookbook, in honor of the twenty-fifth anniversary of its original publication.  As a freelance writer who was in between projects, I was happy to say yes. 

Contracts were signed, zucchini was planted, meetings arranged.  At one of those meetings, I happened to mention to the sales manager at Storey Publishing that I thought zucchini was basically a very bland vegetable, and his jaw dropped.  But that’s a good thing, I hastened to add.  Because it means that you can do a lot with it.

That an overabundance of zucchini can be a problem is uncontestable.  Every article I have ever read about zucchini mentions a New England suburban myth: Why do Vermonters (or New Yorkers, or Mainers, or whatever – you supply whatever applies to you) have to lock their car doors every August?  To keep people from filling their cars with zucchini, of course! 

It happened to me.  One September, my husband and I threw a birthday bash in the Ripton Community House for 100 of our closest friends and while my back was turned, the deed was done.

I don’t know when I’ve had more fun in the kitchen.  

Making up recipes for zucchini is almost like child’s play.  You can do anything with zucchini, and get good results.

My breakthrough moment in the kitchen occurred about a week after attending a zucchini festival.  I heard rumors of “mock apple pies” made with zucchini instead of apples. I followed the directions I was given and was amazed at its resemblance to apple pie.  If you peel zucchini and cook it in lemon juice with enough sugar and spice, you get something very much like apple pie filling.  I took the pie on a picnic and completely enjoyed the incredulous looks I received when I told my friends the pie was made with zucchini, not apples.  I had fooled almost everyone.

My son looked up from his slice and told me I should call it “Zapple Pie.”   After the Zapple Pie, we started thinking up recipe titles.  Zapple Pie was swiftly followed by Zesto Pesto Pizza (pesto plus zucchini) and Zingerbread (gingerbread plus zucchini).  This was fun, and the recipe-testing results were delicious.  We moved on to Zesto Pasta Salad and Zapple Strudel – not to mention Squococonut Pie – coconut custard pie made  with yellow squash and coconut flavoring, but no coconut.

Even without cooks disguising squash as apples, this vegetable has a history of causing confusion.  While Europeans were cultivating various types of gourds, New World natives were enjoying squash and pumpkins for at least 7000 years.  The confusion arose when the first European explorers visited the Americas and reported that the natives were cultivating a new type of melon.  It was a mistake made again and again, because the Europeans had never seen anything like squash, and so they had no word for it.   Nonetheless, squash was readily adopted by the first European settlers, who couldn’t be too choosy, given their circumstances.

Squash, when young and unripe, is summer squash.  When ripe and hard-shelled, it becomes winter squash. According to botanists, there is no firm line winter squash from summer squash,  or winter squash from pumpkins, for that matter.  Basically there are four types of edible squashes.  Cucurbita pepo is noted for its pentagonal stems with prickly spines.  This group includes zucchini and all the summer squashes, as well as pumpkins, acorn squash, spaghetti squash, and numerous gourds.  Butternut squash, which is one of the best replacements for pumpkin in any recipe, is in another grouping entirely (C. moshata, which has pentagonal stems without spines).  C. maxima  (round stems) includes buttercup, Hubbard, and turban squashes.

Winter squash and pumpkin rapidly became staples in New World kitchens, but summer squash were not common until the 1950s, when the zucchini was re-introduced from Italy.  It came via a circuitous route.  Sometime in the 1820s, a South American squash called the Valparaiso was introduced to Europe.  As it was adopted, the long, thick, meaty squash became known as the vegetable marrow of England and the cocozelle of France and Italy.  Increasing travel in the post-war era meant that Americans slowly broadened their palates and refrigerated rail cars and other technological improvements allowed a wider range of foods to become available.  Home gardeners were the first to pick up the zucchini, and it was accepted quite rapidly.  Today zucchini and other summer squash are supermarket staples.

Most summer squash recipes are interchangeable.  All of the summer squash  have tender, edible skins and flesh that ranges mild and nutty to buttery or cucumber-like.  But the shapes and appearance vary considerably.  With more and more varieties available from garden seed catalogs, farm stands, and supermarkets, it is fun to experiment with new types. 

Unless you are preparing squash to masquerade as apple, don’t peel the squash as this is where most of the nutrition, fiber, and flavor lie.

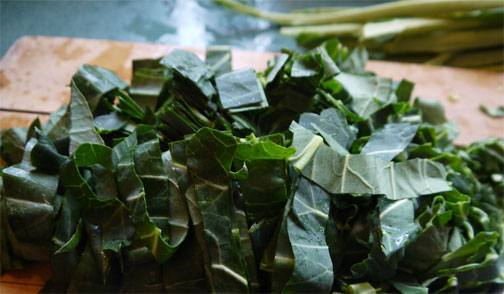
 My standard summer vegetable dish starts with extra virgin olive oil in a skillet.  Next I throw in chopped garlic and chopped vegetables, which usually means summer squash.  Maybe I’ll throw in a handful of green beans, some corn stripped off the cob, chopped Swiss chard, or diced bell pepper.  I sauté the veggies until tender, about 5 minutes.  Finally, I’ll add some chopped tomato and/or basil and season generously with salt and pepper.  It’s never quite the same dish, and we never tire of it.  

Here’s two recipes to get the summer squash out of your garden and onto the table.

Ratatouille

Serves 6 to 8

            In the perfect ratatouille, the flavors are blended, yet each vegetable remains distinct.  The vegetables are neither mushy nor undercooked.  To do this properly, sauté each vegetable separately in a large skillet and then combine them in a saucepan just long enough to blend the flavors. Chopped fresh basil, or a little thyme or oregano makes fine additions.


7 tablespoons extra virgin olive oil

1 medium-sized eggplant, peeled and diced

Salt and freshly ground black pepper

1 onion, diced

1 small green bell pepper, diced

1 small red bell pepper, diced

2 small zucchini, diced

2 small yellow summer squash, diced

2 ripe tomatoes, seeded and diced

4 garlic cloves, minced

1 (8-ounce) can unseasoned tomato sauce or tomato puree


            1. In a large skillet over medium-high heat, heat 3 tablespoons of the oil.  Add the eggplant and season with salt and pepper.  Sauté until browned, juicy, and cooked through, 10 to 12 minutes.  Transfer to a medium saucepan with a slotted spoon.

            2. Return the skillet to medium-high heat and add 2 more tablespoons of the oil. Add the onion and bell peppers and sauté until tender-crisp, 3 to 5 minutes.   Transfer to the saucepan with a slotted spoon.

            3. Return the skillet to medium-high heat and add the remaining 2 tablespoons oil.  Add the zucchini and summer squash and season with salt and pepper.  Sauté until tender-crisp, 3 to 5 minutes. Transfer to the saucepan and add the tomatoes, garlic, and tomato sauce. 

            4. Simmer the ratatouille for 15 minutes over medium heat. 

5.  Taste and adjust the seasoning.  You can serve immediately, but the flavor will improve if the ratatouille sits at room temperature for 1 to 2 hours.  Serve at room temperature, or reheat and serve warm.

From Serving Up the Harvest. © Andrea Chesman, 2006.  All rights reserved.


Zapple Pie with a Streusel Topping

            In the tradition that began with a recipe on the back of a box of Ritz crackers comes this ultimate mock apple pie, made from zucchini.  I love to serve this pie to the unwitting and watch their response when I tell them it was made from zucchini.  This is a delicious pie – and you can’t help smiling as you eat it.


6 cups peeled, quartered, and thinly sliced zucchini (about 2 pounds)

3/4 cup sugar

2 teaspoons ground cinnamon

1/4 teaspoon ground nutmeg

1/2 cup plus 2 tablespoons fresh lemon juice

1/3 cup unbleached all-purpose flour

1 unbaked 9- or 10-inch pie shell


Topping

1/2 cup unbleached all-purpose flour

1/2 cup packed light brown sugar

1/4 cup butter

1 teaspoon ground cinnamon

1 cup chopped pecans or walnuts


            1.  To make the filling, combine the zucchini, sugar, cinnamon, and nutmeg in a medium saucepan over medium heat.  Add the 2 tablespoons lemon juice.  Stir to mix and cook until tender but not mushy, about 15 minutes, stirring frequently. 

2.  Dissolve the flour in the remaining 1/2 cup lemon juice.  Stir into the zucchini.  Continue to cook until the mixture thickens, 2 to 3 minutes.    Remove from the heat.

3. Preheat the oven to 450° F. 

4.  Make the topping.  Combine the flour, brown sugar, cinnamon, and butter in a small bowl.  Cut in the butter until the mixture is crumbly.  Stir in the pecans. 

            5.  Spoon the filling into the pie shell.  Top with half of the streusel topping.  Place in the oven and reduce the oven temperature to 350° F.  Bake for 30 minutes, until the crust is browned and the filling is bubbling.

6.  Sprinkle the remaining topping over the pie.  Turn on the broiler.  Run the pie under the broiler for about 3 minutes, until the topping is browned.

7.  Set the pie on a wire rack to cool.  Serve warm or completely cooled.  This is best served on the day it is made.


From The Classic Zucchini Cookbook © 2002, 1990. 1977 by Storey Publishing.  All rights reserved.

Pie for Breakfast


Say, did you hear the one about the definition of a Yankee? 

To foreigners, a Yankee is an American.

To Americans, a Yankee is a Northerner.

To Northerners, a Yankee is an Easterner.

To Easterners, a Yankee is a New Englander.

To New Englanders, a Yankee is a Vermonter.

And in Vermont, a Yankee is somebody who eats pie for breakfast.


This aphorism is ascribed to E. B. White, though some credit the punch line to Robert Frost. I’m not sure who said it first, but I do know that by that definition, there are very few Yankees left.


Perhaps, for good reason.  The tradition of pie for breakfast is a farm tradition, where breakfast was served after the morning chores were done. "The man who enjoyed a slab of pie at seven-thirty had been up milking cows since four o'clock," wrote Louise Andrews Kent of Calais, who wrote cookbooks and articles for Vermont Life under the name of Mrs. Appleyard. "He had already done what most men would consider a day's work, and he would still be working 12 hours later."


And, if most men today aren’t up at 4:00 a.m. doing chores any more, most women aren’t getting up with their men at that time either, to stoke the cookstove, make the coffee, and get the breakfast ready for the family and any hired help.  Both the decline in the farm culture and the women’s movement has changed all that. 


Jan Albers in her wonderful book, Hands on the Land, writes about all the ways people have changed the landscape of Vermont. She tells the story of a farm wife in East Corinth who wrote, “I had an aunt that her husband didn’t think he’d had breakfast unless he had hot apple pie.  She was sick once and he came in from the barn one morning and the hired girl was bustling around trying to have a pie ready for breakfast.  And he told her she didn’t have to bother…that they could get along without it.  And my aunt, she was in bed, but she heard him say so.  So she said to herself, ‘Old man, if the hired girl doesn’t have to make pie, your wife doesn’t have to.’  So he didn’t get any more pie for breakfast.  He’d get it for dinner and supper but not for breakfast.”


Double-crusted fruit pies are the traditional breakfast pie, in part because they could be served hot fresh out of the oven, or reheated after sitting in a pie safe for the better part of a week. Pies were made assembly-line fashion in the farm kitchen and enough were made at a time to last the week.  According the American Pie Council, a Vermont housewife, itemizing her baking for the year 1877, counted her yearly total as 421 pies (plus 152 cakes and 2,140 doughnuts). 


Does anyone have pie for breakfast anymore?  According to a 2008 survey conducted by Crisco and the American Pie Council, 35 percent of Americans say they’ve had pies for breakfast. Ask around Vermont and just about everyone has had pie for breakfast one time or another; they just don’t make a regular habit of it any more.


It’s blueberry season right now and music festival season.  Dinners are scattered affairs; our schedules are fractured.  So when our son Sam arrived with 4½ pounds of tiny wild blueberries that he had foraged, pie for breakfast sounded ideal.  I needed a recipe that wouldn’t mask the delicate flavor of the wild berries, so I made the Fresh Blueberry Pie from 250 Treasured Country Desserts, which I wrote with Fran Raboff a few years ago.

The recipe calls for 3 cups of fresh berries lining the crust, with a glaze of 1 cup cooked berries.  The glaze seeps in between the fresh berries and holds it all together – just barely.  The flavor is pure fresh berries, slightly enhanced.  A dollop of whipped cream on top does no harm.


Here’s the recipe.  Breakfast, lunch, dinner, or coffee break.  It’s a fine way to enjoy this season’s fresh blueberries.


Fresh Blueberry Pie

Serves 6

            The deep blue berries glisten under a glaze of blueberries.  The fresh flavor of the berries are undiminished in this delicious pie.  This recipe first appeared in 250 Treasured Country Desserts by Fran Raboff and Andrea Chesman (Storey Publishing) © Andrea Chesman and Fran Raboff.  All rights reserved.


4 cups fresh blueberries

1 cup water

3/4 cup granulated sugar

2 teaspoon finely grated lemon zest

2 tablespoons lemon juice

1 1/2 tablespoons cornstarch

Fully baked 9-inch pie shell

Whipped cream or ice cream, to serve


            1. Rinse and thoroughly drain the blueberries. Spread 3 cups of the berries on a towel to dry while you prepare the glaze.  Set aside 1 cup of the berries.

            2.  Combine 3/4 cup of the water and sugar in a small saucepan.  Bring to a boil, decrease the heat to medium, and cook, stirring, until the sugar dissolves. Add the 1 cup blueberries, lemon zest, and lemon juice.

            3.  Dissolve the cornstarch in the remaining 1/4 cup water.  Add to the berry mixture and cook, stirring, until the mixture boils; the liquid will thicken and clear, becoming somewhat transparent.

            4. Spread the 3 cups of uncooked blueberries in the pie shell.  Spoon the thickened berry glaze mixture over the fruit. 

            5.  Chill until served. Serve with whipped cream or ice cream.


Grilling Season Begins

Memorial Day marks the beginning of grilling season, and even though there is a frost warning tonight (June 8), it is the time of year to grill.

Vegetables cooked on the grill develop a sweet and smoky taste that is irresistible. Because of the natural sugars present in vegetables, the dry heat of the grill causes the vegetables to form a caramelized crust that seals in flavor and moisture. For more flavor, the vegetables can be tossed with an herb-scented oil or a soy sauce–based marinade before grilling. Even better, the grilled vegetables can be tossed with salad greens, blended into a pasta sauce, layered with polenta, or stirred into couscous. Grilled vegetables can be stuffed into pita pockets, dressed with pesto on Italian bread, or tucked into tortillas. The variety of great vegetarian dishes you can prepare on the grill is boundless.

If you are going to be grilling a lot of vegetables, do yourself a favor and get the one piece of equipment that makes grilling vegetables truly worthwhile—an enamel-coated metal vegetable grill rack, or grill topper, as they are sometimes called.  Sure, without one you can grill asparagus (if you are careful) and slabs of eggplant and zucchini, not to mention veggie burgers.  

A vegetable grill rack opens a whole new range of cooking possibilities. What the vegetable grill rack does is enable you to cook vegetables that are already cut into bite-size pieces. Basically, it enables you to sauté over an open flame. Think of the possibilities—garlic-soaked, flame-kissed zucchini whisked off the grill and tossed with just-cooked pasta; soy-marinated broccoli and tofu lightly seared over an open flame and bedded down with rice; lime-marinated peppers and onions tucked into tortillas to make rich-tasting vegetarian fajitas.

Bite-size vegetables cook faster than large slices, and yet they have a stronger grill flavor because of the increased surface area that is exposed to the heat. Because they don’t have to be chopped after grilling, the vegetables are more likely to retain their heat and texture as they are moved quickly from grill to table. Veggie burgers and tofu slices, which have a tendency to fall apart on the grill, hold their shape on the vegetable grill rack.

A grill rack can be used to make pizza on the grill. The pizza cooks directly on the grill rack, which can be moved on and off the grill, eliminating the need for a baker’s peel to transfer the loaded pizza. A grill rack is also wonderfully portable for campfires and barbecues at a campground. You never know what was on the grate over the fire pit before you arrived. With a vegetable grill rack, your food doesn’t come in contact with the public grill grate.

The advantages of grilling vegetables are many. Foremost is the delicious flavor that smoke adds to crisp-tender vegetables. But beyond that, grilling is also fast and easy, and there’s very little clean-up. Best of all, the food I take off the grill is special, enhanced by the direct kiss of flame and smoke. 

I know alot about grilling vegetables because several years of my life have been devoted to grilling vegetables as I tested recipes and developed ideas for the Vegetarian Grill and its revision, The New Vegetarian Grill, both published by Harvard Common Press.  If you are going to be grilling vegetables this year, you might want to buy a copy.  And visit my kitchen where I have posted a couple of recipes.


First Harvests

Spring came early this year, with warm weather in March.  And though the garden is currently under a blanket of snow, spring will return shortly.

The first harvest of the year is maple syrup.  Next comes wild leeks, neither dependent on gardening skills, for both are more or less wild harvests.  For these, I am dependent on my son Sam, a tireless worker and forager.

I live in the land of the wild onion, or at least that’s how the original inhabitants of Vermont saw this area.  Winoskik was the name of an Abenaki village near the mouth of the Winooski River, which flows some 90 miles from Cabot, Vermont,  south to Montpelier, than westward through Waterbury, Richmond, Essex Junction, then to Winooski and Burlington and into Lake Champlain.  Winoskik  means “At Wild Onion Land.”  Historians have speculated that the name was given because the land was lush with wild onions.

Much of Vermont’s forests are suitable for the wild onion,  Allium tricoccum, whose range stretches from Canada to Georgia and as far west as Minnesota.  In other parts of the continent, the wild onion is likely to be called a ramp. Here in Vermont it is usually called a wild leek.

Like all onions, the wild leek is a member of the lily family.  It has tapered green leaves (shaped like the leaves of the lily of the valley), a red stem, and a small white bulb, which grows underneath the soil.  Its flavor ranges from mild to pungent, something like a cross between cultivated garden leeks and garlic. 

Wild leeks are one of the first plants to emerge from the awakening earth, around the same time as bloodroot, a wildflower with a beautiful eight-petal white flower and a stem that bleeds orange. Wild leeks are ready for harvest when the plants are 8 to 12 inches tall.  At this point, the flavor is at its most mild, with a distinctive garlicky note, and the wild leeks can be enjoyed raw or cooked.  As the plants head into warmer weather, they become tougher and more strongly flavored.

Look for these delicacies in areas of mixed hardwoods.  The plants are usually found in large groups and thrive in damp areas, often along streambeds or on slopes that drain.  If you find a clump of plants that may be wild lilies of the valley, but smell like garlic, you’ve found wild leeks. The roots are tenacious and it is quite difficult to dig them up with your fingers.  Give a mighty heave and you are like to come up with just greens and lose the bulb. It is best to dig around a clump of plants with a small spade, loosening the earth around the plants so you do not destroy the tender bulb.  Make sure you leave a sufficient number of wild leeks undisturbed so the patch will continue to produce.

To prepare wild onions for cooking, rub your fingers over the bulb and pull off the thin sheath that surrounds the bulb.  Rinse in cold water.  Trim off the root ends, as you would trim off the roots of scallions.  Use both the leaves and bulb.  Taste one and decide if it is mild enough to use raw.  If it is, use it in salads, or just eat out of hand.  If the flavor seems too pungent, use it in any recipe that calls for leeks, scallions, green onions or garlic.

Wild onions can be added whole to a delicate chicken or vegetable broth and simmered for a few minutes to make a delicious spring tonic.  They are also terrific sautéed in butter and folded into an omelet. Blanched for a few minutes to tame their more aggressive flavors, they are wonderful served at room temperature under a light vinaigrette.  This year, I have added wild leeks to stir-fries and pad Thai, and to the spinach filling in enchiladas.  They will go into tomorrow's chicken soup.

In southern Appalachia, the harvesting of wild onions was once a time for celebrating. Entire towns would get together to celebrate spring by hosting ramp festivals known as “Dancin’ and Stinkin’ ” (due to the pungent aroma the wild onions give off when eaten raw).  These festivals have become large tourist events, just as our own sugar-on-snow parties have come to be an attractive event for tourists. 

I don’t know of any wild onion festivals in Vermont, but I find spring a fine time to do a little dancin’ and stinkin’ of my own, in the privacy of my own kitchen.