Gratitude for Garlic

Of all the vegetables that I plant, of all that I tend, of all that I harvest, of all that I cook, I am most grateful for garlic.
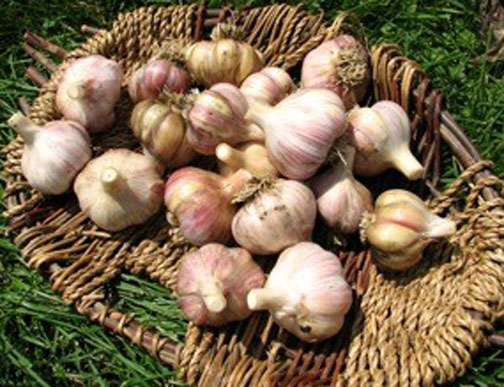
Garlic in basket. Photo by Lauren Slayton

As a garden crop, garlic is a prize-winner.  It is planted in late October, when most of the other garden chores are over.  There is time – time to work the bed, time to mulch before the weeds threaten, time to put away clean the garden tools and put them away for the winter.  Time to rock back on my heels and appreciate how rewarding the garden can be.

Then, if I’m lucky, the snow comes and buries the garlic for months.  The garlic is safe, and I am done with it. Come spring, garlic will sprout up first—a significant part of the garden all set for the growing season.

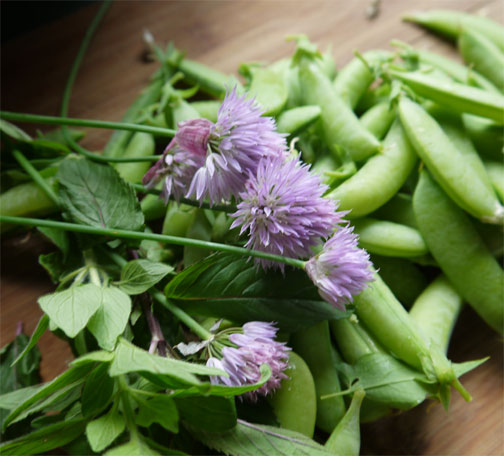
This year, like most, the garlic harvest came after the peas and spring greens were spent and before the green beans were really coming on.  I’ve been stealing a bulb here and there for cooking, but not worrying about the garlic at all. 

You have a much wider window of opportunity for harvesting garlic than most plants.  Yes, if you wait too long, it could rot in the ground, or at least the outer skins could rot away, leaving the bare, unprotected cloves.  But generally you can wait for a nice sunny day for the garlic harvest.  

Just harvested garlic left to dry

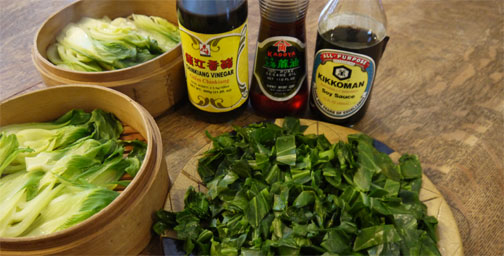
Of course, I am grateful for the flavor garlic brings to food.  Neither Italian nor Chinese foods would tantalize like they do without garlic.  Without garlic, there would be no Jewish half sour pickles, no French aïoli (garlic mayonnaise), no Italian spaghetti aglio e olio (pasta with garlic and oil), no Spanish gambas al ajillo (garlic shrimp), nor Greek skordalia (a dip of potatoes and garlic).

Finally, I am grateful for any reason to cool myself in the river where I wash my bulbs.  I sit in the river, rub the dirt from the bulbs, and plunk them into a-five gallon bucket.  And then I think to myself, work doesn’t get any better than this.
The river where I wash my garlic

Marcella Hazan has a perfect recipe for spaghetti with garlic and oil, with a variation that includes tomatoes.  

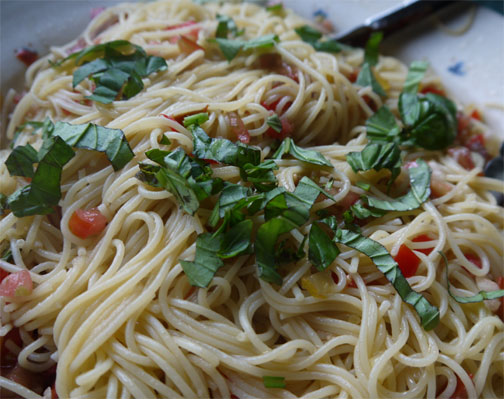
Spaghetti with garlic, oil, and tomatoesI followed her version fairly faithfully, using 1 pound of vermicelli, ½ cup good extra virgin olive oil, and 4 cloves garlic.  A little basil to garnish, salt and pepper.

Yellow Taxi tomato, black Nyagous tomatoes, and Romas, with garlic and basil 
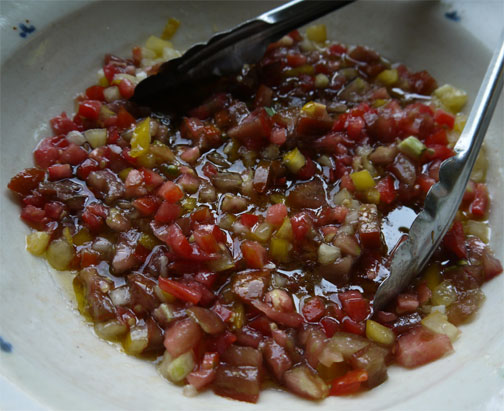
First the oil goes in the bowl, then the garlic, then the tomatoes. Add the hot pasta and toss. Garnish with basil. Simple.

 That’s it.  I doubled the tomatoes, however, and didn’t bother to peel and seed them.  It is summer, after all.  Who has time to peel tomatoes?  The river calls.

CSA Anxiety Disorder

My friend Joanna suffers from a new psychiatric disorder.  It hasn’t yet appeared in the psychiatric bible, the DSM, but as soon as she started talked about it, I knew I suffered from it also.

It's not pretty. On top of CSA anxiety disorder, I suffer from refrigerator management deficit disorder
The disorder is CSA anxiety disorder (or CSAAD, as I call it), and its symptoms appear cyclically.  Like the day before a CSA pick up.  The anxiety centers around the refrigerator, which is often filled with vegetables, vegetables from the CSA that haven’t been prepared and consumed by the time the next CSA pickup rolls around.  

The anxiety can be heightened by guilt, especially if you are prone to guilt due to a certain religious or ethnic background (you know who you are).  

In the New York Times on Wednesday, July 18, Julia Moskin wrote about vegetable anxiety, which apparently goes beyond CSA members and extends into the general farmers’ market shopping population.   She writes that even though everybody knows they should be eating more vegetables, and many are buying gorgeous fresh vegetables from the market, meal planning still centers around the meat, with vegetables as the afterthought.

Obviously, you need to reverse that kind of thinking and start your meal planning around the vegetables.  

A CSA share

Joanna has found that a huge stir-fry of greens does much to decrease the anxiety.  And it will, a big bag of greens cooks down to almost nothing.  Season with soy sauce and garlic, and serve it over rice with some tofu.  Even better, master a few stir-fry sauces and your family will never again ask for Chinese take-out when your refrigerator has all you need.  Or cook up some Italian sausage, sauté a mound of vegetables, and serve it over pasta, with a sprinkling of Parmesan cheese.  (If you cut all the vegetables to the same size and sauté or stir-fry the vegetables one type at time, you will get better results.)

When I wrote Serving Up the Harvest, I included several “master recipes” that can be made with whatever vegetables you have on hand.  You can make quiches, crepes, stir-fries, lo mein, vegetable soups, and sautés by following the basic recipe and using whatever vegetables you have on hand.  The recipe  below is one of my favorites.    

It is far, far better to start cooking with more vegetables than to give up your CSA. After all, where would you get your beautiful flowers?

The best part of my week is picking my bouquet.

Sautéed Vegetable Medley with Fresh HerbsServes 4
A side dish of sautéed vegetables, much like restaurants serve, is welcome with almost every meal.  The trick is to blanch the vegetables first, then finish in the sauté pan.  The vegetables are most attractive when they are all cut to the same size and shape. All of the vegetables are optional – use whatever combination of vegetables you have on hand.

1 medium zucchini or other summer squash, julienned  (optional)2 teaspoons salt (optional)2 tablespoons extra virgin olive oil1 shallot or 2 garlic cloves, minced1 green, red, or yellow bell pepper or 1 small fennel bulb, cut into strips (optional)1 cup green shelled peas, snap peas, snow peas, or corn kernels (optional)1-2 cups blanched julienned asparagus, broccoli stems, carrots, celery root, snap beans (optional)Salt and freshly ground black pepper2 tablespoons finely chopped or torn fresh herbs (basil, mint, oregano, rosemary, sage, summer savory, tarragon, thyme)

1.  If you are using zucchini or summer squash, toss with the salt in a colander and set aside to drain for 30 minutes.  Wrap in a clean kitchen towel and squeeze dry.
2.  Heat the oil in a large skillet over medium-high heat.  Add the shallot or garlic and sauté until fragrant and very slightly colored, about 1 minute. 
3.  Add any uncooked vegetables (bell pepper, fennel, peas, snap peas, snow peas, and/or corn) and sauté until slightly softened, 1 to 2 minutes.  Add the remaining blanched vegetables (asparagus, broccoli, cauliflower, carrots, celery root, and/or snap beans) and continue to sauté until heated through, 2 to 3 minutes.  
4. Season generously with salt and pepper.  Sprinkle with the herbs.  Sauté for 1 minute longer.  Serve hot.

Taste-Testing Chickens

My son and I are gearing up to raise chickens for meat. The other day, Sam came home with two live birds,Red Ranger hen to practice harvesting, to see if dry plucking yielded better skin, and to get a sense of whether there is a difference in flavor among breeds.  


Cornish Cross hen
The hens he brought home were an 8-week-old Cornish Cross and an 8-week-old Red Ranger.  The Cornish Cross is a white feathered, big-breasted lady and the standard commercial broiler breed.  This hen dressed out at 4.1 pounds.  The Red Ranger, a French hybrid created in the 1960s is a slower-growing breed, known for its flavor.  This bird was a scrawny 3.6 pounds, with a long, narrow breast.  The dark meat of this bird is proportionate to the white meat.  In my family, dark meat is always favored over white meat.  

Meanwhile, back in the kitchen...
While I was roasting the two birds side-by-side to detect whether there was going to be a flavor difference, Sam returned to his friend’s place, where he helped to harvest the remaining 40 odd birds.  Besides being significantly bigger, Sam reported, the Cornish Crosses proved easier to pluck because they had far fewer feathers.  And, the Cornish Cross were bigger in part due to their aggression at the feeder, which meant they ate more.  They also yielded more fat.  Once in the vacuum-sealed bags, they looked more like supermarket chickens.

Meanwhile, back in the kitchen, I set my two birds on racks in a roasting pan, breast side down, and roasted them at 500°F for 20 minutes. Then I turned them over for another 10 minutes at 500°F.  By then the skin was golden and the drippings were beginning to smoke. I decreased the heat to 325°F, added a little water to the pan to decrease the smoking, and roasted until the meat in the thickest part of the thigh registered 165°F. The big bird took about 20 minutes longer than the smaller bird (which I removed from the oven and let sit under a tent of aluminum foil).

The problem with roast chicken—if you consider it a problem—is that it calls out for gravy and mashed potatoes.  Add a cooked vegetable (fresh spinach), and you are getting close to a Thanksgiving meal with lots of timing issues and lots and lots of dirty pans (and a failure to remember to photograph it).  You’ll have to take my word that was a fine dinner—and provided lots of leftovers.

The flavor?  The Red Ranger was the clear winner in the flavor department.  It may have looked scrawny, and the texture was definitely more stringy, but the flavor of the flesh was superior to the Cornish Cross and to any supermarket bird I’ve ever had.  The dark meat tasted almost like turkey, and the white meat was juicy and delicious.  The Cornish Cross lost out only in comparison.  It was certainly more tender and and perhaps more juicy.  On its own, we would have been mighty pleased. (I have to add that the Cornish Cross leftovers were juicier and much more tender.)

Roast chicken!

Where will we go from here?  Probably to a breed we haven’t eaten before.  The experiment continues.  Please stay tuned.

Zucchini Season is Here!

At first the summer squash trickle in.  A nice 6-inch zucchini here, a 3-inch pattypan there.  Then all of a sudden, a monster.  Such is the way of the summer squash.

The squash is bigger than my 12-inch chef's knife.
At my CSA pickup this week, we were entitled to six items in the summer squash/cucumber bin.  There were squash of several varieties:  zucchini (of course) in both yellow and gold colors and long and round shapes, a light-skinned Mid-East type, some yellow squash (both straight-neck and crooked), Pattypan (look like flying saucers), and Zephyr (yellow with light green ends).  I went straight for the golden and green straight zucchini, because they are the most versatile, lending themselves to easy slicing, julienning, and cutting into spheres. I skip the round zucchini since they are only good for stuffing, while the straight zucchini can work fine for stuffing and everything else.  Another time I’ll try the Mid-eastern type to see if the flavor varies.  

You’d think with the season just beginning, there wouldn’t be any overgrown summer squash, but, of course, there were a few.  Even at a farm, where the gardening is anything but haphazard and careless, those pesky squash can get out of control easily.  One rainstorm and there you have it: a monster.  It doesn’t help that a healthy plant is big and leafy, fully capable of playing hide and seek, til the squash is overgrown.  The plant just wants to produce seeds. 

Naturally, there was unlimited access to the overgrown squash.  You’d think that after years of growing my own zucchini baseball bats, I’d have had enough.  But no, I happen to have a full repertoire of recipes that deal with overgrown zucchini, and I was hankering to make the Zucchini Cheese Squares that I made for Serving Up the Harvest.

The squash I used was an overgrown Zephyr, so the dish lacked the green flecks that usually dominate the color.  The eggs I used were free-range guinea fowl eggs, so the color is a bit more golden than usual.  Also, for the cheddar, I substituted a mix of Grafton cheddar, Crawford Farm’s Vermont Ayr, and provolone cheese – what I had on hand.

The Zucchini Cheese Squares is ready for the oven.

While happily applying themselves to dinner, my family commented that the title doesn’t do the dish justice.  They got no argument from me—but no one came up with a better name.  The dish could be called a spoonbread, but most spoonbreads are made with cornmeal and the texture is usually softer.  The flour and baking powder rule it out of the frittata category.  The eggs aren’t separated, so it isn’t a soufflé.  We pondered the problem until it disappeared.  

Literally.  Not a crumb was left.  Let me know if you come up with a better name.

Dinner was Zucchini Cheese Squares, green salad dressed with Ripton House Dressing (see below), plus pickled golden beets, and cantaloupe. If the beets had been purple, the colors of dinner would have been perfect.

Zucchini Cheese Squares

Serves 6 to 8 

Zucchini Cheese Squares

My kids love these “zucchini pillows.”  The texture is softer than a bread and denser than a soufflé, with just the trace of crunch from the onions.  It makes a great side dish, especially on a picnic, where the squares can be eaten out of hand.  You can use overgrown zucchini here.
3 cups grated zucchini

2 teaspoons salt

2 cups grated cheddar cheese

1 onion, diced

1 1/2 cups all-purpose flour 

1 tablespoon baking powder

2 teaspoons fresh thyme leaves or 1/2 teaspoon dried

1 teaspoon freshly ground black pepper or lemon pepper

1/2 cup canola oil

3 large eggs, beaten

1.  Combine the zucchini and salt in a colander and toss to mix.  Set aside to drain for 30 minutes.  Squeeze out the excess water. 

2.  Preheat the oven to 350° F.  Butter a 7- by 11-inch or 9-inch round baking dish.

3.  In a medium bowl, stir together the flour and baking powder.  Add the zucchini, cheese, thyme, and pepper.  Mix well with a fork, breaking up any clumps of zucchini.  In a small bowl, whisk together the oil and eggs.  Pour into the zucchini mixture and mix well.  Spread evenly in the baking dish.

4.  Bake for about 35 minutes, until golden.

5.  Let cool on a wire rack for 5 minutes.  Cut into squares and serve warm or at room temperature.

Adapted from Serving Up the Harvest.  © 2007, 2009 Andrea Chesman.

Planning Around a CSA Pick-Up

CSA bouquetThe best part of my week?  Wandering down rows of flowers at Elmer Farm when I pick up my CSA share.  Flowers and herbs, cut as needed, are part of this CSA, and I really value it – especially on a dreary day like today.  My bouquet contains snapdragons, a stem of safflower (Carthamus), black-eye susan, amaranth, cleome, painted tongue (Salpiglossis), ageratum, and strawflowers.   


But let me not shortchange the beautiful veggies. I brought home enough mesclun salad mix for three salads, a head of frisee, one kohlrabi, a handful of purple-top turnips with their greens, a bunch of golden beets, two heads of red butter lettuce, and one fennel bulb.  Let the meal planning begin.


Still life with veggiesLast weeks’ tuna and white bean salad served on a bed of greens featured a shaved fennel bulb, and that was pretty wonderful.  I could repeat that, but maybe I’ll make a risotto with fennel and golden beets.  I’ll put the butter lettuce to use in Vietnamese spring rolls with shrimp, cellophane noodles and lots of fresh herbs.  The frisee will be wilted in bacon fat and used to bed down decadent supper of poached duck eggs and crisp bacon.

We love turnip greens and beet greens, so those will be lightly wilted and served one night or another.  That leaves only the turnips.


When I wrote Serving Up the Harvest 2007 I had not yet discovered the joys of turnips.  I found my way to turnips via roasting them and I expect I’ll roast the tunips and the kohlrabi.  Come to think of it, roasted beets, kohlrabi, and turnips on a bed of frisee, dressed with my Ripton House Dressing (see post June 22, 2012) would make a fine dinner.  Poached eggs – hen or duck – would not go amiss here.


So many choices.  So little time.


The Green, Green Month of June

The green month of June is all about salad in my book.  I have been harvesting a little from my own garden, and a lot from my CSA.  It’s salad for dinner almost every night—sometimes with a grilled steak on top, sometimes stuffed in a pita with falafel or hummus, sometimes served on the side.  


Last night salad greens made a bed for a simple, hot-weather tuna–white bean salad (1 can of tuna, two cans of cannellini beans, 1 can of artichoke hearts—all well drained—plus finely chopped garlic scapes—could have been scallions or onions—steamed asparagus—could have been green beans—and sliced Harukei turnips—could have been radishes or carrots).  I dressed the salad mixture with a good olive oil plus red wine vinegar, sea salt, and pepper.  A fine, easy meal for a hot night.  Bread and wine and a porch for catching the slight breeze made it a fine dinner.    

Tonight I’m bringing a salad to dinner at a friend’s house.  Because the greens are so lovely, so fresh, and so flavorful, I don’t want a lot of other ingredients to detract from them.  So all I will add are some sugar snap peas  (the season will end quickly, so they are added to almost everything while they last), a handful of chive blossoms, and a couple of leaves of fresh oregano and mint.

If I were dressing this at home, I might just drizzle in some extra virgin olive oil, splash in some sherry vinegar, and sprinkle with Maldon sea salt – that’s what I usually do.  But for tonight, I’ll shake up a dressing in a canning jar because it is easier to transport that way.  Then, I’ll dress it at the last minute before we eat.  

Salad greens this fresh should be dressed with a light, light hand.  

Ripton House Dressing
Makes about 1/3 cup

Balsamic vinegar with maple syrup has an almost smoky aftertaste.  The maple syrup acts as an emulsifier and holds the dressing together.
1 large garlic clove, minced1 ½ tablespoons balsamic vinegar1 ½ teaspoons pure maple syrup3/4 teaspoons soy sauce4 ½ tablespoons extra virgin olive oil

Combine all the ingredients in a half-pint canning jar and shake until well blended.


Or, you could go with a classic vinaigrette.

Classic Vinaigrette
Makes about 1/4 cup

A classic vinaigrette is made of oil and vinegar, bound together with a touch of mustard and flavored with a little garlic, shallot, or herbs.  The best quality extra virgin olive oil and the best-quality vinegar will make all the difference.  Which vinegar to use – red wine, white wine, sherry, herbal, raspberry, balsamic – depends on the salad you are dressing.  All work equally well with a salad of mixed greens.  This recipe is easily multiplied when a large quantity it desired, but for best flavor, make it up fresh each time you need it.  

1 tablespoon balsamic, herbal, raspberry red wine, sherry, or white wine vinegar

1 small garlic clove, minced, or 1 tablespoon minced fresh herbs or shallot

1/2 teaspoon Dijon mustard

3 tablespoons extra virgin olive oi

lSalt and freshly ground black pepper

Combine the vinegar, garlic, and mustard in a small bowl.  Whisk until smooth.  Slowly pour in the oil.  Whisk constantly until the oil is fully incorporated.  Season with salt and pepper.  Use immediately.

Adapted from Serving Up the Harvest.  ©2009 Andrea Chesman.  All rights reserved.

My First CSA Pick-Up

My first CSA pick-up today – a whole new level of food fun – and it beats shopping any day. 

I decided to join a CSA because I write about food, and I wanted to experience what it is like to come home with a big box of vegetables, not necessarily of my choosing.

Of course, what I picked up was put in my own canvas bags—no boxes.  And, I had a fair amount of choice among the offerings.  Still, since my usual meal planning begins with knowing what is ready to harvest from my own garden or making a list for buying at a store, the CSA share turns my head around.  I have to start with the veggies, then figure out the meals.  

Turns out, the vegetables immediately told me what I’d be cooking this week.

CSA still life
I knew that salad greens were pretty much inevitable this time of year, so I planned ahead and bought a steak to grill.  Sure enough, each share included a hefty helping of a beautiful mesclun mix. I dumped half of my bag in a big bowl.  Dinner was begun. 

I sliced half of a bunch of beautiful, white Harukei turnips into the salad as well.  (The remaining half was put away, with the greens bagged separately.  No question I will cook the greens; they are simply delicious.) Surprise!  There were zucchini in this week’s share, so those tasty morsels were quartered lengthwise, slicked with olive oil, and grilled after the steak, while the meat was resting.  Dinner was a lightly dressed salad topped with steak and grilled zucchini.  Perfect.

Tomorrow, I’ll be stir-frying those emerald Asian greens, along with the turnip greens – that’s a no brainer.  They are crying out for a swift swish through the wok, with garlic, chili paste, and soy.  The Boston lettuce I picked up (there was a choice of five items, including three different lettuces, the Asian greens, napa cabbage, and the turnips) will definitely be used as a wrap.  I am thinking I will stir-fry ground pork and finely chopped napa cabbage seasoned with Asian fish sauce, cilantro, garlic, and chiles.  The mixture will be wrapped in Boston lettuce and served with some Thai dipping sauces.  The dried black beans (another pleasant surprise) will be turned into a chili and served with salad.  There’s probably enough greens for salad throughout the week. 

This is going to be fun.  Here’s my house salad dressing; it’s a simple, balanced vinaigrette that doesn’t draw attention to itself. I figure I am going to be making this often.

Balsamic Maple Vinaigrette
Makes about ½ cup
1 garlic clove or small shallot, minced1 tablespoon high-quality balsamic vinegar1 teaspoon pure maple syrup½ teaspoon soy sauce3 tablespoons extra virgin olive oil
Combine all the ingredients in a half-pint canning jar.  Cover and shake to blend.  
©2012 Andrea Chesman

It's a Book!

The Pickled Pantry is here!  thumbnail imageAnd now my summer truly begins.  I am planning to take my show on the road and bring dilly happiness to folks at book stores, festivals, farmers’ markets, and cooking classes.


Over Memorial Day weekend I pickled a case (that’s 48 pounds) of pickling cucumbers into dill chips, bread and butters, and curry chips. I have 60 pint jars of pickles aging in a corner of my dining room.  Then I bought another 5 pounds of cukes and made a gallon of half-sours, which I hope to be ready by Sunday, June 8, when I take part in the Grand Opening of Phoenix Books in Burlington, Vermont.
60 jars of pickles plus a gallon of half-sours
People often ask how long it takes to write a cookbook like this, which has about 150 recipes.  The answer is usually, “All my adult life.”  If the book covers a subject I care passionately about – cooking vegetables, making pickles, preserving – then, truthfully, I’ve been at it since I left my mother’s house, a long, long time ago.  

Pickles got me started as a cookbook author.  As the newly anointed cookbook editor for Garden Way Publishing, which specialized in books about gardening and other self-sufficiency, homesteading skills, I was looking for someone to write a book about pickling.  When I couldn’t find anyone, I said to the publisher, “Heck, I could write it myself.”  That book was Pickles and Relishes: 150 Recipes from Apples to Zucchini, and it was publishing in 1983.  Then Garden Way morphed into Storey Publishing but I went freelance rather than relocate when the company moved.  My next book was Summer in Jar, which included jams as well as pickles.  That publishing company was bought out by a Christian publisher with no interest in cookbooks.  But I was off and running, writing  and editing cookbooks as a freelancer, writing for magazines, gardening, cooking, and raising a family.

Those first preserving books are out of print. The Pickled Pantry combines the very best of those original recipes with new ones.  Kimchi, anyone?

All along, through busy summers and leisurely ones, I had one quest: to make the perfect dill pickle.  Have I succeeded?  You be the judge. 


 A sample of No-Fail Half-Sour Dills

No-Fail Half-Sour Dill Pickles

Makes about 2 quarts


Vinegar gives a kick-start to the pickling process in these quick and easy pickles, guaranteeing success. If you’ve never tried fermented pickles, this is definitely the recipe to start with. You can multiply this recipe as many times as you like, but these pickles are best enjoyed at 1 to 2 weeks, so it makes sense to make small batches as the cucumber season progresses.


4 cups water

2 tablespoons pickling or fine sea salt

1/2 cup distilled white vinegar

1 dill head or 6 sprigs fresh dill

4 garlic cloves, peeled

8 cups whole pickling cucumbers


1. Heat the water and salt in a saucepan, stirring until the salt is fully dissolved. Add the white vinegar and let cool to room temperature.


2. Slice 1/16 inch off the blossom end of each cucumber.


3. Pack a clean 2-quart canning jar or crock with the dill, garlic, and cucumbers, in that order. Pour in the brine. Weight the cucumbers so they are completely submerged in the brine.


3. Cover the container to exclude the air. Set the jar where the temperature will remain constant: 65° to 75°F is ideal.


4. Check the jar daily and remove any scum that forms on the surface.


5. The pickles will be ready in 2 to 3 days, although full flavor will not be reached for a week. If your kitchen is reasonably cool, you can leave these pickles out for up to 2 weeks. If the brine starts to become cloudy, refrigerate immediately to prevent spoiling. The flavor of the dill and garlic will continue to develop. The pickles will keep for at least 3 months in the refrigerator.


Kitchen Note

If your cucumbers are large, you may want to cut them into spears rather than leave them whole. Spears will pickle faster and more evenly than whole cucumbers.


Adapted from The Pickled Pantry  by Andrea Chesman.  ©2012 Andrea Chesman.  All rights reserved.


Full of Beans


The seasons march on, but some foods stay the same.

Memorial Day Weekend marks the beginning of the summer dining season, if not the actual beginning of summer..  For some, this means picnic suppers. My summer begins when I can fire up the grill and start eating on a screened in porch with a view of the river.  I’d like to say that my summer begins with an early harvest, but the veggies are still tiny seedlings, the peas only 6 inches tall.

The garden is all potential now. My garden is all potential right now: a delivery of composted manure, a newly dug bed on a sunny slope, germinating beets, carrots, lettuce, and spinach.

What to eat on al fresco when you are still eating last year’s harvest?  Why baked beans, of course.  

Baked beans, hot dogs, cole slaw, pickles!

Baked beans are a picnic tradition in the Northeast.  They travel warm in a Dutch oven and can be made in advance or baked slowly underground in a bean hole. The bean hole is a well-established tradition in New England that may date back to Native Americans, who prepared beans seasoned with maple syrup, bits of venison, and bear grease.  They baked them in a pit dug into the ground. It is thought that early European settlers adopted the bean, which is a New World food, cooking it with molasses or maple syrup and salt pork. Beans baked in cast iron pots buried in the ground became a lumber camp specialty and remains popular in New England – and especially in Maine -- to this day, particularly for public suppers and community gatherings.

Vermont used to be a center of bean agriculture.  There were bean elevators north of Burlington in the same way that there are grain elevators in the Midwest.  Trains sent the beans to Montreal, Boston, and New York and returned with tourists, who even then enjoyed Vermont’s rustic charms. Then, during World War II, the government set bean prices at a low of $.85 a pound, to encourage meatless eating at a time when meat was rationed.  But there was no ceiling on milk prices, so Vermont farmers switched to more lucrative dairy.  Local bean growing is slowly returning as milk prices tank, but demand far exceeds supply.

Dried beans are a long-season crop.  They do best in the flatlands and valleys, not in my short-season, mountain-top garden.

For cooking baked beans, I prefer navy beans, though yellow-eyes, soldier beans, and Jacob’s cattle beans are popular choices around here. Navy beans soaked overnight. I don’t bother with a bean hole; a 300° oven does fine for me.  And what goes best with baked beans for a summer supper?  Why, hot dogs, of course.  And cole slaw.  Welcome to summer.  I’m feeling full of beans.

Sunday Supper Baked Beans
Makes 6 servings

The two-stage cooking process (beans are boiled, then baked) is necessary to achieve a perfect texture.  Once the bean comes in contact with the acidic flavorings (ketchup, coffee, and so on) the skins will soften no further, so they must be cooked to tenderness first. This is a fairly classic baked bean recipe, tweaked a little for greater depth of flavor.  In the vegetarian version below, chipotle chiles replace the bacon for a touch of smoke.

2 cups dried navy or pea beans, soaked overnight and drained
8 cups water
1 large onion, halved and thinly sliced
1/2 cup pure maple syrup or firmly packed brown sugar
1/2 cup ketchup
1/2 cup brewed coffee
2 tablespoons soy sauce
1 tablespoon prepared mustard
2 teaspoons powdered ginger
4 ounces thick-cut bacon, diced 

1. Combine the beans with the water in a large saucepan.  Cover and bring to a boil. Reduce the heat and simmer, partially covered, until just tender, 1 to 1 1/2 hours. Skim off any foam that rises to the top of the pot.

2. Transfer the beans and their cooking water to a bean pot or covered casserole. Add the onion, maple syrup, ketchup, coffee, soy sauce, mustard, ginger, and bacon and mix well.  

3. Cover and bake at 300° F (no need to preheat) for about 3 hours.  Check occasionally and add more hot water if needed to make sure the beans remain moist. On the other hand, if the beans seem too soupy remove the cover during the last 30 minutes. Serve hot.
Vegetarian Baked Beans.  Omit the bacon.  Add 2 tablespoons chopped chipotles in adobo sauce and proceed as above.

Adapted from Recipes from the Root Cellar by Andrea Chesman.  ©2010 Andrea Chesman.  All rights reserved.

Volunteers in the Garden

Easy Pumpkin CakeI’m not talking about getting the kids or the neighbors or friends to help with big chores, like digging new beds or erecting fences.  I’m talking about volunteers, spontaneous growth of unplanned and unplanted vegetables.


Some people call them weeds.


You don’t have to be particularly inexperienced or particularly soft-hearted to think that volunteers are a good thing.  I rarely have to plant dill or cilantro because it just pops up near wherever it grew the previous year.  Tomatoes often volunteer and because I plant heirlooms, they breed true.  Last year we had a generous harvest from a single volunteer tomatillo plant (which was something of a mystery because I’ve never grown tomatillos).


So last year when a volunteer winter squash popped up in a corner of the garden, we—my son and I—allowed it to spread across the lawn.  We couldn’t guess the variety until it had fruited, so against my better judgment, we let it grow.  I knew it was likely to be some ancient winter squash throwback, some variety whose genes were mixed into a hybrid variety for a single characteristic like color, or days to harvest, but not necessarily fine flavor. It certainly grew vigorously and fruited copiously.  


The harvested squash turned out to have no verifiable identity. It looked like a green pumpkin, with paler flesh.  “Can I compost it now?”   I asked throughout October and early November.  “No, no, don’t throw it out!  Cook it.”  Who throws away good food?  Not me.

Spaghetti squash and no-name squash/pumpkin harvest

I cooked the odd squash and found the flavor insipid but not bad.  The flesh was watery, perhaps by nature but perhaps because it had been such a wet growing season. Whatever it was, I put by several quarts in the freeze because I’m not the type to waste food.  I figured even weird, watery, no-name squash would be fine in this foolproof recipe for pumpkin cake


Now it is time to use up the old harvest to make way for the new.  And I still have several containers of this squash. 


This quick and easy recipe is perfect for using up pureed winter squash or pumpkin—frozen or canned, insipid or inspiring. I topped it with chopped pecans and sent it off to the refreshment table for the May Ripton Community Coffeehouse concert with Dollar General.  It was eaten and I heard no complaints—sugar fixes what nature doesn’t. 

Easy Pumpkin Cake

Serves 12 to 15

At my children’s elementary school, this recipe was passed from mother to mother and from class to class.  It was featured at the school’s annual Thanksgiving feast, a meal prepared by parents and school children and shared with all the school families and the town elders each year.  It has become the cake I am most likely to whip up when a bake sale or potluck dinner catches me unprepared.  And it is absolutely foolproof.


First I drained the squash puree so it would be less watery.

2 cups unbleached all-purpose flour

2 teaspoons baking powder

2 teaspoons ground cinnamon

1 teaspoon baking soda

1 teaspoon salt

1 1/2 cups sugar

1 cup canola oil

4 large eggs

1 3/4 cups cooked and mashed pumpkin or winter squash puree 

Cream Cheese Frosting

1 (8-ounce) package cream cheese, softened

1/2 cup butter, softened

1 teaspoon vanilla extract

2 to 2 1/2 cups confectioners’ sugar, sifted

1. Preheat the oven to 350° F.  Butter and flour a 9- by 13-inch baking pan.

2. In a medium-sized mixing bowl, combine the flour, baking powder, cinnamon baking soda, and salt.  Mix well.
 

3. In a large mixing bowl, combine the sugar and oil and beat until light.  Add the eggs, one at a time, beating well after each addition.  Beat in the pumpkin.  Add the flour mixture and beat just until thoroughly blended.  Pour the batter into the prepared pan.

4. Bake for 30 to 35 minutes, until the top springs back when lightly touched.

5. Cool completely on a rack.


6.  To make the frosting, beat together the cream cheese, butter, and vanilla.  Add 2 cups confectioners’ sugar and beat until smooth.  If the frosting is too thin, add the additional 1/2 cup confectioners’ sugar and beat until smooth.

7. Spread evenly over the cooled cake.


From Serving up the Harvest by Andrea Chesman.  © 2009 Andrea Chesman.  All Rights Reserved.


Borscht! Glorious Borscht

What’s not to love about borscht?  It is infinitely variable, infinitely delicious, and beautiful to behold.
Borscht There aren’t many soups that are equally delicious hot or cold, in simplified or embellished form.  
The strange thing about borscht is that kids hate it, and I don’t know why.  I hated it as a kid, my kids hated it when young.  The odd thing is, we all agree it tastes the same; it is just now we perceive it as delicious, as in, “When are you going to make borscht again?!?”
One of the great things about borscht is that it uses a root vegetable that has staying power in the root cellar (your’s or your friendly farmer).  So this time of year, before the local harvests (at least in the Northeast), there are still beets to enjoy.  Be aware, though, that some beets may look okay from the outside, but be funky within.Some of these beets are moldy on the inside and must be discarded  Therefore it is a good idea to buy more than you think you will need.
If it turns out that the weather is chilly on the day serve your soup, serve it hot.  If it turns out to be a dazzling, hot spring day such as we have had lately, then serve it chilled if you like—with or without the potato.  My family is split about the potato with a chilled soup.  The potato lovers say potato is always appropriate.  I’m more inclined to accompany a chilled version with buttered rye bread.  Glorious! 
 
Borscht

Serves 4


Getting ready to cook borscht.
4 medium to large beets (1 1/2 to 2 pounds)
1 onion
4 cups vegetable broth, chicken broth, beef broth, or water
4 thin-skinned potatoes
Juice of 1/2 lemon
Salt and freshly ground black pepper
Sour cream
Dried dill, to garnish
1.  Peel and grate the beets and onions.  A food processor makes lovely, uniform shreds, which greatly enhances the soup.Shredded beets. The onions quickly take on the color of the beets.
2.  Combine the beets, onions, and broth in a saucepan.  The broth should just barely cover the vegetables.  Add additional broth or water if needed.  Bring to a boil, cover, and reduce the heat to a simmer.  Simmer for 30 minutes.
3.  Meanwhile, put the potatoes in a saucepan, cover with water, and bring to a boil.  Boil gently for about 15 minutes, until the potatoes are tender, about 20 minutes.  Drain and keep warm.
4.  When the beets have simmered for 30 minutes, add the lemon juice and salt and pepper to taste.  Simmer for another 5 minutes, until the beets are fully tender and the flavors have blended.
5.  To serve, put a potato in each bowl. Break up the potato with a fork or potato masher, but do not mash.  Ladle the hot soup over the potato in each bowl and top with a dollop of sour cream.  Sprinkle dill over the sour cream and serve at once.
Adapted from Recipes from the Root Cellar by Andrea Chesman.  ©2010 Andrea Chesman.  All rights reserved.


Use It Up Season

Maple-Pear Tea Cake. Plate by Mar Harrison
Old accounts of life in Vermont—everywhere really—used to note that spring, before the new crops started to yield, was the “hunger season.”  Stores of food were mostly gone, with the exception, perhaps, of some limp root vegetables, sprouting potatoes, and rotting apples in the root cellar. 
These days, in North America at least, hunger is more likely to be a year-round consequence of an unequal economy and not diminished food stores.  Still, neither forest nor fields are offering up fresh local foods just yet.  For the thrifty homesteader and localvore, it is “use it up season,” time to make sure you have eaten all the fruits and vegetables, jams and pickles you have put by, to make room for this year’s harvests.
I have a tendency to save frozen berries for a “special treat.”  So they are one of the items that tends to linger in the freezer.  Not so with tray-frozen wild blueberries, which were eaten as a snack by the handful and gone before the first frost.  Canned pears is another item that tends to linger, perhaps because of my insistence on canning in “healthy” apple juice rather than a sweet sugar syrup.  Sprinkle it with sugar, I say, if that’s what you want!
This year’s maple syrup crop was meager at my house—only a couple of quarts.  But the yield from 2011 was so great that even though I gave away plenty as gifts, there is still more in the freezer.  So when it was time to bake a treat for the Ripton Community Coffeehouse concert this month, a Maple-Pear Tea Cake was the obvious choice.
Ingredients for Maple-Pear Tea Cake, including pears canned in apple juice
I'm no Marie Antoinette.  I know that cake has nothing to do with real, physical hunger.  But in this season, when we hunger for working in the garden and renewing our outdoor lives, a sweet treat is always welcome. 
Maple-Pear Tea Cake
Serves 8 to 12
The combination of maple syrup and pears is heavenly, and this cake proves it.  A pint of pears yields one loaf; a quart would yield a double batch.
2 1/2 cups unbleached all-purpose flour
1 tablespoon baking powder
1/2 teaspoon baking soda
1/4 teaspoons salt
2 large or 4 small pears, peeled (if fresh) and diced
3/4 cup pure maple syrup
1/4 cup firmly packed brown sugar
1/4 cup unsalted butter, melted
1 large egg, beaten 
1/2 cup sour cream or yogurt
1 teaspoon vanilla extract
1. Preheat the oven to 350° F.  Butter a 9 by 5-inch loaf pan.
2.  Sift together the flour, baking powder, baking soda, and salt.  Add the pears, tossing them to coat with the flour.
3.  Beat together the maple syrup, brown sugar, melted butter, egg, sour cream, and vanilla.  Stir in the dry ingredients. Spoon the batter into the prepared pan and smooth the top. 
4. Bake for 1 hour, or until a toothpick inserted into the center comes out clean and the cake has begins to pull away from the sides of the pan.
5.  Cool on a wire rack for 15 minutes.  Invert onto a wire rack and finish cooling.  
A very moist slice. Plate by Mar Harrison
From 250 Treasured Country Dessert.  © 2009 Andrea Chesman and Fran Raboff.  All Rights Reserved.


March Market Madness

The email arrived in my mailbox with the title “March Market Madness.”  My friend Lauren Slayton had a problem.  She is a market gardener, brilliant baker, and superb cook who sells baked goods, soups, and other prepared foods at the Middlebury Farmers’ Market.  Like many growers trying to earn a living off the land, she finds it necessary to market “value-added” products.  Carrots may be a dime a dozen in the growers’ bins, but Lauren’s creamy Carrot-Ginger Soup is a whole other story.  It flies out of the market.  Likewise her potpies and rustic tarts, not to mention her breads, brownies, and cookies.


Now that it is March, Lauren’s supply of the vegetables she grew herself has dwindled. So she proposed a contest to help her come up with a localvore-inspired recipe for the next market, with extra brownie points (literally, meaning she would include brownies with the prize), if the recipe included onions or garlic, her last remaining vegetables.


 Red onions. Photo by Lauren Slayton

Onions don’t get enough love.  They are a workhorse in the kitchen, the backbone flavor note in many, many soups and sauces.  I don’t think my mother ever cooked a single dinner than didn’t start with “first you sauté an onion.”  But beyond French onion soup and batter-coated onion rings, there aren’t a lot of classic onion dishes.  So Lauren’s market regulars might have been stumped by the challenge.  But I wasn’t.


Just that week, I watched as my last pint jar of Rosemary Onion Confit was opened and consumed on biscuits with some nicely aged goat cheese from Twig Farm in Cornwall, Vermont.  I knew that onions can be the star of the show, so I sent her a recipe that will appear in The Pickled Pantry, which will be out in June.  The recipe makes a delectable, savory-sweet jam or rosemary-scented caramelized onions.  I’ve enjoyed it on turkey sandwiches and used it to as a filling for a pork tenderloin.

 Rosemary Onion Confit on a biscuit

Lauren used the confit as a filling for a rustic tart.  What will this relish inspire you to make?


Photo by Lauren Slayton

Rosemary Onion Confit

Makes 3 pints

            . 

¼ cup extra virgin olive oil

3 pounds onions, chopped

3/4 cup sugar

1 cup cider vinegar

1 tablespoon rosemary

1 tablespoon soy sauce, or to taste

Freshly ground black pepper


1.  Heat the oil in a large saucepan over medium-high heat.  Add the onions, reduce the heat to low, and stir to coat the onions with the oil. Cook, stirring occasionally, until the onions are brown and meltingly tender, about 30 minutes.


2.  Stir in the sugar, cider vinegar, rosemary, and soy sauce and simmer for 5 minutes.


3.  Pack the onion mixture into clean hot pint jars, leaving ½ inch headspace.  Remove any air bubbles and seal.


4. Process for 10 minutes in a boiling water bath.  Let cool undisturbed for 12 hours.  Store in a cool dry place.  


Recipe from The Pickled Pantry by Andrea Chesman.  ©2012.  All rights reserved.

Roasted Chicken with Root Vegetables

Is it winter or spring?   The wacky weather we have been having says spring, and the snows have melted unusually early this year.  But spring has not sprung.  Not yet.  There are still root vegetables filling the root cellar and produce bins at the stores.  Not even the wild leeks have begun to emerge from the forest floors.  We have been making maple syrup all week, so no, it is not spring.
Roasted chicken makes a festive dish any time of the year.  Root vegetables added to the roasting pan makes a one-dish meal that is hard to beat. My stovetop is engaged with boiling sap for syrup, so a one-dish meal in the oven is good thing.
 
In this dish I have golden beets, fingerling potatoes, onion, carrots, celery root, and garlic.  The veggies take on the flavor from the chicken juices – a delightful combination.  A fresh cabbage salad would not go amiss here.  Serve with a good red wine and you won’t mind waiting just a bit longer for spring.
Roasted Chicken with Root Vegetables

Serves 4 to 6
1 whole roasting chicken (3 1/2 to 5 pounds), neck and giblets removed
2 tablespoons canola or extra virgin olive oil 
6 cups peeled and cubed root vegetables (any combination of beets, carrots, celery root, parsnips, rutabagas, salsify, turnips) 
2 cups cubed fingerling potatoes
1 to 2 onions, cut into wedges
1 whole bulb garlic, cloves separated and peeled
2 tablespoons extra virgin olive oil, plus more to brush
3 teaspoons dried sage
1.  Preheat the oven to 350°F.
2.  Rinse the chicken under cold running water and pat dry.  Set in a large roasting pan.  (The pan must be large enough to hold the vegetables in a single layer surrounding the chicken.)  If you like, tie together the legs with cotton string or thread to prevent them from overcooking.  Brush with the oil and sprinkle with 1 teaspoon of the sage.
3.  In a large bowl, combine the root vegetables, potatoes, and onions in a large bowl.  Place a few garlic cloves and 1 teaspoon of the sage in the chicken.  Add the remaining garlic cloves to the vegetables along with the remaining 1 teaspoon sage.  Add the oil, salt and pepper, and toss to coat. Arrange the vegetables in a single layer around the chicken. 
4.  Roast for 1 1/2 to 2 hours (20 to 25 minutes per pound), until the juices run clear from the chicken, a leg moves easily, and an instant-read thermometer inserted into the thickest part of the thigh reads 165°F.  Stir the vegetables once or twice during the roasting to promote even roasting and baste the vegetables with the yummy chicken juices.
5.  Transfer the chicken and vegetables to a serving platter and keep warm under a tent of foil.  Allow to rest for 10 minutes before serving. 
Adapted from Recipes from the Root Cellar.  ©2010 Andrea Chesman.  All rights reserved


Cooking Winter Greens

It’s the first of March and the snow has finally arrived here in Vermont, where the western slopes of the Green Mountains have been sorely deprived of our usual white blanket.  The wacky weather has brought our early maple sugaring to a halt and promises some much delayed cross-country skiing.  Still, the body knows what it knows.  And right now, I am craving greens.
The further along we get from the growing season, the more greens I crave.
I know I’m not the only one.  Last week I cooked winter greens for a very receptive audience at the Rhode Island Flower Show.  (Oh! Those masses of tulips…) The recipes that follow are the greens I prepared for the flower show.  I cooked kale at the flower show mainly because kale is my favorite vegetable.  Today I cooked those same recipes using collard greens and bok choy.  The recipes work with any hearty green.
Every time I demo making winter greens, I get a comment from someone who says the greens never become tender.  At first the comment mystified my, then I realized the problem was that the stems were not being stripped away.  You must hold the stem in one hand, and strip away the leaves.  Chop the leaves and discard the stems.  (Or mince them and add to soups.) But don’t try to cook kale or collard greens quickly when they are still attached to those tough stems.
The Chinese-style steamed greens are steamed for just 5 minutes, then drizzled with soy sauce and sesame oil.  Lately I have also been adding a drizzle of Chinese black vinegar.  This rich vinegar is to Chinese cooking as balsamic vinegar is to Italian cooking – a bold flavor accent.  Vinegar is often paired with greens because it cuts through bitter flavors.  The greens can be served hot or at room temperature. 


Steamed Chinese Greens

Serves 4


It doesn’t get any simpler than this, and this way of preparing greens is simply perfect.  It is terrific with kale, especially lacinta kale, and most Chinese greens, including baby bok choy, Chinese broccoli, and Chinese or napa cabbage.  It is also an excellent method for preparing regular broccoli and broccoli rabe.  


1 1/2 to 2 pounds greens, tough stems discarded

Soy sauce

Asian sesame oil

Chinese black vinegar


1.  Fill a saucepan with a couple of inches of water and bring to a boil.  Put the greens in a steaming basket and steam until tender, about 5 minutes.

2.  Arrange the greens on a platter.  Drizzle generously with soy sauce and sparingly with sesame oil and vinegar.  Serve hot.


Kitchen Notes: For an extremely simple meal, steam cube silken tofu and place over the greens before drizzling with soy sauce, sesame oil, and vinegar.  Serve over rice.


From Recipes from the Root Cellar by Andrea Chesman.  ©2010.  All rights reserved.


Portuguese Kale Soup

Serves 4 as a main dish


Caldo verde (“green soup”) is considered one of the national dishes of Portugal. I like it best when it is kept simple, made with homemade chicken stock, potatoes, sausage, and kale.  The only seasoning needed is salt and pepper.  Don't confuse dried, cured Portuguese or Spanish chorizo with fresh Mexican chorizo -- they are very different in flavor.


1/2 pound Portuguese or Spanish chorizo, sliced

8 cups chicken stock or broth, preferably homemade 

3 to 4 medium-sized potatoes (1 pound), peeled and diced

12 ounces kale, stems discard and leaves chopped (8 cups lightly packed) 

Salt and freshly ground black pepper


1. Combine the sausage and stock in a large saucepan.  Bring to a boil, then reduce the heat and simmer while you prepare the potatoes. 

2. Combine the potatoes with water to cover in a medium-size saucepan.  Cover and bring to a boil.  Boil until tender, about 8 minutes.  Drain and briefly mash with a potato masher for an uneven, lumpy texture.  Add to the chicken stock along with the kale.

3. Simmer for 10 to 15 minutes, until the kale is quite tender.  Add salt and pepper to taste.  

4.  Serve hot.


Adapted from Serving Up the Harvest by Andrea Chesman.  ©2008.  All rights reserved.


Steamed Chinese Greens

Serves 4


It doesn’t get any simpler than this, and this way of preparing greens is simply perfect.  It is terrific with kale, especially lacinta kale, and most Chinese greens, including baby bok choy, Chinese broccoli, and Chinese or napa cabbage.  It is also an excellent method for preparing regular broccoli and broccoli rabe.  


1 1/2 to 2 pounds greens, tough stems discarded

Soy sauce

Asian sesame sauce


1.  Fill a saucepan with a couple of inches of water and bring to a boil.  Put the greens in a steaming basket and steam until tender, about 5 minutes.

2.  Arrange the greens on a platter.  Drizzle generously with soy sauce and sparingly with sesame oil.  Serve hot.


Kitchen Notes: For an extremely simple meal, steam cube silken tofu and place over the greens before drizzling with soy sauce and sesame oil.  Serve over rice.


Adapted from Recipes from the Root Cellar by Andrea Chesman.  ©2010.  All rights reserved.


Bird and Biscuits

A cookbook writer never rests.  Maybe a recipe seems perfect as it goes into print, but inevitably, an improvement occurs.  Such is the case with my chicken potpie, one of the family favorites for years. The biscuit lovers requested that I bake the biscuits separately from the creamed chicken and vegetables. The biscuits absorbed too much moisture was the complaint.  Not much of a change as it turned out, but oh, what a difference!  
The biscuits remain tender, and the creamed chicken seems richer.  This is comfort food, there’s not doubt about it. The chicken (or turkey) can be leftovers from a roasted bird or from making stock or it can be quickly prepared by poaching split chicken breasts for 35 minutes.  I change the vegetables with the seasons. It’s winter now, so I used golden beets, carrots, rutabagas, and turnips.
Adding the vegetables

 I could have also used celery root, parsnips, salsify, and/or winter squash. Good choices for the summer are corn (removed from the cob), carrots, green beans, or zucchini.  Frozen peas are always good.                                                                                                                                                                                                                                                                                                                                                                                                                                                                                                                                 
Chicken and Biscuits                                                                                                                                                       
Rolled Biscuits (see below)
6 tablespoons butter, chicken fat, or any vegetable oil 
2 shallots, minced, or 2 leeks, thinly sliced
2 garlic cloves, minced (optional)
6 tablespoons all-purpose unbleached flour
4 cups chicken stock 
4 cups cooked chicken
4 cups cubed vegetables, peeled if necessary
1 tablespoon chopped fresh dill or 1 teaspoon dried thyme
2 tablespoons sherry or dry white wine (optional) 
Salt and freshly ground black pepper                                                                                                                                                                                     
1.  Prepare the biscuits according to the directions below, up through step 3.  Place in the refrigerator.                                              
2.  If you are using fresh root vegetables, put in a saucepan, cover with water, and add about 2 teaspoons salt.  Bring to a boil and boil until just tender, about 10 minutes.  Drain.  If you are using, fresh summer vegetables, steam over boiling water until tender, about 5 minutes.  If you are using frozen vegetables, remove from the freezer.                                                                                                           
3.  Preheat the oven to 450°F.                                                                                                                                        
4.  To make the creamed chicken, heat the oil in a large saucepan over medium heat.  Add the shallots and garlic, if using, and sauté until fragrant and limp, 3 to 5 minutes.  Sprinkle in the flour and stir until all the flour is absorbed into the oil.  Whisk in the stock and stir until thickened and smooth.  Stir in the chicken, vegetables, dill, and sherry, if using.  Taste and adjust seasoning with salt and pepper.  Bring to a simmer.  Keep hot while you bake the biscuits.                                                                                                                               
5.  Remove the biscuits from the refrigerator.  Bake for 15 to 18 minutes, until the biscuits are golden.                
6.  To serve, split open one or two biscuits for each serving.  Ladle the chicken and vegetable mixture over the biscuits halves and serve immediately.                                                                                                                                                                                                                                                                                                                                                                                                                                                                           
Biscuits                                                                                                                                

 
Biscuits 
With a food processor, biscuits are really easy to make – no rolling required.                                                                                                                                                                                                                                 
3 cups unbleached all-purpose flour
2 tablespoons baking powder
1 1/2 teaspoons salt
2/3 cup butter, cut into pieces
1 cup buttermilk                                                                                                                                                            
1. Preheat the oven to 450°F with an oven rack in the middle of the oven.  For ease of clean-up, line a sheet pan with parchment paper or a silicone baking mat.                                                                                          
2. Combine the flour, baking powder, and salt in a food processor.  Add the butter and process until the mixture resembles coarse crumbs.  Pour in the buttermilk and process to make a soft dough.                                                       
3.  Transfer the dough to a lightly floured board and knead a few times to make a smooth ball.  Pat out the dough to a thickness of about 1/2 inch.  Cut into 3-inch rounds.  By gathering the scraps and patting out again, you should get twelve biscuits.                                                                                                               
4. Bake for 15 to 18 minutes, until golden brown.                                                                                                   
5.  Serve as soon after baking as possible.  Biscuits are best on the day they are made.  Day-old biscuits (if they last that long!) are delicious toasted.                                                                                                                  
Adapted from Serving Up the Harvest by Andrea Chesman © 2008.  All rights reserved.


Winter Fish Tacos

Every summer my brother spends a month fishing on Lake Champlain.  His haul is impressive and some of it winds up in my freezer.  I think I just pulled the last bag of his fish from my freezer.  The fish is known by the not-terribly-nice name of “crappie.”

Crappie is in the sunfish family and very popular among sport fishermen because it is delicious, with mild, sweet white flesh.  Other names for crappie are strawberry bass, speckled bass, speckled perch, and calico bass.  In Louisiana, I’ve been told it is called sac-au-lait ("bag of milk").  But around here it is called crappie, so crappie for supper it is.

In the sunny climes of California, fish tacos with grilled fish was invented.  It is typically accompanied by a sour cream and lime sauce, pickled red onions, and cabbage, which I think makes it perfect for whipping up in the middle of winter, as long as you skip the grill.

Winter Fish Tacos
Serves 6
In summer, I would probably add cilantro the fish marinade and sour cream sauce, but the dish is just fine without it.  Fresh corn tortillas are the preferred wrap, but flour wrappers do fine, especially where fresh corn tortillas aren’t available.
  
Pickled Red Onion
1 small red onion, halved lengthwise, cut thinly into slivers
1/2 cup rice vinegar
Juice of 1 lime
2 teaspoons sugar
1 teaspoon salt
Dash of hot pepper sauce

Fish and Marinade
3 tablespoons olive oil
2 tablespoons fresh lime juice
1 1/2 pounds fresh mahi mahi or other white fish fillet

Sour Cream Sauce
1 cup sour cream
1/2 cup mayonnaise
2 tablespoons fresh lime juice
1 teaspoon (packed) finely grated lime peel
Pinch of salt
Dash of hot sauce

Tortillas and Garnishes
18 small flour or corn tortillas
2 cups shredded green cabbage
Salsa

1. To make the pickled onion, combine all the ingredients in a small nonreactive saucepan and bring to a boil.  Remove from the heat, transfer to a serving bowl, and let cool.
 2.  To prepare the fish, combine the oil and lime juice in a large shallow glass baking dish.  Add the fish and turn to coat in the marinade.  Set aside and let marinate for 15 minutes.
 3.  To prepare the sour cream sauce, combine all the ingredients in a small bowl and stir until well combined. Set aside. 
 4.  Preheat a large heavy skillet over medium-high heat. Remove the fish from the marinade and place in the hot pan, skin side down. Cook the fish for 4 minutes on the first side and then flip and drizzle with the marinade.  Cook on the second side for 3 to 5 minutes, depending on the thickness of the fish.  Let rest for a few minutes, then flake the fish with a fork.
 5.  To warm the tortillas, stack them between damp paper towels and microwave for about 60 seconds.
 6.  Serve the warm tortillas, fish, cabbage, pickled onions, sour cream sauce, cabbage, and salsa in separate bowls and allow the diners to assemble their own tacos.


From Recipes from the Root Cellar.  ©2010 Andrea Chesman.  All rights reserved.

Music and Noodles

When you live in a DIY world, music can be as much a part of your life as carpentry and dinner from food you raised yourself.

It was around my dinner table—I can’t remember the menu at this point—that a casual conversation about the dearth of venues for singer-songwriters morphed into the idea of starting a once-a-month coffeehouse series.  Eighteen years later, the Ripton Community Coffee House is still going strong.

There’s a dedicated volunteer crew to keep the organization going.  I feed the performers and crew who come early for set-up.  I got that job because I live closest to the venue, and not because I am a cookbook writer.  The musicians expect dinner made by the executive director’s wife.  Expectations are low.

My expectations are high, however, and I like to please.  Still, the menu can be a problem.  Inevitably there is a vegetarian in the group. Vocalists want to eat lightly and never want cheese before they sing.  Male instrumentalists eat hearty, the younger the heartier.

The dishes I choose must be ready by sound check time for the crew, but hold up for the sound man and the performers, who will eat a bit later.  The meal must be portable, because half will be served at the venue and half at my house, where the performers can relax. 

Lately, my go-to meal is Chinese sesame noodles, accompanied by Sweet Spicy Thai Slaw.  Sometimes I’ll roast some tofu to add protein.  The great thing about Sesame Noodles is that it can be adapted to what is in season and what is in the fridge.  In this week’s version, I swapped in a handful of chopped cilantro for the leek.  Scallions can replace leeks; cilantro is always a good addition.  During the gardening season, summer vegetables replace the carrots and daikon radish. 

In a DIY world, musicians should always eat free (see my favorite DIY blog, Cold Antler Farm.com) and recipes should be freely adapted.

Sesame Noodle Salad
Serves 4 to 6

 An arsenal of Chinese condiments combines to make the spicy dressing for these noodles.  Serve as soon as you combine the noodles and dressing.  If you want to make this dish ahead, cook the noodles and toss with sesame oil, assemble the vegetables, and make the dressing.  Refrigerate separately and combine just before serving.


1 pound dried vermicelli
1 leek, very thinly sliced
3 tablespoons Asian sesame oil
2 garlic cloves, chopped
1/2 inch fresh ginger, peeled and chopped
1/4 cup tahini
1/4 cup water
3 tablespoons soy sauce, or more to taste
1 tablespoon rice vinegar, or to taste
1 tablespoon Chinese black vinegar
1 tablespoon rice wine
1 to 2 teaspoons Chinese chili paste with garlic, or more to taste
2 tablespoons sugar, or more to taste
1 carrot, finely julienned
2 turnips or 6-inch piece daikon radish, peeled and finely julienned

 1.  Cook the noodles in plenty of boiling salted water according the package directions until tender but firm to the bite. 
2.  Place the leek in the colander.  Reserve 1 cup of the cooking water. Drain the noodles by pouring into the colander; the hot water will cook the leek.  Rinse with cold water.  Transfer the noodles and leek into a large bowl and toss with 2 tablespoons of the sesame oil.
 3.  In a blender, combine the garlic and ginger and process until finely chopped.  Add the remaining 1 tablespoon sesame oil, tahini, water, soy sauce, rice vinegar, black vinegar, 1 teaspoon chili paste, and sugar.  Blend well.  Dip a noodle into the sauce to taste for seasoning, and add more soy sauce, rice vinegar, sugar, or chili paste, as needed. 
 4.  Toss the noodles with the carrot and turnips. (If you can’t serve immediately, cover and refrigerate the noodle mixture.  Hold the dressing at room temperature for up to 4 hours. Just before serving, add the dressing to the noodles and toss well.  Taste and adjust the seasoning as needed. Serve immediately. 

Recipe from Recipes from the Root Cellar by Andrea Chesman. ©2010.  All rights reserved


Roasted Spiced Potatoes

      The story goes that at age two, still in the highchair, I declared to my mother that I would never eat potatoes again.  And I didn’t.  Not until I was a teenager and decided to try a French-fry.  Delicious.  Of course.

      My repertoire has expanded somewhat, though I am still not the potato eater the men in my family are.  RR has it in his Irish genes.  My boys are part Irish and part, well, I say that the genes on my side are from Russian potato farmers.  Something has to explain the sturdy looking legs.  In any case, I could serve them potatoes day in and day out to no complaints.

      This was the first year I grew potatoes myself.  I’ve always left it to the professionals before.  But Sam did the digging and planting, so I agreed to do the cooking.  We shared the joy of harvesting.  And it was pure pleasure, rooting around for every last spud.  We had planted a 5-pound sampler of fingerlings from Moose Tubers that included Austrian Crescent, French Fingerling, LaRatte, and Rose Finn Apple.  Although a pain in the neck to scrub, these small potatoes are delicious roasted.


      I play around with spices when I roast.  Sometimes I make my own spice mix, sometimes I pull a jar of Ethiopian berbere off the shelf.  It is all delicious.  Just give those babies plenty of room on a baking sheet.  If you want them to brown, don’t crowd them.  Slick them with oil, then spices, then roast in a hot oven, turning them once or twice.  That’s all there is to it.

      Here’s my recipe for Roasted Spiced Potatoes.  It serves four.


4 tablespoons canola oil

1 teaspoon salt

1 teaspoon curry powder

1 teaspoon onion powder

1 teaspoon ground cumin

1/4 teaspoon ground ginger

1/4 teaspoon Chinese five-spice powder

1/4 teaspoon freshly ground black pepper

1/8 teaspoon ground cayenne pepper

2 pounds thin-skinned potatoes, cut into 1-inch cubes


      1.  Preheat the oven to 425° F.  Lightly oil a large shallow roasting pan or half sheet pan.

      2.  In a large bowl, combine the oil with the salt, curry powder, cumin, five-spice powder, ginger, black pepper, and cayenne. Mix well.  Add the potatoes and toss to coat.  Spread the potatoes on the prepared pan in a single layer.

      4.  Roast for 35 to 40 minutes, turning occasionally for even cooking, until the potatoes are tender when pierced with a fork and browned.  Serve hot.


From Recipes from the Root Cellar. © Andrea Chesman.  All rights reserved.


Eat More Kale

Eat more kale.  It’s been my words to live by for years, ever since I discovered that this delicious green was for eating, not for decorating salad bars at steakhouses.  This enlightenment happened for me sometime in the 1980s.  When I wrote Recipes from the Root Cellar I included 33 recipes for kale – wilted salads, stir-fries, sautés, braises.  And, of course, crisp oven-baked kale chips.

Indeed, after returning from the Mother Earth News fair this fall where I did some cooking demos, I wrote about cooking—kale!  

I usually phrase my personal mantra as “Can’t Cook Enough Kale” so as not to infringe on a Vermont artist who supports his family with a small business selling t-shirts and bumper stickers saying “Eat More Kale.” But when mega fast-food chain, Chik-fil-A threatened a lawsuit against Bo Muller-Moore for trademark infringement, I had to jump into the fray in defense of kale. 
Chik-fil-A has a marketing slogan of “Eat Mor Chiken,” which appears as hand-written signs held by cows.  The defense, of course, is who ever confused a leaf of kale with an extruded piece of chicken nugget?  And how can you trademark a saying of “eat mor” and have it apply to eating more of everything?

Yesterday I brought Crispy Kale Chips and a Wilted Kale Salad, both recipes from Recipes from the Root Cellar, to the Middlebury Natural Foods Coop and gave out samples.  My display included a hand-written sign that read, “Eat More Kale.” 

 “Aren’t you afraid of being charged with trademark infringement?” someone asked?  “They’ll never take me alive,” I replied.

 Enjoy More Kale.  Plant More Kale. Grow More Kale. Eat More Kale.    


Crispy Kale Chips
Serves 1 to 4

 Potato chips: be gone! Roasted kale is so delicious, you never need to turn to them again for a hit of crisp and salt.  My son introduced me to this delicacy, but he learned to make it in a cast-iron frying pan over a hot wood fire outdoors.  It took me a while to figure out this version, which is faster, more suited to the average lifestyle, and so good it will make kale lovers out of the most picky eaters.  This is more appropriate as a snack or hors d’oeuvre than a side dish because of the high volume of the pieces.    

1 bunch kale (I prefer curly kale), leaves chopped in 1-inch pieces and tough stems discarded
About 2 tablespoons canola or extra virgin olive oil
Coarse sea salt or kosher salt

 1.  Preheat the oven to 425°F.
 2.  Measure the kale and transfer to a large bowl.  For every 4 cups of firmly packed leaves, add 1 tablespoon oil.  Mix well with your hands to make sure the leaves are evenly coated.  Spread out on a large sheet pan into a single layer.  Use two sheet pans, if necessary.
 3.  Roast for about 10 minutes, until the curly tips of the leaves are darkened and the interior of the leaves are a bright green.  If you are using two sheet pans, roast in batches, unless you can use the “convection bake” option.  The leaves should be mostly crunchy and browned, but not blackened.
 4.  Toss with salt and serve.

Adapted from Recipes from the Root Cellar by Andrea Chesman.  ©2010.  All rights reserved.