maple syrup

Spring Starts Here

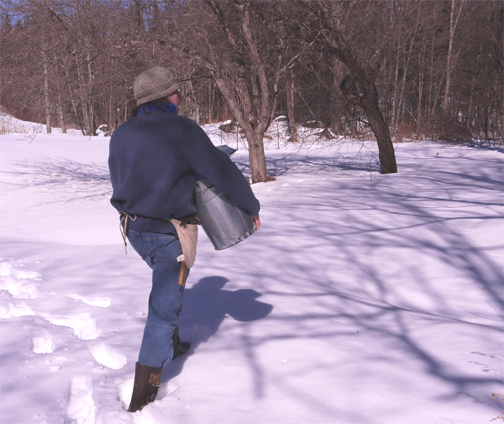
Hauling buckets in 2 feet of snow

Today I committed myself to spring.  That is, today my husband and I tapped four maple trees, installing just seven taps.  We aren’t looking for a cash crop of maple syrup—or even a barter crop—just enough syrup to sweeten our days and make gifts for family.  Those seven taps—three of which are already running—will yield us gallons of maple sap that I will boil down into syrup on my kitchen stove as I go about my ordinary days doing my ordinary things.


Surely winter has had us in its grip long enough.  The path to the buckets is two feet of corn snow that falls into our boots in icy clumps.  Friday, when we woke, it was -8°F (“you get up too early,” laughed my sister on the phone), but by one o’clock, it was a warm bright day.  The sunlight means something.  I can feel my bones defrosting.

 We drill holes with a portable drill.
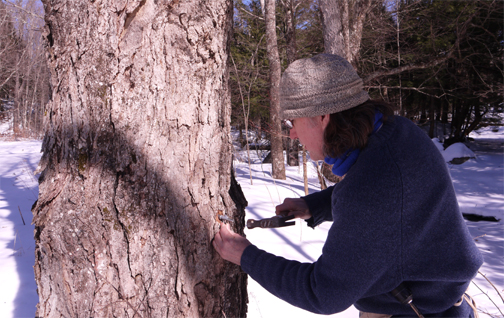
Then hammer in the taps

I haven’t bought any maple syrup in about 15 years.  Most of our sugaring equipment was bought used; some of our taps are real antiques.  We make our tap holes with a portable drill, then we hammer in the taps, hang the buckets, and slip the lids on the buckets.  It takes maybe a minute per bucket.  The well-known statistic is that it takes 40 gallons of maple sap to make 1 gallon of syrup.  In fact, the ratio is anywhere from 20 to 1 to 40 to 1.  Some years all the trees yield sweeter sap than other years, and there is always variation from tree to tree.  If you drink sap, which many people do, you can often taste the variation in sweetness.


People look at me with amusement when I say that we have been boiling maple sap into syrup in the kitchen for all these years and have only ran into a problem once—an ice dam that formed on the roof outside the kitchen because of extra moisture that collected during very cold weather.  We weathered it. Oh, and the surface of my stove around the burner has become pitted and has lost its finish—a cosmetic issue caused by long periods of high heat. I’ve heard tales of wallpaper falling off walls, mold forming on painted surfaces, and the like, but I’ve never experienced it or visited anyone with firsthand experiences of said disasters. 


All maple syrup doesn’t taste the same!  Definitely how well you handle the process, your sanitation and cleanliness will affect the final results.  But there is more to it than that.  Early in the season, the sap will yield a light-colored syrup, called Fancy or Grade A.  As the season progresses, the sap yields a darker syrup, or Grade B.  At the end of the season, as leaf buds begin to form, the sap will yield a dark, dark syrup and it will begin to taste “buddy” or off.  That is when it is time to stop.  In between the extremes of fancy and buddy, the syrup will have hints of vanilla, crème brûlée, coffee beans, dark chocolate, butter, and even a subtle hint of smokiness.  In general, I prefer dark syrup for baking and lighter syrup for pancakes, but that is a personal preference.


When sap is flowing, I collect the sap daily. If I can’t boil the sap immediately, or if I collect more than will fit in my 5-gallon stock pot, I try to keep the sap as cold as I can, preferably outside, in the shade, and packed with snow.               

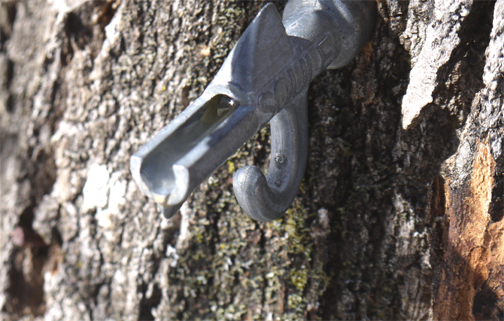
 Sap dripped from our antique tap as soon as we hammered it it.

Making maple syrup is really easy.  You filter the sap before pouring it into your boiling container to filter out insects and twigs that flew or blew into the collecting buckets.  (I use coffee filters or cheesecloth fit in a strainer.) Then you boil until it is syrup.  It is that simple. And yes, you can interrupt the process at any point (like you want to go to bed, finally!), but keep whatever you took off the stove chilled.


Really, the most challenging part of the process is figuring out when the syrup is done. Syrup that is too thin may ferment in storage—or change the baking time or texture of your baked goods that use syrup. If the syrup is too dense, it may form sugar crystals during storage.  You can judge when the syrup is ready by visual cues (risky but cheap), by using a thermometer (you should have one anyway for judging when meat is done), or by using a hydrometer (single use, but highly accurate and can be found for under $20).


If you are going to use a thermometer correctly, you need to figure out the boiling temperature of water on that day. Boiling temperature is generally 212°F.  But it will go up or down based on your elevation and on the atmospheric pressure on that day.  If you are going to use visual cues, stick a plate in the freezer.  A spoonful of syrup dropped on the chilled plate will allow you to leave a trail if you run a finger through it.  


Your syrup will contain a small amount of sediment, known as nitre or sugar sand.  You can filter the hot syrup through a wool filter or you can bottle the syrup without filtering.  The nitre will settle to the bottom of the jar.  When you use the syrup, just don’t use the every last drop; discard the sediment at the bottom of the jar.  Alternatively, you can let the nitre settle, pour off the syrup, again leaving the sediment behind, and reheat to 180°F and bottle it hot.  Don’t let the syrup get hotter than 180°F or more sediment will precipitate out.


That’s it.  Making maple syrup is the best way I know to wait for the ground to thaw.

Gratitude for Spring

Daffodils are having a banner year.
What a spectacular—albeit dry—spring is unfolding in the Northeast. The sunny weather is exceptional, nothing to take for granted.  We are all in a frenzy of planting.


Well, not quite a frenzy.  It is time to plant greens and peas—and water them, too.  We don’t set out tender plants, such as tomatoes, until Memorial Day weekend.  Freezes will still come, if past springs, even last year, has taught us.

I heard of a woman who used to live in Virginia, then moved to Vermont.  Each spring she takes her children down to Virginia, just to experience spring.  Spring in Vermont, she says, is too fleeting.  It isn’t a real season, just a moment between winter and summer.

I’m taking a moment to express gratitude for the way spring unfolds in Vermont.  It is less fleeting than it is subtle. You just have to know when to start looking for it. 

Spring begins with the maple syrup run, which starts with snow still on the ground.  In my household, we made a record five gallons this year.  It was an unusual season with a long, long stretch of ideal cold nights and warmer days when the sap boiled down to fancy for a prolonged period.  This was followed by a stretch when the sap didn’t run at all because it was too cold, then another stretch of ideal weather.  I am glad to be done with sugaring, but also delighted with all the wonderful syrup that will make great gifts year-round.

I am grateful for the ramps and fiddleheads that are springing up in the woods.

There was enough snow pack for fiddleheads and ramps, but mushrooms are not to found.
I am grateful for daffodils and the other spring bulbs that brighten the garden and the migrating birds that stop at the bird feeder. I am grateful for the rhubarb and raspberries and blueberries that are just breaking dormancy and promising another season of desserts and jam making.

Raspberries are just breaking dormancy.Dependable rhubarb is just breaking dormancy.
I am grateful for an energetic son who is digging a new asparagus bed and who has declared war on the bishops weed that invaded the garden a few years back and won’t be controlled by digging, weeding, soil sifting.  This years plan: a 1-foot trench around the affected bed, to be followed by black plastic for a year or more.  

Bishops weed -- a more pernicious invader I have never seen.
I am not grateful for bishops weed that invaded the garden, moles that ate my tulips, cluster flies that invaded the house, and black flies that attack me. Even gratitude has its limits.

Use It Up Season

Maple-Pear Tea Cake. Plate by Mar Harrison
Old accounts of life in Vermont—everywhere really—used to note that spring, before the new crops started to yield, was the “hunger season.”  Stores of food were mostly gone, with the exception, perhaps, of some limp root vegetables, sprouting potatoes, and rotting apples in the root cellar. 
These days, in North America at least, hunger is more likely to be a year-round consequence of an unequal economy and not diminished food stores.  Still, neither forest nor fields are offering up fresh local foods just yet.  For the thrifty homesteader and localvore, it is “use it up season,” time to make sure you have eaten all the fruits and vegetables, jams and pickles you have put by, to make room for this year’s harvests.
I have a tendency to save frozen berries for a “special treat.”  So they are one of the items that tends to linger in the freezer.  Not so with tray-frozen wild blueberries, which were eaten as a snack by the handful and gone before the first frost.  Canned pears is another item that tends to linger, perhaps because of my insistence on canning in “healthy” apple juice rather than a sweet sugar syrup.  Sprinkle it with sugar, I say, if that’s what you want!
This year’s maple syrup crop was meager at my house—only a couple of quarts.  But the yield from 2011 was so great that even though I gave away plenty as gifts, there is still more in the freezer.  So when it was time to bake a treat for the Ripton Community Coffeehouse concert this month, a Maple-Pear Tea Cake was the obvious choice.
Ingredients for Maple-Pear Tea Cake, including pears canned in apple juice
I'm no Marie Antoinette.  I know that cake has nothing to do with real, physical hunger.  But in this season, when we hunger for working in the garden and renewing our outdoor lives, a sweet treat is always welcome. 
Maple-Pear Tea Cake
Serves 8 to 12
The combination of maple syrup and pears is heavenly, and this cake proves it.  A pint of pears yields one loaf; a quart would yield a double batch.
2 1/2 cups unbleached all-purpose flour
1 tablespoon baking powder
1/2 teaspoon baking soda
1/4 teaspoons salt
2 large or 4 small pears, peeled (if fresh) and diced
3/4 cup pure maple syrup
1/4 cup firmly packed brown sugar
1/4 cup unsalted butter, melted
1 large egg, beaten 
1/2 cup sour cream or yogurt
1 teaspoon vanilla extract
1. Preheat the oven to 350° F.  Butter a 9 by 5-inch loaf pan.
2.  Sift together the flour, baking powder, baking soda, and salt.  Add the pears, tossing them to coat with the flour.
3.  Beat together the maple syrup, brown sugar, melted butter, egg, sour cream, and vanilla.  Stir in the dry ingredients. Spoon the batter into the prepared pan and smooth the top. 
4. Bake for 1 hour, or until a toothpick inserted into the center comes out clean and the cake has begins to pull away from the sides of the pan.
5.  Cool on a wire rack for 15 minutes.  Invert onto a wire rack and finish cooling.  
A very moist slice. Plate by Mar Harrison
From 250 Treasured Country Dessert.  © 2009 Andrea Chesman and Fran Raboff.  All Rights Reserved.


Maple Syrup: Anyone Can

Just Do It

It’s been a crazy, mixed-up sort of weekend.  Snow fell off and on.  As Sam (my son) collected the first sap from the buckets he hung earlier in the week, he spotted a barred owl in one of the trees.  That’s the owl that calls, “Who Cooks for You?”

The answer, of course, is me.  At least to those within hearing distance.

This morning while we continued our first boil, we spotted our first redwing blackbirds.  Buckets and birds mean spring will come to Vermont.  Falling snow means we are still locked in winter. Like I said, its been a mixed metaphor of a weekend.

Photo from 2010 sugaring season


When Sam was young, he liked to roam around and indulge in sips of sap from buckets the neighbors hung during sugaring season.  They were making syrup; he was enjoying the cold, faintly sweet, clear liquid that collected in the buckets. The spring he turned eleven he tapped two trees using a drill bit (without the drill), a couple of drinking straws, and plastic 1-quart containers. 

The next year, Sam got the season rolling with old buckets and taps a neighbor no longer needed.  He drilled the holes for the taps with an awl. That was the year the sap he collected exceeded his thirst.  We started boiling sap in our kitchen to make syrup.  It takes 30 to 40 gallons of sap to make syrup. The house welcomed a little extra moisture in the air after a long, dry heating season.  At the top of the stairs, there developed an aroma of maple syrup.  We didn’t care.  No wallpaper loosened from the walls (who uses wallpaper these days?); no mold grew on the paint.  We made about a pint of syrup. Liquid gold.

These days we have seven taps in five trees. We start by arguing whether or not it is time to tap.  Since Sam provides the labor, he always wins the argument, though it never becomes particularly heated.  (We missed the first run a few years in a row, but haven’t done so in a while.  The earliest sap runs produce a very light, delicately nuanced syrup that is considered “Fancy” grade. As the season progresses, the syrup becomes darker, going from Fancy to Grade A to Grade B to “buddy,” as the trees begin to bud and the season ends.)

So Sam tapped the trees earlier this week, a week after a major snowstorm dumped two feet of snow—on top of the three feet of snow already in the yard. The weather warmed to days above freezing and nights below freezing, as it is supposed to at this time of year, and sap collected in the buckets. 

This weekend we started our first boil.  Sam collected the sap and strained it through coffee filters.  Then he poured as much sap as he could into a five-gallon stockpot, and I began the boil. I boiled the sap up until it was time to go to bed, at which point I transferred the stockpot to the porch.  When I got up this morning, I added another half gallon of sap that hadn’t fit in the pot yesterday and put the pot on to boil again. When it is reduced to a couple of quarts, we’ll strain it again and pour it into a small, heavy saucepan for the final boil to the syrup stage.

Sap becomes syrup at 7.1° F above the boiling point.  Because our thermometer isn’t that accurate and we’ve never bothered to buy a hydrometer to accurately measure the density of the syrup (this isn’t a commercial operation), we decide when it is syrup by the look of the bubbles.  When the bubbles of the boiling sap change from small to big and open, the syrup is ready.  Sometimes we pull it off too soon and the syrup is thin; other times it boils too long and some of the syrup crystallizes in storage. 

That first pancake supper from the first batch of syrup is worth everything.  Because syrup stores so well, nobody tells you that fresh maple syrup is infinitely more delicate and delicious that aged syrup.

So my advice to anyone who lives up North among sugar maples: Just do it.  The syrup may be thin, or it may crystallize.  Whatever. It will be perfect. 

Sap is boiling on the stove

Quantity Pancake Mix

I developed this recipe for my book 366 Delicious Ways to Cook Rice, Beans, and Grains (© Andrea Chesman, 1988.  All rights reserved).  The mix makes a hearty pancake that doesn't sacrifice tenderness and lightness.  When making the batter, I often throw in a grated apple or a handful of berries.  For lighter pancakes, separate the eggs and beat the egg whites.

Dry Mix
5 cups unbleached all-purpose flour
2 1/2 cups whole wheat flour
2 1/2 cups stone-ground yellow cornmeal
1 1/2 cups sugar
3/4 cup baking powder
3 tablespoons salt

To make 1 batch (18 to 20 four-inch pancakes)
2 large eggs
3 tablespoons canola oil
1 1/4 cups milk
1 1/2 cups Quantity Pancake Dry Mix (above)

 To make the mix, combine the all-purpose and whole-wheat flours, cornmeal, sugar, baking powder, and salt in a large bowl.  Mix well.  Store in an airtight jar.
 To make a batch of pancakes, preheat the oven to 200°F.  Place four to six plates in the oven to warm, if desired.
 Combine the eggs, oil, and milk in a large glass measuring cup or bowl and beat well.  Add the mix and beat until smooth.
 Spray a well-seasoned cast-iron griddle or nonstick frying pan with nonstick cooking spray and heat over medium heat.  Pour about 3 tablespoons batter for each pancake and cook for about 1 1/2 minutes, or until bubbles appear on the surface and the edges appear dry.  Flip and cook on the other side until done.  Keep warm in the oven until all the batter is cooked.