Drizzling Flavor

As the bounty of summer piles up, I’ve been thinking about drizzles.  Not the rain drizzle, but drizzles over vegetables so tasty and fresh, all you want to do is add a whisper of dressing and call it done.

drizzled tomatoes.JPG

Tomatoes drizzled with olive oil and red wine vinegar

You don’t need recipes for drizzles.  All you have to do is grab a couple of bottles from the cupboard.

Does a tomato need more than a drizzle of olive oil and red wine or balsamic vinegar and a sprinkling of salt and pepper? I don’t think so, though a shredded basil leaf, a shaving of Parmesan never hurts. 

august 9 2014 037.JPG

Drizzled cucumbers

It’s been a perfect cucumber summer in the Northeast.  Hot, sunny days with a thunderstorm late in the afternoon.  I complain because every time I plan to go swimming, the storm clouds catch up to me.  But the cucumbers are abundant.  My favorite drizzle?  A little salt, a little rice wine vinegar, a sprinkling of fresh cilantro.

august 9 2014 029.JPG

Drizzled green beans with sesame oil, soy sauce, and black vinegar

Then there are green beans.  I love green beans every which way.  Slowly stewed in a tomato-based sauce, baked under a béchamel sauce with a crispy garlic topping, roasted and salted.  But most of the time, I just steam and drizzle. The drizzle of the week is sesame oil, soy sauce, and black (Chinese) vinegar. Garlic gives it depth. Black sesame seeds dress it up for a party.

You don’t always need a recipe to make a great dish.

As the bounty of summer piles up, I’ve been thinking about drizzles.  Not the rain drizzle, but drizzles over vegetables so tasty and fresh, all you want to do is add a whisper of dressing and call it done.
You don’t need recipes for drizzles.  All you have to do is grab a couple of bottles from the cupboard.
Does a tomato need more than a drizzle of olive oil and red wine or balsamic vinegar and a sprinkling of salt and pepper? I don’t think so, though a shredded basil leaf, a shaving of Parmesan never hurts. 
It’s been a perfect cucumber summer in the Northeast.  Hot, sunny days with a thunderstorm late in the afternoon.  I complain because every time I plan to go swimming, the storm clouds catch up to me.  But the cucumbers are abundant.  My favorite drizzle?  A little salt, a little rice wine vinegar, a sprinkling of fresh cilantro.
Then there are green beans.  I love green beans every which way.  Slowly stewed in a tomato-based sauce, baked under a béchamel sauce with a crispy garlic topping, roasted and salted.  But most of the time, I just steam and drizzle. The drizzle of the week is sesame oil, soy sauce, and black (Chinese) vinegar. Garlic gives it depth. Black sesame seeds dress it up for a party.
You don’t always need a recipe to make a great dish.


Celebrating with Strawberries

Strawberries!Yesterday I finished writing a book on kitchen skills for the backyard homesteader, and today I celebrated by…making strawberry jam.

 Making jam

Strawberries emit a siren call in late June, early July. The first fruit of the season, and they exert a powerful call to those of us who have been making due with last summer’s bounty that we stored away.  Until it was all gone.  Though I wouldn’t be surprised if there was an errant bag of blueberries hiding behind the lamb I recently bought.  My freezer management skills are nothing to boast about. 


I digress.


So even though I was under great deadline practice, I made time to go to Norris’s Berry Farm in Monkton, Vermont, with my friend Andrea, and we each picked about 15 pounds, effortlessly.  It was a perfect June day, and the strawberries were at that stage where the biggest berry in each cluster was ripe, along with several others.  It seemed we were picking in a row that hadn’t been picked over this season.


I am strawberrying through my days.  Just strawberries with a little sugar and crème fraiche first.  Then fresh strawberry pie.  Strawberry jam this morning.


The perennial question with summer jams is whether or not to add pectin and which to use.  Pectin occurs naturally in fruit; it contributes to the structure of the cell walls. As the fruit ripens, the pectin degrades, which is why under-ripe (hard) fruits have more pectin than overripe (soft) ones.  The old-fashioned way is to cook the fruit slowly, slowly, slowly, until most of the liquid is either evaporated out or has combined into a gel in the presence of pectin. High-pectin fruits, like blackberries, don’t take much time to make by this method. Strawberries, on the other hand, require so much cooking that in the end you are left with a miniscule amount of jam with caramelized sugar notes.


Because it is such a hot day, because I just liberated myself from one deadline, I decided to go with the convenience of a store-bought pectin. 


Commercial pectin, like homemade pectin, is extracted from citrus peels and seeds or apples and made into either a powder or a liquid. These pectins first hit the hit the market in the 1920s and 1930s; before that, people added pectin-rich fruits to jams when they wanted a firm set. The trick with commercial pectin, though, is that you have to follow the recipe from the manufacturer; brands of different commercial pectin are not interchangeable.


Those first—and still popular—pectins to hit the market—Sure-Jel and Certo—were formulated to be activated by white sugar and acid.  They required almost as much sugar by volume as fruit.  Enter Pomona’s Universal Pectin, most frequently found in natural food stores and sold online It allows you to sweeten to taste.  Sales took off.  And many, many jam makers adopted Pomona’s as their go-to brand. Pomona’s pectin is activated by calcium (included in the box).  It is a little fussy to use in my opinion, but works fine.


Since Pomona’s became successful, and since sugar is Public Enemy No. 1, and since a lot of people prefer jams that taste like fruit, not sugar, other manufacturers have come up with their own no-sugar and low-sugar versions. I have a favorite brand: Ball’s Real Fruit Pectin for Low or No-Sugar Needed Pectin.  It is ridiculously easy to use and gives a nice, soft set.  At the website freshpreserving.com, which is Ball’s online store, they have a jam and jelly calculator that lets you pick the fruit and the pectin to use and calculates how much of everything to use.  It is quite handy.  And here’s the thing: As much as I prefer to avoid commercial products, using a commercial pectin gets me out of the kitchen much faster on a day like today.

 Strawberry jam on toast

Toast anyone?


Fresh Strawberry Pie

Fresh Strawberry Pie

This recipe comes from my 2009 book, 250 Treasured Country Desserts, co-written with Fran Raboff.  I don’t think a finer pie can be made this time of year.

6 cups fresh strawberries, hulled and halved if large

One 10-inch pie crust, baked

2 tablespoons fresh lemon juice

2 teaspoons unflavored gelatin

1 cup white sugar

1/4 cup cornstarch

1/8 teaspoon salt

1/2 cup water


1.  Place 2 cups of the berries in a food processor and puree.  Set aside.

2.  Arrange half of the remaining strawberries in the baked pastry shell.

3.  Sprinkle the gelatin over the lemon juice in a small bowl and let soften.

4.  Whisk the sugar, cornstarch, and salt in a heavy saucepan.  Whisk in the water and pureed berries. Bring to a boil over medium-high heat, stirring constantly.  Boil for 1 minute.  Remove from the heat and whisk in the softened gelatin until smooth.

5. Pour half of the strawberry sauce over the strawberries in the pastry shell. Shake the pan gently to evenly distribute the sauce. Add the remaining uncooked strawberries. Spoon the remaining strawberry sauce evenly over the berries. Chill for at least 4 hours, up to 8 hours before serving.

Red-Cooked Chicken

A beautiful red-cooked chicken 

Some of my fondest food memories stem from the time I worked in a Chinese restaurant in upstate New York.  The chef-owner, Mr. Wong, had a post-doc in nuclear physics that ended and no job was in sight.  So while his wife continued to teach Chinese as an ad hoc professor at the university, Mr. Wong opened a restaurant and hired students as waitresses.

I was not motivated by a desire to serve.  The money wasn’t great.  But I started each shift cheerfully after fortifying myself with a snack of eggrolls.

Because Mr. Wong cooked by himself on a two-burner hot plate and sent dishes out of the kitchen one at a time, expecting each table to share each dish as it came out, orders often backed up.  And backed up.  And backed up further.  It turned out the frat boys, who usually ordered pork fried rice, didn’t like to share, so every table had some people who were unhappy—and hungry. 

It also turned out that I wasn’t very skillful at mollifying disgruntled patrons—if you count dumping a pitcher of water in someone’s lap mollifying.

I was banished from the dining room and spent the rest of my time in the kitchen, until the restaurant went out of business.

The kitchen was where I loved to be.  I made dumplings and eggrolls, I prepped soups and vegetables. And waited for the place to clear out so we could eat a late dinner.  One of my favorite staff meals was what Mr. Wong called “hacked chicken.”  This was chicken slowly braised in a soy broth until it was a deep mahogany brown and unbelievably flavorful. 

Years later, I was thumbing through Nina Simond’s wonderful book, Classic Chinese Cuisine, when I came across her recipe for Red-Cooked Chicken, or Hong Shao Ji. As soon as I read it, I knew this was the same as Mr. Wong’s hacked chicken. 

Red-cooked chicken is ready, veggies in the wok

Red-cooking is now part of my cooking repertoire.  It could be become part of yours—if you are looking for something quick, comforting, and unbelievably delicious.  Each time you make it, save the broth for the next batch.  Strain it, then freeze it.  The next time you make the dish, half the ingredients and the spices should be replenished.  This same broth can be used for pork (especially pork belly, which is unbelievably delicious cooked this way), lamb, beef, chicken gizzards, tofu, and duck.  It is the home-style Chinese cooking you never get to experience in today’s Americanized small-town Chinese restaurants where General Tzao’s chicken reigns supreme.

 Here’s my adaptation of the recipe.  Serve with a stir-fry of vegetables or steamed greens.

Red-Cooked Chicken

Serves 4 to 6


Red-cooked chicken with stir-fried vegetables

4 cups water

1 cup soy sauce

1/2 cup Chinese rice wine or sake

1/3 cup honey, maple syrup, or brown sugar

1 tablespoon Chinese five-spice powder

6 cloves garlic

6 thin ginger root slices

1 orange or tangerine peel

1 whole chicken

Dark sesame oil

Finely chopped cilantro, to serve

Finely chopped scallions, white and green parts, to serve

Hot cooked rice

1. Combine the water, soy sauce, rice wine, honey, five-spice powder, garlic, ginger, and orange peel in a large Dutch oven.  Bring to a boil, reduce the heat to low, and let simmer for 5 minutes.

2.  While the liquid simmers, rinse the chicken and remove any fat from the cavity and neck.  Place the chicken in the red-cooking liquid, breast-side down, and simmer for about 1 1/2 hours, turning the chicken occasionally. 

3. Turn off the heat and let the chicken cool in the liquid for 15 minutes.

4.  Remove the chicken from the cooking liquid and set aside.  Preheat the oven to 400° F.

5.  Cut the chicken into small pieces, cutting through the bone.  Arrange in a single layer, skin side up, on a baking sheet. Drizzle the chicken with sesame oil and.  Place in the hot oven for 10 minutes to make the skin crispy.

6.  Skim the fat from the cooking liquid and bring to a boil.           

7.  To serve, place the chicken on a platter and sprinkle with cilantro and scallions. Pour the cooking liquid into a pitcher to pass at the table. Spoon the rice into individual bowls, passing the chicken, and cooking liquid at the table.


Spring Starts Here

Hauling buckets in 2 feet of snow

Today I committed myself to spring.  That is, today my husband and I tapped four maple trees, installing just seven taps.  We aren’t looking for a cash crop of maple syrup—or even a barter crop—just enough syrup to sweeten our days and make gifts for family.  Those seven taps—three of which are already running—will yield us gallons of maple sap that I will boil down into syrup on my kitchen stove as I go about my ordinary days doing my ordinary things.


Surely winter has had us in its grip long enough.  The path to the buckets is two feet of corn snow that falls into our boots in icy clumps.  Friday, when we woke, it was -8°F (“you get up too early,” laughed my sister on the phone), but by one o’clock, it was a warm bright day.  The sunlight means something.  I can feel my bones defrosting.

 We drill holes with a portable drill.Then hammer in the taps

I haven’t bought any maple syrup in about 15 years.  Most of our sugaring equipment was bought used; some of our taps are real antiques.  We make our tap holes with a portable drill, then we hammer in the taps, hang the buckets, and slip the lids on the buckets.  It takes maybe a minute per bucket.  The well-known statistic is that it takes 40 gallons of maple sap to make 1 gallon of syrup.  In fact, the ratio is anywhere from 20 to 1 to 40 to 1.  Some years all the trees yield sweeter sap than other years, and there is always variation from tree to tree.  If you drink sap, which many people do, you can often taste the variation in sweetness.


People look at me with amusement when I say that we have been boiling maple sap into syrup in the kitchen for all these years and have only ran into a problem once—an ice dam that formed on the roof outside the kitchen because of extra moisture that collected during very cold weather.  We weathered it. Oh, and the surface of my stove around the burner has become pitted and has lost its finish—a cosmetic issue caused by long periods of high heat. I’ve heard tales of wallpaper falling off walls, mold forming on painted surfaces, and the like, but I’ve never experienced it or visited anyone with firsthand experiences of said disasters. 


All maple syrup doesn’t taste the same!  Definitely how well you handle the process, your sanitation and cleanliness will affect the final results.  But there is more to it than that.  Early in the season, the sap will yield a light-colored syrup, called Fancy or Grade A.  As the season progresses, the sap yields a darker syrup, or Grade B.  At the end of the season, as leaf buds begin to form, the sap will yield a dark, dark syrup and it will begin to taste “buddy” or off.  That is when it is time to stop.  In between the extremes of fancy and buddy, the syrup will have hints of vanilla, crème brûlée, coffee beans, dark chocolate, butter, and even a subtle hint of smokiness.  In general, I prefer dark syrup for baking and lighter syrup for pancakes, but that is a personal preference.


When sap is flowing, I collect the sap daily. If I can’t boil the sap immediately, or if I collect more than will fit in my 5-gallon stock pot, I try to keep the sap as cold as I can, preferably outside, in the shade, and packed with snow.               

 Sap dripped from our antique tap as soon as we hammered it it.

Making maple syrup is really easy.  You filter the sap before pouring it into your boiling container to filter out insects and twigs that flew or blew into the collecting buckets.  (I use coffee filters or cheesecloth fit in a strainer.) Then you boil until it is syrup.  It is that simple. And yes, you can interrupt the process at any point (like you want to go to bed, finally!), but keep whatever you took off the stove chilled.


Really, the most challenging part of the process is figuring out when the syrup is done. Syrup that is too thin may ferment in storage—or change the baking time or texture of your baked goods that use syrup. If the syrup is too dense, it may form sugar crystals during storage.  You can judge when the syrup is ready by visual cues (risky but cheap), by using a thermometer (you should have one anyway for judging when meat is done), or by using a hydrometer (single use, but highly accurate and can be found for under $20).


If you are going to use a thermometer correctly, you need to figure out the boiling temperature of water on that day. Boiling temperature is generally 212°F.  But it will go up or down based on your elevation and on the atmospheric pressure on that day.  If you are going to use visual cues, stick a plate in the freezer.  A spoonful of syrup dropped on the chilled plate will allow you to leave a trail if you run a finger through it.  


Your syrup will contain a small amount of sediment, known as nitre or sugar sand.  You can filter the hot syrup through a wool filter or you can bottle the syrup without filtering.  The nitre will settle to the bottom of the jar.  When you use the syrup, just don’t use the every last drop; discard the sediment at the bottom of the jar.  Alternatively, you can let the nitre settle, pour off the syrup, again leaving the sediment behind, and reheat to 180°F and bottle it hot.  Don’t let the syrup get hotter than 180°F or more sediment will precipitate out.


That’s it.  Making maple syrup is the best way I know to wait for the ground to thaw.

The Year of the Ferment

Dilled Green Tomatoes, Dilly beans, Mild Kimchi all from The Pickled Pantry.The year 2013 may be the year fermentation reached critical mass in America.  I’m off to a fermentation festival in Boston next weekend (http://eglestonfarmersmarket.org/fermentation-fest), and there have been other fermentation festivals throughout the summer – almost as many fermentation festivals as music festivals.  Fermented pickles are found at almost every farmer’s market and farm-to-table restaurant menus. 


The mainstream health community is catching on to the idea that the billions of microbes we host in our bodies, especially in our guts, are kept healthy and well when we eat plenty of fermented foods with live cultures.  Of course, fermented foods with live cultures includes some beers and wine, some sodas, kombucha, yogurt, and miso, tempeh, and more.


So as summer winds down, I am fermenting green tomatoes and dilly beans as a way of dealing with the harvest.  We took in about 40 pounds of tomatoes, much of it green when frost threatened.  The beans were ready for harvest even if the tomatoes weren’t.  Still 10 pounds of snap beans on top of the 10 pounds harvest the week before and the week before means lots of beans to deal with. 


The kimchi is less about dealing with the harvest and more about my household’s love of kimchi.  It is great tasting stuff – and very “morish” – the more you eat, the more you want.


All of my ferments are made in canning jars.  I use a beer bottle sanitizer to clean the jars and all my utensils.  Scrupulous attention to cleanliness pays off.  My small batches mean that if a jar goes off (which doesn’t seem to happen since I switched to jars), my investment in ingredients and time is minimal.  My ferments do age, getting softer and more sourer, but I am more likely to finish a small batch before it gets unpleasant than I am a large batch. 

About 1/2 inch of brine as been forced out as the kimchi ferments 

I fill the jars to the very brim with brine, then cover them with the canning jar lids and screwband.  I close the screwband fingertip tight – not ninja, tough-guy tight.  Then I put the jars in containers or on saucers.  Ferments that make their own brine (kimchi, sauerkraut) will push some of the brine out as they actively ferment. But no air comes in.  After the jar is opened and sampled, I continue to make sure the remaining pickles stay under the brine level. mixing up some additional brine to keep everything covered as needed.   Once I put the jar in the refrigerator, I don’t worry about the brine levels.

The saurkraut and dilly beans started out in 2-quart jars and are now in pint jars. Moving the ferments to smaller jars reduces exposure to air and extends the life of the pickles. 

This is the recipe for the kimchi I usually bring to workshops for tasting.  I have been promising to post it for a while.

 Kimchi is "morish." The more you eat, the more you want.

Mild Kimchi

Makes 1 quart

            If you like your kimchi hot, increase the amount of chili paste. 


8 cups Napa cabbage, cut into 2-inch pieces

4-inch length daikon radish, peeled and thinly sliced

1 carrot, sliced

½ cup pickling salt

Water to cover

2 garlic cloves, minced

1 tablespoon Korean chili paste

½ teaspoon minced fresh ginger root

½ teaspoon sugar


            1.  Combine the cabbage, daikon, carrot, and pickling salt in a large bowl.  Mix to evenly distribute the salt.  Add water to cover.  Let stand for at least 2 hours, up to 6 hours.

            2. Drain, reserving the brine.  Add the garlic, chili paste, ginger, and sugar to the cabbage mixture and mix well.

            3.  Pack the mixture into a clean 1-quart canning jar.  Add enough brine to cover the mixture and fill to the top.  Cover to exclude air.

            4.  Set the jar on a saucer where the temperature will remain constant: 65° to 75°F is ideal.

5.  Begin tasting after 3 days and refrigerate when the kimchi is pleasantly sour. The kimchi continue to age and develop flavor. Store in the refrigerator.  It will keep for several months.


Recipe adapted from The Pickled Pantry.  ©2012 Andrea Chesman.  All rights reserved.

An Eggplant Garden

Some of the eggplant are in pots.
We planted an eggplant garden this year.  Twenty-six eggplant plants, nine varieties.  There are Japanese eggplants, Chinese eggplants, Thai eggplants, Italian globe eggplants.  There are Little Fingers, Black Beauties, Oriental Longs, Kermits, Rosa Bianca, Pingtung Long, and Oriental Gourmet. We are not growing any African eggplant, because these are too tropical for our climate. 


Eggplants are an Old World nightshade, unlike the tomato, chile, and potato, also nightshades but of New World origins.  The earliest records of eggplant in Chinese and Sanskrit date back 2000 years, according to Elizabeth Schneider’s excellent reference book, Vegetables from Amaranth to Zucchini.  She explains that the eggplant was introduced to Japan in the eight century and to Europe in the thirteenth.  The variety that was introduced to North America was indeed white and egg-shaped and valued more as an ornamental than a vegetable.  Which may explain why Americans have been so slow to adopt eggplants.

But thanks to the influence of immigrants and their cuisines, Americans are now growing some sixty-six different varieties of the eggplant berry (eggplant is a berry), of which we are growing a sampling.  You’d think we’d be planning to do some seed saving, but the fact is, most of these varieties are hybrids.  And, it seems that eggplant cross-pollinates quite readily, so any seeds we saved would be unlikely to breed true.  But from a cook’s point of view, I wouldn’t have wanted to be a seed saver.  Because the dreaded bitterness for which the eggplant is known and despised is a function of fully developed seeds.

This row of eggplant is in front of a trellis of pole beans.
Indeed, much of what I learned about cooking eggplant is just plain wrong, as I have come to appreciate since growing my own.  Eggplant fresh from the garden doesn’t have to be peeled, unlike some supermarket specimens that have been waxed to extend its shelf life.  And a fresh, young eggplant doesn’t require salting to drain away bitter juices, because it isn’t bitter.   Finally, eggplant do much better sitting on a kitchen counter than being placed in the refrigerator.  At 50°F or lower, the eggplant flesh will turn brown.  

It mystifies me when someone tells me that don’t like eggplant, because the eggplant flesh is mild, hardly something that should inspire a distaste.  But oh, it is a sponge for flavors, which is why we can’t get enough of my Soy-Sesame Eggplant, sometimes served up plain (with rice, of course) and sometimes combined with a stir-fried meat.  (Just prepare the Soy-Sesame Eggplant and set it aside to marinate in its dressing.  Stir-fry matchsticks of chicken, pork, beef, or whole shrimp and dump in the eggplant at the end.)

The original version works with grilled or broiled eggplant.  It's all good.  


Soy-Sesame Eggplant

Soy-Sesame Garlic
When you are looking for a make-ahead vegetable dish that can be served at room temperature, consider the eggplant.  In this case, slices of eggplant are grilled or broiled, then combined with a spicy marinade featuring soy sauce and Chinese chili paste with garlic.  It’s not the most beautiful dish in the world, but a scattering of cilantro and scallions brightens the dark colors of soy and eggplant.  The flavor is intense and delicious.

Three pounds of eggplant is about two large globe eggplant.  This dish works well with any variety of eggplant.  If the eggplant is long and curved, like some varieties are, it may be more convenient to slice the eggplant horizontally.  


Eggplant

3 pounds eggplant, cut into cubes

3 tablespoons peanut or canola oil

Marinade

5 tablespoons soy sauce

2 tablespoons sesame oil

2 tablespoons mirin, rice wine, or sake

1 tablespoon rice vinegar

1 tablespoon chili paste with garlic

1 tablespoon sugar

2 garlic cloves, minced

Garnish

3 scallions, whites and tender greens, finely chopped

3 tablespoons fresh chopped cilantro

1.  Heat a wok over very high heat.  Add the oil and heat until it shimmers.  Add the eggplant and stir-fry until cooked through, about 5 minutes.  Transfer to a medium-sized bowl.

2, Combine the soy sauce, sesame oil, mirin, vinegar, chili paste, sugar, garlic, and in a small bowl.  Mix well.  Pour over the eggplant and toss to mix.

3.  Let stand at least 30 minutes to allow the eggplant to absorb the flavors of the marinade.  You can hold this dish in the refrigerator for up to day, but bring to room temperature. Just before serving, sprinkle with the scallions and cilantro.    

  
Adapted From Serving Up the Harvest by Andrea Chesman.  ©2007, 2009 Andrea Chesman.  All rights reserved.


On Slow Cookers, Beans, and Greens

I was a slow adapter of the slow cooker.  What can a slow cooker do that a Dutch oven and a low oven temperature can’t accomplish?  Not much, actually.  But the slow cooker can allow you to fix dinner and forget it, walk away, even leave the house.  Even garden if it ever stops raining.  And the slow cooker won’t heat the whole house – if it ever gets warm enough to matter.


Heat the whole house isn’t a bad idea in this season that is not summer, not yet anyhow.  Tonight the low temperature will be 48°, tomorrow it will be 39°, the next day 43°F.  We’ve planted the garden, except for the eggplant, which we are still babying in pots.  The basil will brown or even die.  The beans will lie inert in the soil.  The tomatoes are barely hanging in there.  Spinach is on hold. The weather is dispiriting.

 Middlebury Farmer's Market.

So I will be forgiven for making a slow-cooked, out-of-season Tuscan White Beans and Kale stew.  We needed it to fortify our spirits.  What inspired the dish was a trip to the Middlebury Farmer’s Market, where Jon Folger of Pine Wood’s Farm of West Pawlet, Vermont, was selling his heritage beef and pork.  He had pork neck bones, which I had never cooked with.


“What do you do with neck bones?” I asked.  He suggested simmering it in tomato sauce for pasta.  “The meat will just melt off the bones.”


Pasta sauce made me think Italian.  Italian made me think Tuscan.  Tuscan made me think of white beans and kale, a dish my family loves.  This version, the simplest one yet, was also the best I've ever had.  It really does make a difference to start with dried beans.  The meat adds a silken texture and meaty background flavor.  Any cut of pork will do, but something bony like neck bones or trotters are best.


Oh, and to make it more seasonal?  Substitute spinach for the kale—if your garden grows.

 Substitute spinach or another green for the kale if you prefer.

Tuscan White Beans and Kale

Serves 8 to 10


2 cups cannellini beans, soaked overnight and drained

2 to 3 pounds pork neck or trotters

4 cups chicken broth or water

4 cups water

1 whole head garlic, cloves separated and peeled

1 large sprig sage, or 1 teaspoon dried

1 large sprig rosemary, or 1 teaspoon dried

1 teaspoon salt, plus more to taste

1 large bunch kale, stems removed and discarded, leaves chopped

Freshly ground black pepper

Grilled or toasted bread, to serve


1.  Combine the beans, pork, broth, water, garlic, sage, rosemary, and 1 teaspoon salt in a slow cooker.  Set on high and cook for 6 hours, or until the beans are tender.  (If you combine the beans, pork, broth, water, garlic, sage, rosemary, and 1 teaspoon salt in a saucepan and bring to a boil before transferring to the slow cooker, you can knock off 1 to 2 hours of cooking time.  Or combine in a large Dutch oven, bring to a boil on the stovetop, then cover and bake at 250°F for 4 to 6 hours.)  Taste and adjust the seasoning with more salt, if needed, and pepper.


2.  About 15 minutes before serving, reheat, if necessary.  Stir in the kale and cook on High in a slow cooker or on top of the stove in a Dutch oven until the kale is wilted and tender, about 10 minutes.


3.  Place two slices of bread in each shallow pasta bowl.  Ladle the stew on top.


© 2013  Andrea Chesman.  All rights reserved.

For the Love of Green

Pasta with spinach, sausage, cannellini, and garlic

When my husband was little, he would eat spinach directly out of the can.  It wasn’t a Popeye thing—he just loved spinach.  He was shocked—shocked!—to learn that his fellow kindergarteners didn’t share his love for this leafy green.

We are a family of spinach lovers—fresh or frozen (not canned!).  At this time of year we anxiously await the first harvest.  A cold frame or greenhouse is needed to get a good crop of early spinach.  That’s not me.  Instead, I plant my spinach under an apple tree.  My spinach isn’t early,

 My spinach is slow to grow in this crazy weather.

but it will be slow to bolt when other gardens have given up on the crop.  But the waiting?  Easily solved by the professionals at the farmer’s market.

My first introduction to raw spinach was with the ubiquitous spinach and raw mushroom (yuck!) salad in the 1970s.  Alton Brown thinks the salad originated among the Pennsylvania Dutch.  That salad, with bacon and hard-boiled eggs, soon morphed into a spinach and canned mandarin orange salad, then a spinach and berry salad with raspberry vinaigrette.  I avoid them all, but I love cooked spinach.

According to nutritionists, cooked spinach provides greater amounts of vitamins A and E, protein, fiber, zinc, thiamin, calcium, and iron than raw spinach. Heating spinach also helps free up beta-carotene, which your body converts to vitamin A, along with other carotenoids.

When I’m cooking spinach, I like to allow 1/2 pound per person; that’s 6 to 12 cups per person, depending on how you pack it and whether you are measuring baby spinach or fully mature leaves, flat leaves or crinkled ones.  Mature Savoy leaves yield more cups per pound than flat leaves or baby leaves.  A half pound sounds like a lot, but spinach cooks down to almost nothing. 

Sometimes I sauté a little garlic in olive oil, add the spinach, cover, and cook until the spinach is wilted, about 4 minutes.  Or I turn the sautéed spinach into creamed spinach just by adding a little cream or half-and-half.  Then I turn the creamed spinach into eggs Florentine by adding freshly grated Parmesan cheese and topping it with a poached egg.  Sometimes I even remember to take photographs…

This past week I made my first batch of feta cheese with goat milk.  Because I was slow to make the cheese, the flavor of the feta is a little strong.  It called for the mellowing with other strong flavors. 

My first batch of feta cheese.
Fortunately, Elmer Farm had beautiful spinach at the farmer’s market, so I picked up three pounds.  Half went into the pasta, along with the feta cheese, some sausage, garlic, and cannellini beans.  I blanched the garlic cloves for 6 minutes in boiling water and added the mellowed whole cloves to the finished dish.  

Spinach!
Here’s a tip for you if your spinach is coming on faster than you can eat it:  Cook it.  Wilt the spinach in a large pot of salted boiling water.  Lift the spinach out of the boiling water and into ice water to stop the cooking.  Drain well, then refrigerate.  It will hold well for up to 5 days, ready to be added to a recipe and taking up a lot less space than uncooked spinach.


Woodchuck Stew

The time has come

The gardener said

To post unpleasant blogs

Of does and bucks 

And slugs and flies

And ravenous groundhogs.


Groundhog AKA woodchuck AKA PEST!
I have experienced rage, pure murderous, blinding rage only once in my life.  It was provoked by a woodchuck.

This woodchuck, or ground hog as some would call it, could distinguish among the different sounds of various car motors and knew when a car pulled into the driveway whether it was one of the roommates who had a dog that would go after the woodchuck.  It also knew which car was driven by someone who would go after the woodchuck with a shovel.  And it knew the sound of my car.  When I pulled in, he would stand on his hind legs and laugh at me.  I swear it.

We tumbled rocks down the existing woodchuck holes.  We contemplated pouring gasoline down the holes and throwing in burning sticks of wood.  We contemplated dynamite.  The lettuce was gone.  The spinach was gone.  The broccoli was sorely nibbled.  

We built a fence around the garden.  We buried the chicken wire a foot deep in the hard clay soil and swore no woodchuck would breech our defenses. Two new woodchuck holes opened up—right in the middle of the corn patch.  

That’s when I experienced rage.  I did go after that woodchuck with a shovel.  But I never caught up to it.  There was always another hole for it to escape into.  Eventually, we both moved away.

My friend Jane is a woodchuck warrior of great skill and creativity. Jane lives in town, where woodchucks are particularly voracious and preys on backyard gardens.  These gardens are not large enough to share with critters, so she has gathered all the neighbors together and enlisted them as well.  

To begin with, Jane makes a woodchuck-hole sachet consisting four layers of 1-inch nylon netting (two layers are 3-feet square, the other layers are scraps.  They netting is wrapped around rocks that are bigger than grapefruits. The netting is gathered around the rocks to resemble a purse, or sachet.   She stuffs the netting sachet (she calls in a bon-bon) in each hole she finds.  Jane also lays that same netting around the perimeter of her garden in sheets that are 25 feet long and 6 feet wide; the woodchucks don't like to cross it. She installed a solar-powered sound emitter that repels woodchucks.  And she has electric fencing -- with one strand low enough to also deter rabbits. 

I asked Jane how much she has spent on her woodchuck war.  "Oh, I don't even want to guess," she said.


I don’t worry about woodchucks anymore.  My son has a .22 and he knows how to use it.  He is pretty firm in his conviction that you only kill what you eat, and I am firm in my conviction that I would rather eat a woodchuck than see one, so it all works out.

He looked huge but weighs only 2.14 pounds.
Woodchucks, for all their mass, don’t yield that much meat.  The woodchucks average around 2 pounds after all the fur and organs are discarded.  That 2-foot critter was mostly just voracious appetite and fur.  It should be noted that woodchucks, as well as most other small food animals such as squirrel, have scent glands that should be cut out as soon as possible to avoid tainting the meat. When dressing woodchucks, look for and carefully remove without damaging any small gray or reddish brown kernels of fat located under the forelegs, on top of the shoulder blades, along the spine in the small of the back, and around the anus.

I have no family tradition to lean back on when it comes to cooking woodchuck, so I use my beef stew recipe.  Here I made it with the last of my root-cellared carrots and potatoes, but any root vegetables are in stew.  Also any meat.

The meat tastes more like squirrel or rabbit than anything else – they are all rodents, after all.  I did not weep to see the stew disappear.


Mystery meat stew? No! It's woodchuck stew!


Woodchuck Stew 

Serves 4 to 6
This recipe is adapted from a beef stew recipe from Recipes from the Root Cellar.  A similar recipe appears in Serving up the Harvest.  

2 pounds woodchuck, cut into serving pieces

It's pretty obvious how to cut the critter up.

1/2 to 2/3 cup all-purpose unbleached flour

1 tablespoon dried thyme

1 teaspoon dried oregano

Salt and freshly ground black pepper

3 to 4 tablespoons extra virgin olive oil

1 large onion, thinly sliced

1 1/2 cups beef broth 

2 cups home-canned or store-bought diced tomatoes with juice

1 cup red wine

2 garlic cloves, minced

12 to 16 ounces rutabaga or turnips, peeled and cut into 1-inch cubes

12 to 16 ounces carrots, peeled cut into 1-inch cubes 

12 to 16 ounces parsnips, peeled and cut into 1-inch cubes

16 ounces thin-skinned potatoes, peeled and cut into 1-inch cubes

1. Pat the meat dry. Combine the flour, 1 teaspoon of the thyme, and oregano in a shallow bowl.  Season generously with salt and pepper.  Add the meat and toss to coat.

2. Heat 3 tablespoons of the oil over medium heat in a large saucepan or Dutch oven.  Lift the meat out of the flour, shaking off the excess, and add a single layer to the pot.  Do not crowd the pot.  Let the meat brown, turning as needed, about 5 minutes.  Remove the meat as it browns and set aside.  Continue cooking until all the meat is browned.

3.  Add the remaining 1 tablespoon oil and onion to the Dutch oven and sauté until the onion is soft, about 3 minutes.  Add the broth, tomatoes, wine,  garlic, and remaining 2 teaspoons thyme.  Stir to scrape up any stuck bits from the bottom of the pan.  Bring to a boil, then reduce the heat to a slow simmer.  Return the meat to the pan.  Partially cover the pan and let simmer until the meat is tender, 2 to 3 hours.

4.  Add the rutabagas, carrots, parsnips, and potatoes to the pan and let simmer until the vegetables are tender, about 1 hour.  

5.  Taste and add salt and pepper as needed.  Serve hot. 


Recipe adapted from Recipes from the Root Cellar by Andrea Chesman.  ©2010 Andrea Chesman.  All rights reserved.

Gratitude for Spring

Daffodils are having a banner year.
What a spectacular—albeit dry—spring is unfolding in the Northeast. The sunny weather is exceptional, nothing to take for granted.  We are all in a frenzy of planting.


Well, not quite a frenzy.  It is time to plant greens and peas—and water them, too.  We don’t set out tender plants, such as tomatoes, until Memorial Day weekend.  Freezes will still come, if past springs, even last year, has taught us.

I heard of a woman who used to live in Virginia, then moved to Vermont.  Each spring she takes her children down to Virginia, just to experience spring.  Spring in Vermont, she says, is too fleeting.  It isn’t a real season, just a moment between winter and summer.

I’m taking a moment to express gratitude for the way spring unfolds in Vermont.  It is less fleeting than it is subtle. You just have to know when to start looking for it. 

Spring begins with the maple syrup run, which starts with snow still on the ground.  In my household, we made a record five gallons this year.  It was an unusual season with a long, long stretch of ideal cold nights and warmer days when the sap boiled down to fancy for a prolonged period.  This was followed by a stretch when the sap didn’t run at all because it was too cold, then another stretch of ideal weather.  I am glad to be done with sugaring, but also delighted with all the wonderful syrup that will make great gifts year-round.

I am grateful for the ramps and fiddleheads that are springing up in the woods.

There was enough snow pack for fiddleheads and ramps, but mushrooms are not to found.
I am grateful for daffodils and the other spring bulbs that brighten the garden and the migrating birds that stop at the bird feeder. I am grateful for the rhubarb and raspberries and blueberries that are just breaking dormancy and promising another season of desserts and jam making.

Raspberries are just breaking dormancy.Dependable rhubarb is just breaking dormancy.
I am grateful for an energetic son who is digging a new asparagus bed and who has declared war on the bishops weed that invaded the garden a few years back and won’t be controlled by digging, weeding, soil sifting.  This years plan: a 1-foot trench around the affected bed, to be followed by black plastic for a year or more.  

Bishops weed -- a more pernicious invader I have never seen.
I am not grateful for bishops weed that invaded the garden, moles that ate my tulips, cluster flies that invaded the house, and black flies that attack me. Even gratitude has its limits.

First Harvests!

It’s mid-April.  The ground is still mostly frozen up here in Ripton.  But the harvest season has begun.  

One month into sugaring and still boiling light syrup.
The first harvest is always maple syrup, and no, we haven’t pulled our taps yet.  We tapped early in March – on Town Meeting Day (first Monday in March) as is traditional.  This year we ended up with 17 taps on 7 trees – more is more. We have almost reached the three-gallon mark and are still boiling light or Grade A. And, it is cold enough to enjoy the added heat from the kitchen stoves. 

Last week spring peepers started singing in our neighbor’s pond.  We thought that meant the end of sugaring because once the frogs sing, the trees bud.  But the cold weather that returned put a stop to all that spring springing, and the sap is flowing like crazy.  My son just poked his head in the door and said that he was going to collect.  “Hope you like an endless sugaring season,” he said.  I do!

Freshly harvested Jerusalem artichokes.
Meanwhile, second big sign of spring: Jerusalem artichoke harvest.  From our one-pound planting a few years ago, we harvested about ten pounds this year (leaving plenty in the ground to grow for next year’s harvest).  Still, it is more than enough to roast and turn into pickles.   That’s about the extent of my cooking with Jerusalem artichokes.  Sure, they can be made into soups, added to stews, and generally substituted for potatoes or parsnips in any cooked dish.  Raw, think of them as a North American jicama and julienne them and dress with lime, or just add their crisp, white flesh to any salad for some bland crunch.  They won’t go to waste.

There is going to be a pretty long stretch between now and the first asparagus, so having something to harvest feels pretty good – even if it isn’t the green foods I crave.

Roasted Jerusalem Artichokes
Makes 3 to 4 servings

1 to 2 pounds Jerusalem artichokes
2 tablespoons walnut oil or extra virgin olive oil
Coarse or kosher salt and freshly ground black pepper

1. Preheat the oven to 500° F.  Lightly oil a half sheet pan (preferred) or shallow roasting pan large enough to hold the Jerusalem artichokes in a single layer.
2. Peel the artichokes or scrub them well.  Cut into 1-inch pieces.  Put them on the baking sheet, sprinkle the oil over, and toss with two rubber spatulas until well-coated.  Spread out in a single layer.  
3. Roast for about 15 minutes, or until the chokes are tender and well-browned, shaking the pan occasionally for even cooking.  Shake the pan more frequently toward the end of the roasting time as they will go from well-browned to burned rather quickly. Sprinkle with salt and serve at once.  

He Was a Mean Ol' Rooster

He was a mean old bird, but quite handsome. 


My neighbor Robert has a flock of lovely hens and a couple of mean ol’ roosters who work those ladies hard.  Too hard.  The roosters had to go and one of them came to me – live, in a large box.


I’d never cooked a rooster before and I was more than curious. 


It fell to my son to reach a swift hand into the box and grab that rooster by the feet.  He quickly swung the bird onto the counter, on top of a long sheet of plastic wrap, holding the wing against the bird’s body.  I reached over to hold down the bird’s wing and we wrapped that bird in a snug Saran wrap blanket.  We’ve done this before.  It is a good way to immobilize a bird if you don’t have a cone.


Then outside went Sam and the bird and…


Back in the kitchen (it was minus 6°F) outside, we scalded the bird in my 5-gallon stock pot and placed it in a large plastic bin.  In minutes we plucked that bird clean as we marveled at its long, narrow anatomy and beautiful feathers.  Back onto the sanitized counter, Sam eviscerated the bird.  I gave it a good wash in the sink, patted it dry, and bagged it.


Take your time with roosters, and they are more than worth eating, as are older birds.  Roosters differ from older hens in that their bones are larger and sturdier (harder to cut) with more cartilage and denser muscles.  Also the breasts are much smaller, and there is a greater proportion of dark meat.  But the cooking rules are the same.


*Let the bird age in the refrigerator for 2 to 4 days.  You can keep them in a container of water or just wrapped in plastic (after washing and drying well).

* Marinate for at least 12 and up to 48 hours, if you are planning to eat the meat. This isn’t necessary if you are simply making stock.

* Cook long and slow.  In a Dutch oven with a lid, cook at 200° for at least 6 hours, or until the meat is falling off the bone.  The manual for my slow cooker says High equals 212°F, Low equals 200°F, Simmer equals 185°F, and Keep Warm equals 165°F.  If you are going to use a slow cooker, it is worth checking to make sure that Low is the proper temperature for your slow cooker; many run higher than that.

* Old birds vary!  This is not a standardized piece of meat.  Do not plan to serve the day you are cooking the bird, unless you plan to start very, very early in the morning.  Far safer is to cook the bird a day in advance and give it as much time as it requires to become tender.  Then skim off the fat, reheat, and serve.

 It was marinated for 12 hours in pinot noir.

I used a pretty classic coq au vin recipe, coq being French for rooster, or cock.  I cut the bird the bird into serving-size pieces and marinated it in pinot noir with a shallot, carrot, garlic, and celery for about 12 hours in the refrigerator. Next, I browned the pieces while I reduced the marinade.  Then I strained the marinade and used it as the base of the cooking liquid, along with additional broth to keep the bird covered.  When the meat was almost tender enough, I added sautéed mushrooms and garlic, sliced celery and carrots and pearl onions.

 Veggies are added when the meat is tender.

Parslied potatoes were the perfect accompaniment.  I’ve never enjoyed a better coq au vin, and it was so satisfying to know that I was turning a mean old rooster into a dish that was created with just that in mind.

Coq au vin with parslied potatoes, bread, and more wine.

Winter Salads II

Spring is coming


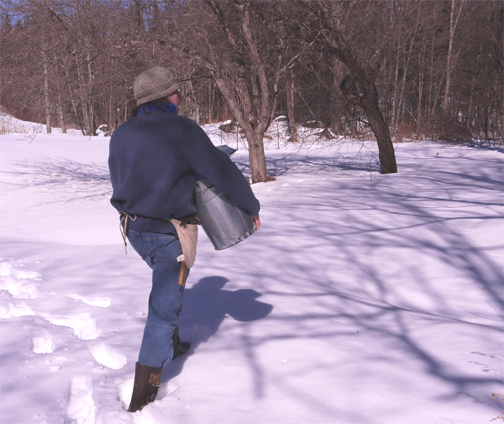
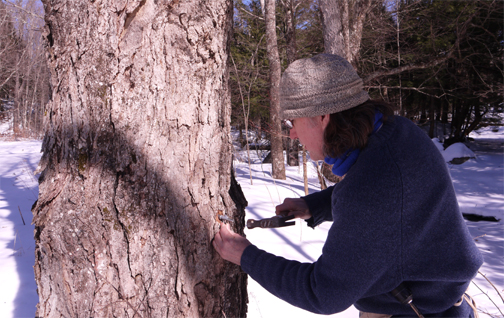
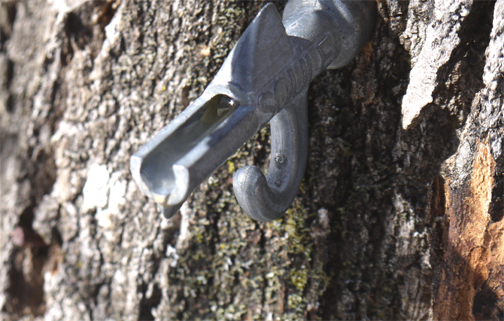
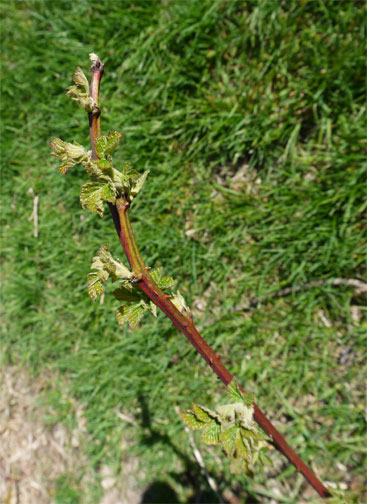
I know spring is coming because we have tapped the maple trees. 

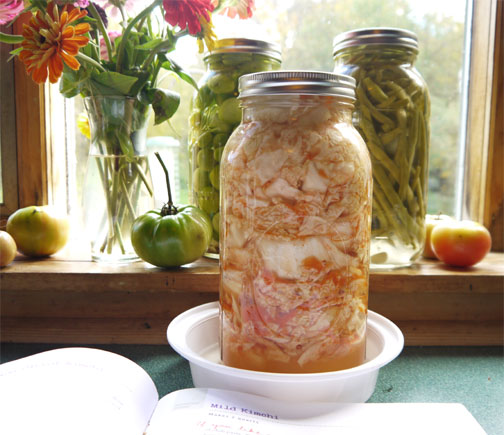
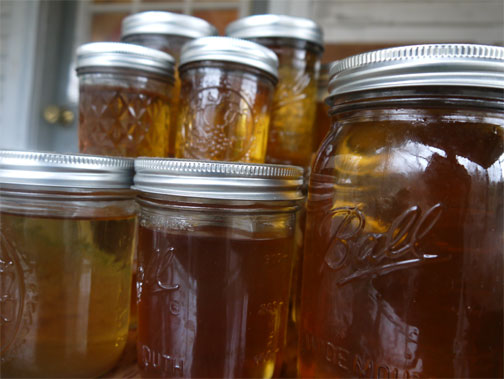
and like most gardeners, I am dreaming of the garden season to come.  But in the harsh light of day, or rather the lengthening hours of soft afternoon light, I am contemplating what preserved foods need to be used up.  Not much as it turns out.


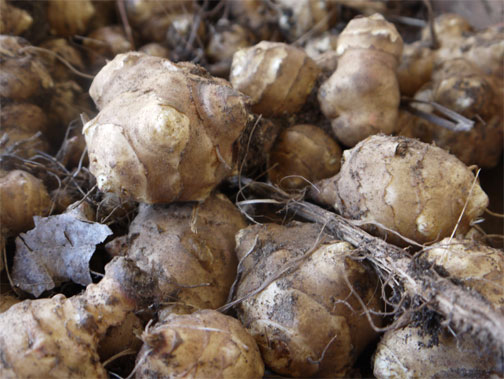
The last of the vegetables in the root cellar and what’s this?  Another bag of frozen green beans? And frozen peas?


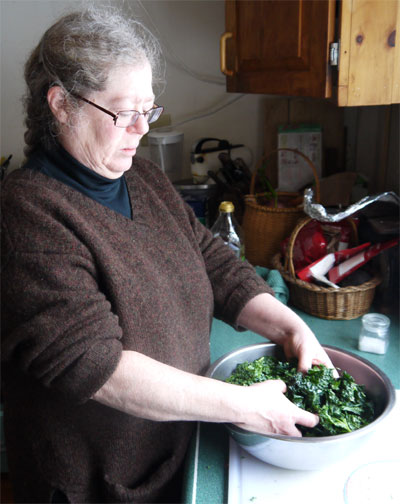
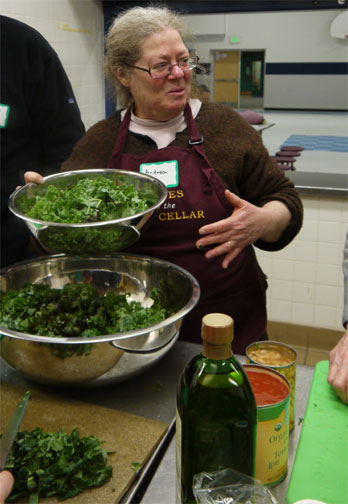
My heart doesn’t soar looking at the last of the vegetables in cold storage, but I do crave green food – be it fresh or frozen. Turning not-fresh vegetables into salads will be the challenge of the day.

 Roasted Vegetable Salad with Maple-Soy Vinaigrette

When I was working my way through college, I briefly held a job in the kitchen of an assisted living residence.  My boss—the meal planner—was old enough to be a resident herself, and salads tended to be easy on dentures – a scoop of cottage cheese garnished with canned peach slices or a square of lime jello in which shredded carrots were suspended, topped with a dollop of mayo.  All served on a limp leaf of iceberg lettuce. Yum. 


But there was one salad I liked (minus the iceberg): frozen peas, sour cream, and dried dill or dill seed.  I like it still, and it makes a fine salad for this time of year.

 A simple salad of just three ingredients: frozen peas, sour cream, and dill seeds. And, of course, salt and pepper.

What else? Frozen green beans will make a fine salad with canned white beans and the last of the pickled roasted peppers.  Sure, it is close to the original three-bean salad made with canned green beans, canned wax beans, and canned kidney beans in an overly sweet dressing.  But this iteration makes really fine use of frozen green beans (or wax beans, if you have them).  I am sure it will add to everyone’s enjoyment to know that this salad, which dates back to the 1800s, was J. Edgar Hoover’s favorite salad and believed to be one of the final dishes he ate before his death.

 Two bean salad. Choose any vinaigrette to dress this.

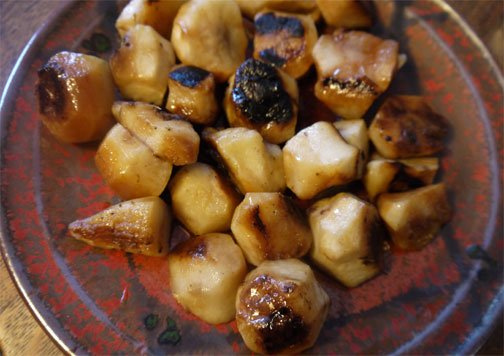
The last few turnips, carrots, and beets in the root cellar are a little soft, and here and there are browned, decay spots.  Not a problem—I’ll just cut them away.  The vegetables will be fine roasted.  They will be even tastier tossed with a maple-soy vinaigrette and bedded on some winter greens.  That maple-soy vinaigrette makes every vegetable delicious.  The combination of the umami characteristics of soy sauce matched with the sweetness of maple syrup and rounded out with balsamic vinegar—I don’t think I have a finer salad dressing in my repertoire…


Roasted Vegetable Salad

Serves 4


1 large beet, peeled and diced

2 carrots, peeled and diced

1 parsnip, peeled and diced

1 rutabaga, peeled and diced

1 whole garlic head, cloves separated and peeled

2 tablespoons extra virgin olive oil

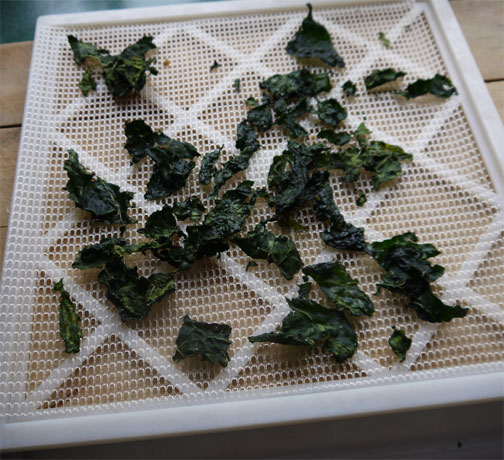
4 to 6 cups mixed tender winter greens (Belgian endive, escarole, frisée, napa cabbage, or Savoy cabbage), thinly sliced

Maple-Soy Vinaigrette (recipe follows)

Salt and freshly ground black pepper


1. Preheat the oven to 450° F.   Lightly oil a large shallow roasting pan or half sheet pan.

2.  In a large bowl, combine the beet, carrots, parsnip, rutabaga, and garlic. Add the oil and toss well.  Transfer to the pan and arrange in a shallow (preferably single) layer.  

3. Roast the vegetables for 35 to 40 minutes, until the vegetables are tender and lightly browned, stirring or shaking the pan occasionally for even cooking. 

4. Just before serving, on a large platter, toss the greens with about 1/4 cup of the vinaigrette. Arrange the vegetables on top and drizzle with another 1/4 cup of the remaining dressing and toss again. Season to taste with salt and pepper. Serve at once, passing the remaining vinaigrette at the table. 


Recipe adapted from Recipes from the Root Cellar by Andrea Chesman.  ©2010 Andrea Chesman.  All rights reserved.


Maple-Soy Vinaigrette

About 2/3 cup


2 tablespoons balsamic vinegar

2 tablespoons soy sauce

2 tablespoons pure maple syrup

2 garlic cloves, minced

1/2-inch ginger, peeled and minced

3 tablespoons extra virgin olive oil


Whisk together the vinegar, soy sauce, maple syrup, garlic, and ginger until combined. Whisking constantly, drizzle in the oil until the mixture emulsifies. Serve immediately or store in the refrigerator in an airtight container for up to 1 week.


Recipe from Recipes from the Root Cellar by Andrea Chesman.  ©2010 Andrea Chesman.  All rights reserved.


Dried Kale Chips


Kale again?

 Here I am massaging the oil and seasonings into the kale.

No kidding.  Besides the fact that I really like kale, I love to feed people.  That means when I give a class, you can expect samples.  Here I am making a batch of dried kale chips.


Last weekend, I taught a couple of workshops on the many faces of food preservation at the Vermont NOFA winter conference.  Saturday’s workshop was an overview of the pros and cons of the various different food preservation methods. Most of the folks at the workshop were new to food preservation, I had to deliver the idea that each method involves a trade-off – whether it is time, storage space, dependence on electricity, use of plastic, or nutrition.  There is no perfect method of food preservation for all foods in all conditions and at all times.


I brought samples of dried kale chips, which may be the best reason to explore dehydration.  Dehydrators are great for wild mushrooms and all manner of snack foods, from seasoned seaweed (more on that at another time) to dried berries.  Unfortunately, my dehydrator (bought at a yard sale for $10) is a small-capacity dryer, and just doesn’t seem practical for serious food preservation.


No matter, the kale chips are delicious – the perfect snack for a long car ride.  Tomorrow I am off to the Rhode Island Flower Show to talk about making pickles and winter salads.


Dried Kale Chips

Makes about 8 cups

 Don't crowd the kale on the dehydrator sheets. I have both lacinato and curly kale here.

Any type of kale can be used.  I have a slight preference for lacinato kale because it is flatter and fits better in the narrow space between trays in the dehydrator.  Don’t overdo the salt; it doesn’t require a lot.


1 bunch kale, stems removed and chopped (about 8 cups packed)

2 tablespoons extra virgin olive oil

1/4 to 1/2 teaspoon salt

1/4 teaspoon garlic powder

1/4 teaspoon onion powder


Toss the kale with the oil until well coated.  Sprinkle the salt, garlic powder, and onion powder over the kale and toss to distribute. 


Spread out on dehydrator trays.  Dry for 4 to 5 hours at 125°F. 


Store in glass jars. 


It isn't the most beautiful food in the world, but it is delicious.

Playing Ketchup

Playing Ketchup

 We grew about six different varieties of cherry tomatoes, including some black, some currant, some grape, some yellow.

I’m always playing catch-up with my garden and my life.  So one of my best tricks for keeping up with my tomato harvest is to freeze the tomatoes as they ripen and make sauces and salsas when I am ready.  Why mention it now?


Because I just turned a 10 pound bag of cherry tomatoes into sauce.  So I figure while you are contemplating how many tomato seeds to order, I will tell you how to tame sugary sweet, amazingly prolific cherry tomatoes into sauce.

 The finished sauce.

There are, of course, plenty of things to do with cherry tomatoes as they ripen.  And because they tend to ripen earlier than beefsteaks or Romas, I do find myself giving over a large portion of my tomato “orchard” to cherries.  Cherry tomatoes are dependable, even when the weather is not.


At some point, a daily harvest of cherry tomatoes yields more than one household could ever eat fresh. Not a problem. I buy jumbo-size plastic bags and the cherry tomatoes go directly into the bag, unwashed, unstemmed, and the bag goes into the freezer.  If the bag isn’t completely filled, I can add more as the tomatoes ripen.


At some point (like now), I’m ready to can them.  The tomatoes go from bag to colander for a rinse, and then from colander to pot to cook them enough to break them down.  Then I run the tomatoes through a food mill, which takes care of the skins and stems and most of the seeds.  The resulting puree is much less than expected, since cherries are mostly seed and skin, but at least they were harvested and put to use, rather than popping up as volunteers next season (though there will be plenty of those).

 First I cook the tomatoes to break them down.Then I run the sauce through a food mill.

I cook the puree down to a consistency good for sauce.  If I’m in the mood to pressure can, and no reason not to, I’ll add lots of sautéed onions, garlic, bell peppers, and herbs-- either frozen pesto or dried or frozen basil leaves, plus dried oregano, thyme, and rosemary.  Salt and pepper, of course.  If the sauce is still too sweet, some balsamic vinegar tones down the sweetness nicely, as does a little soy sauce.  Of course, with no added vegetables, it would be fine to can the tomatoes in a boiling water bath.  But the reason to master using a pressure canner is to be able to have foods that are ready to be heated and served.

 The sauce is cooked down until it has a nice consistency.

The sauce is still sweet but it pairs particularly well with sausage, I think.  Its just fine on pasta, on pizza, on toasted bread with cheese. Maybe it is a little sweet for all applications, but it is just fine for an occasional meal.

 Dinner is served!

The cherry tomatoes could have gone into ketchup, with the natural sugars in the cherry tomatoes replacing some of the added sweetener in the recipe. 


With frozen cherry tomatoes and long, cold winter nights, there’s no reason not to get some canning done when the extra heat in the kitchen is more than welcome.     

An On-going Love Affair with Kale

Call me Kale Woman.  I just love the stuff. 

Kale and me

I love the way it grows tall, allowing the grower to snap off the lower leaves as it continues to grow taller and put out more leaves (just don’t cut off the tip of the plant).  I love the way it is hardy up to 10°F in the garden—even under a layer of snow.  I love the way it has all these healthful properties (high in vitamins A and D, calcium, and fiber).  I love the way it is so versatile in the kitchen, lending itself to steaming, sautéing, and stir-frying. But most of all, I love the way it tastes—so green and just slightly bitter.


So whenever someone approaches me about a cooking class, I suggest a class on cooking with kale.  Which is what I found myself doing this past Wednesday for City Market Co-op Burlington, Vermont.  The class was held in the kitchen of Sustainability Academy, an elementary school in the Old North End.  I’ve taught cooking classes there before—it always feeds my fantasy of becoming a school lunch lady.


The class was titled, Kale Three Ways, and the students were both kale lovers and kale virgins.  All were aware that kale is very good for you and available from local growers through much of the winter.  And although the class was promised three dishes, we actually prepared four.

 Red kale tastes the same as curly kale or Lacinato kale.

We worked with curly kale, lacinato kale, and red kale—and I assured them there was no difference in flavor or texture once the kale was cooked.  First, we started a minestrone soup which featured kale, then we roasted some, then we massaged some kale with a soy vinaigrette until it was tender enough to be enjoyed raw, then I sautéed some with garlic.

 Everything tastes better with garlic--especially kale.

The point of sautéing the kale was to go over a few salient points.  First, in my opinion, everything tastes better with garlic (and a little salt).  Second, the skillet was preheated with olive oil until it shimmered, which is how we knew it was hot enough.  Third, the kale was added in batches; as the first batch wilted, the second batch was added, and so on, until all fit in the pan.   Then I sautéed the kale for about 8 minutes, until it was tender.


Finally, I encouraged everyone to drizzle a little extra flavoring onto the finished kale: either balsamic glaze (available in supermarkets), pomegranate molasses (ditto), or a little soy sauce and sesame oil.  As I wrote in a March 2012 entry about cooking winter greens, Chinese black vinegar also makes a tasty drizzle.


Here’s the recipe for roasted kale.  This is a pretty foolproof recipe, unless you are the type to get easily distracted.  If kids are underfoot, and you don’t have a working timer, roast the kale at 250°F for 20 to 25 minutes, instead of roasting at 450°F for 10 minutes.  The color of the chips will be brighter and the flavor and texture will be just as wonderful.


Crispy Kale Chips

Serves 1 to 4


            Potato chips: be gone! Roasted kale is so delicious, you never need to turn to them again for a hit of crisp and salt.  Like potato chips or popcorn, this is more appropriate as a snack or hors d’oeuvre than a side dish because of the high volume of the pieces.                           

1 bunch curly kale, leaves chopped in 1-inch pieces and tough stems discarded

About 2 tablespoons extra virgin olive oil

Coarse sea salt or kosher salt


            1.  Preheat the oven to 425°F.

            2.  Measure the kale and transfer to a large bowl.  For every 4 cups of firmly packed leaves, add 1 tablespoon oil.  Mix well with your hands to make sure the leaves are evenly coated.  Spread out on a large sheet pan into a single layer.

            3.  Roast for about 10 minutes, until the curly tips of the leaves are darkened and the interior of the leaves are a bright green.  The leaves should be mostly crunchy, but not blackened.

            4.  Toss with salt and serve.


Recipe adapted from Recipes from the Root Cellar.  © 2010 Andrea Chesman.  All rights reserved.


Absolutely Basic, Absolutely Perfect, All-American Pie

I saw some strawberries in the supermarket yesterday.  Strawberries in January!  I didn’t stop to look at the labels to see where they came from: not near Vermont, that’s for sure.  


Okay, I will admit to the occasional Valentine’s Day splurge for strawberries from Texas or California. But early January? Who needs them?

What we need—all we need—when the sweet tooth beckons is apple: apple eaten out of the hand, in a cake, in a tart, and most certainly in an apple pie. There is nothing more satisfying than apple pie, whether it is served hot from the oven with coffee in the gloom of a wintry afternoon, reheated gently and topped with ice cream for an indulgent dessert, or eaten without apology for breakfast.

What we need is apple pie.


Early New Englanders ate apple pie daily and by the 1830s, apple orchards were considered as standard a feature on the average farm as a flock of chickens.  New Englanders consumed prodigious amounts of apples in the form of apple cider and apple jack.  Fresh, unpasteurized apple cider naturally ferments into hard apple cider; if allowed to freeze, the water separates from the cider, resulting in a more concentrated, alcoholic drink, or applejack.

I digress.  Apples are almost always available: fresh and local.  Over 1000 varieties of apples have been developed in the US, though only about 250 varieties can be found in commercial heirloom orchards these days.  Before refrigeration was developed, before railroads and roads crisscrossed the US, before supermarkets eliminated regional favorites in favor of uniform, ship-anywhere varieties, New Englanders planted varieties of apples that produced apples from late summer through late fall, with the late fall varieties good for keeping in root cellars and springhouses—some, like the Northern Spy, especially good for pies.

I make pie whenever the apples I have bought seem to be languishing in the refrigerator.  McIntosh, Gala, Jonathan, Golden Delicious, Northern Spy, Maiden’s Blush. Cortland, Granny Smith, Honeygold, Pink Lady, Rome.  It is all good in a pie.   

The first slice always falls apart.

The pie disappears all too quickly.


Apple Pie
Serves 8


Use 4 pounds of apples so you can mound the apples generously in the pan.  This recipe makes an absolutely basic, absolutely perfect, all-American pie. 

Pastry for a 9-inch double-crust pie, homemade or store-bought

¾ cup plus 1 tablespoon sugar, or more to taste

2 tablespoons unbleached all-purpose flour

1½ teaspoons ground cinnamon

¼ teaspoon ground allspice

¼ teaspoon freshly grated nutmeg

3½ to 4 pounds tart, crisp apples, peeled, cored, sliced ¼-inch thick (8 cups)

1 teaspoon finely grated lemon zest

1 tablespoon freshly squeezed lemon juice

2 tablespoons butter, cut into small pieces

1 teaspoon milk

Cheddar cheese or vanilla ice cream, to serve


1. If you are making your own pastry, prepare the pie dough and refrigerate. 

2. In a large bowl, combine ¾ cup of the sugar, the flour, cinnamon, allspice, and nutmeg. Add the apples; sprinkle with the lemon zest and lemon juice. Toss together to mix thoroughly. If the apples are too tart, add a little extra sugar.

3. Preheat the oven to 425°F with a rack in the lower third of the oven.

4. To prepare the pie shell, lightly flour a work surface. Roll out the larger portion of the chilled dough to a thickness of about 1/8-inch. Fit into a 9-inch pie plate, leaving a 1-inch overhang. (Fit purchased pastry into the pie pan.) Spoon the apple mixture into the pastry, mounding it higher in the center. Dot with butter. Roll out the remaining dough into a circle about 1 inch larger than the pie plate. Moisten the edge of the bottom crust with water. Fold the dough circle in half, lift off the work surface, place the pastry across the center of the filled pie, and unfold. Trim the edge ½ inch larger than the pie plate and tuck the overhang under the edge of the bottom crust. Crimp the edges with a fork or make a fluted pattern with your fingers. Make several decorative slits in the top crust to allow steam to escape. Place the pie on a baking sheet to catch any juices that overflow.

5. Bake the pie in the lower third of the oven for 20 minutes. Reduce the heat to 350°F and continue to bake for 30 minutes. Brush the top of the pie with the milk and sprinkle with the remaining 1 tablespoon of sugar. Bake for 10 to 15 minutes longer, until the crust is golden and the juices are bubbly.

6. Cool the pie on a rack. Serve warm or at room temperature with slices of Cheddar cheese or vanilla ice cream.

Recipe adapted from 250 Trasured Country Desserts by Andrea Chesman and Fran Raboff.  ©2009 Andrea Chesman and Fran Raboff.  All rights reserved. 

Italian Wedding Soup

 Italian Wedding Soup

My cooking tends to the one-dish supper – it’s easy to fix and clean up, it satisfies, and it enables me to plan around a specific vegetable without too much fuss.  But in my writing

I haven’t been giving enough love to Mom’s Best One-Dish Suppers, a book I wrote in 2005.  Why not?  I think because this type of cooking is so deeply ingrained, I rarely refer to a recipe and rarely think to write about it.

 I wrote Mom's Best One-Dish Suppers in 2005

It’s soup weather now (as I write, we are deep in a blizzard), and I’ve been thinking about Italian Wedding Soup for a while. Greens and soup – particularly this combination of greens and meatballs in a clear broth – make a marriage made in heaven.  Hence, minestra maritata has been translated as Italian wedding soup, though it was not necessarily served at wedding celebrations in Italy, where this particular combination was developed. 

 Greens and meatballs in soup -- a marriage made in heaven.

I was at the Middlebury Natural Foods Co-op the other day and saw some gorgeous heads of escarole and knew it is time to make that family favorite.  Escarole is in the chicory family, along with curly endive (frisée), Belgian endive, and radicchio.  Much less bitter than other chicories, its taste is quite similar to radicchio.  You might also note it is less beautiful than radicchio and definitely less expensive to buy.

 A tempting head of escarole

Traditionally, the leafy chicories, such as curly endive and escarole, are grown under covers to deprive the heads of sunlight, resulting in a paler, less bitter head.  I think that custom is falling away, but I don’t mind; I like my greens bitter.


The escarole in this soup can be replaced with mustard greens, turnip greens, kale, chard, spinach, or cabbage, so feel free to substitute.  The meat can be the more traditional ground pork or half ground pork and half ground beef.

 Feeling lazy, I made the meatballs a little larger than usual.

Italian Wedding Soup


12 cups chicken broth (homemade is best)

1 pound ground turkey

2 eggs

1 cup fresh bread crumbs

1/2 cup freshly grated Parmesan cheese

2 garlic cloves, minced

Salt and freshly ground black pepper

1/3 to 1/2 cup pastina or orzo (small pasta shapes)

1 1/2 pounds greens, chopped


1.  Bring the chicken broth to a simmer.


2.  To make the meatballs, combine the ground turkey, eggs, bread crumbs, Parmesan, garlic, 1 teaspoon salt, and 1/2 teaspoon pepper in a food processor.  Process until well mixed.  Alternatively, mix by hand in a large bowl.  Form the meat mixture into 1/2-inch meat balls (the size of marbles) and add to the simmering soup.  Simmer until the meatballs are cooked through, about 30 minutes. 


3.  Increase the heat slightly, add the pasta, and boil gently until the pasta is cooked, about 10 minutes. 


4. Add the greens and continue to boil gently until the greens are tender, 3 to 10 more minutes, depending on the type of greens.  Taste and adjust the seasoning, remove from the heat, and serve.


Adapted from Mom’s Best One-Dish Suppers. @2005 Andrea Chesman.  All rights reserved.             

Onions and More Onions

 Turns out 50 pounds of onions will probably only last through January

I bought 50 pounds of unsorted onions from Elmer Farm, my CSA farmers this fall.  I figured unsorted meant that the onions varied in size, but I didn’t know that they would also vary in likelihood of storing well.

Some of the onions didn't cure properly. 

Some of the onions had soft necks where the leaves had not fully dried.  Each layer of an onion is actually a leaf, and some leaves dry better than others—no matter how well they are handled post harvest.  So before storing, I had to sort the onions, setting aside those with thick and/or soft necks for using immediately. Turns out, about 15 pounds were destined to be used quickly.  Any by using quickly, I mean, discarding any slimy brown layers, but utilizing the rest of the onion.

 I could feel the onions with soft necks, alerting me to the fact they wouldn't store well.

You’d think that would be a daunting situation, but it wasn’t.  First, 6 pounds or so went into making Rosemary Onion Confit (see March Madness 2012).  Some went into the dehydrator, some went into a beef and onion stir-fry with black bean sauce, some went into onion soup.  And the rest were fried—not something I recommend doing but often, what a wonderful once-a-year treat!


About the stir-fry, I followed my basic recipe for a stir-fry (see Serving Up the Harvest, pages 35-35), using beef and 8 cups of slivered onions, substituting black bean sauce and 1 tablespoon chopped fermented black beans for the oyster sauce, and omitting the broth and cornstarch.  When I returned the stir-fried beef to the wok with the seared onions, I added 6 sliced scallions.  The only trick with an onion-based stir-fry is to use a really, really hot wok and get a good sear on the onions.

 Beef and Onion Stir-Fry with Black Bean Sauce

For the onion soup, trust me, you don’t need a recipe.  Also, you don’t need to serve it with a cheese layer on top—you can melt cheese on toast under the broiler and then ladle the soup on top.  It is much easier to eat that way.  To make onion soup, just slice several pounds of onions; you’ll want 8 to 12 cups of sliced onions.  Then pour beef broth on top—could be homemade from roasted soup bones, could be from bouillon, or canned—using enough to cover the onions, 8 to 12 cups, and simmer for about 30 minutes.  Season with soy sauce, which has that umami quality and darkens the color of the broth nicely, and pepper.

 Ladling onion soup onto cheese toasts.

And finally, the fried onion rings.  I went for a simple seasoned flour for a coating, dipping the onions first in buttermilk, then in flour, then into the hot onion in batches until browned.  They turned out great—crunchy, sweet, salty—and maybe just a little too good.  So as with all good seasonal foods, enjoy fried onions as a celebration of the harvest, and don’t worry if your onions haven’t cured as well as you would have liked.

 Deep frying onions.

Oh, and where are all those onions stored?  In an unheated upstairs closet.  I don’t know what people do who have heat in the upstairs bedrooms. An unheated closet is the perfect place to store onions. How do they store their onions?  How do they sleep?